table of contents
- Lawn trimmer thread
- Readjust the thread
- Causes of incorrect adjustment function
- Change thread
- Changing the disposable coil
- Refilling the thread of a reusable bobbin
Mowing the lawn is one of the favorite activities of countless hobby gardeners. Once the area has been trimmed, the far less popular ancillary work can be done, first and foremost the edge trimming. A grass trimmer provides valuable help and saves laborious manual labor on your knees. In order for it to be a lasting pleasure, however, you should know how to change the thread easily and safely and what is important when adjusting the thread. Our instructions explain.
Lawn trimmer thread
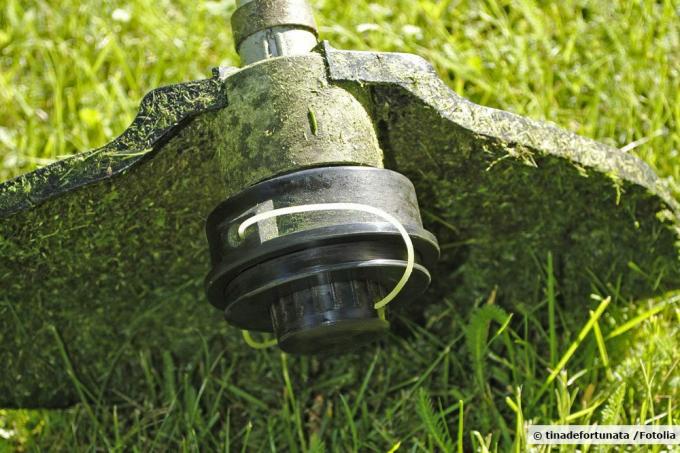
A string trimmer is great for that Lawn edges to trim. But even such a thread wears out over time. Often the thread just needs to be readjusted. But once the bobbin is empty, you should change the whole thread. Here you can find out how to readjust and change the line of the grass trimmer.
Readjust the thread
First, let's look at how to make sure there is always enough while mowing
Trim line is available. The nylon thread used is very robust, but a grass trimmer also has a lot of power. If the resistance from grass, weeds and thin branches is added, it is easy to understand why the cutting line wears out over time and becomes shorter and shorter. In order to be able to follow further cutting lines without great effort, the devices usually have an easy-to-use mechanism. Since every power-operated device, regardless of whether it is gasoline-powered or with an electric drive, is always a danger for the user, this mechanism is designed in such a way that no direct contact with the filament spool is required is:- Release the throttle so that the bobbin comes to a standstill
- Press the edge trimmer with line spool firmly on the ground to activate the automatic tracking
- Operate the throttle so that the released cutting line can be guided out of the spool by centrifugal force
- Length limitation of the thread to the working length over the protective cover of the thread circle facing the operator
Causes of incorrect adjustment function
Adjusting a thread that is too short is therefore basically very easy to do. However, it can happen again and again that the automatic system does not work or works only inadequately. There can be different reasons for this. They can usually be remedied very easily yourself:
1. pollution - Thread spool or tracking mechanism clogged with grass clippings, earth or dirt
Remedy: Open the bobbin, unwind the nylon thread, clean the components and rewind the thread
2. Thread output is stuck - can be the case if the thread package is wound too tightly, or if the thread winding is too loose (then mutual blocking of the loops sliding on top of each other)
Remedy: Unwind the cutting line and wind it up again
3. Thread diameter too thick - leads to the fact that it gets stuck in the mechanics and does not leak cleanly
Remedy: thread size according to instructions resp. Determine the manufacturer's specifications and use the correct strength
4. Spool damaged - Mechanics damaged by stones, wear and tear or the like
Remedy: Change the coil and replace it with a compatible new part
Attention: Before starting any work on the grass trimmer, it must be ensured that the device cannot unintentionally start up. To do this, it is necessary to interrupt the power supply, i.e. pull the plug or remove the battery. In the case of gasoline-powered devices, however, the spark plug connector should be removed to prevent it from starting up unintentionally!
Change thread
At some point when working with the grass trimmer, there comes a point where it is no longer possible to readjust the line despite the automatic tracking system. Then the limited supply of the spool has been used up and must be replaced. There are now two different approaches, which depend on the grass trimmer used:
Changing the disposable coil
Changing by hand is particularly easy when it comes to a device with a disposable coil. Then just remove the entire coil and replace it with a new one:
- De-energize the device or pull out the spark plug connector
- Press in the opposite buttons on the side of the filament spool
- Remove and dispose of the old bobbin
- Put on the new bobbin and press it in until the retaining tabs or pins click into place
- Check that the coil is correctly seated
- Any protective covers, foils, etc. remove via thread outlets
- Put the grass trimmer into operation and place the line head on the ground
- Check correct thread ejection
Refilling the thread of a reusable bobbin
It is a little more effort if the grass trimmer is equipped with a reel that can be used repeatedly. Then the old one is not simply exchanged for a new one. Instead, the existing coil is "refilled":
- Pull out the plug, remove the battery or pull out the spark plug connector
- Open the thread head by pressing the buttons on the opposite side
- Take off the cover and take out the empty bobbin
- Take the new trimming line twice and bend it at one end (corresponds to the middle of the line)
- Hook the bend in the thread bobbin guide
- Wind up the double thread with parallel thread ends in a clockwise direction
- Insert the thread ends into the corresponding slots or openings in the thread head and lead them outwards
- Reinsert the bobbin and close the cover
- Put the device into operation and check the automatic tracking system
tip: Do not leave more than 10 to 20 centimeters of cutting line protruding from the spool at the end. Excess thread is chipped off anyway and is lost for use. If too much thread is cut off, the flying piece of thread can cause painful injuries.


