table of contents
- Wooden rubbish bin box
- Structure and size
- lid
- Body and doors
- Material & tools
- instructions
- Suitable types of wood
- Wood protection
- frequently asked Questions
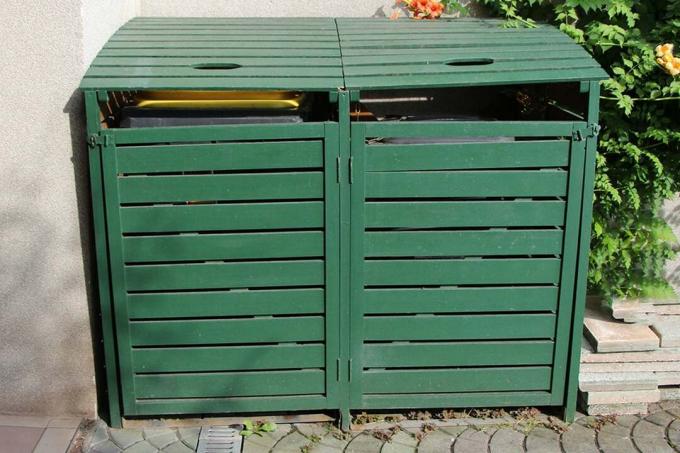
Rubbish bins are essential, but not particularly attractive. A cladding can help here. Building a garbage can box yourself is very easy with our instructions.
In a nutshell
- Structure must be adapted to requirements
- Continuous wood protection plays a crucial role
- Garbage can boxes offer protection against various dangers
- the right choice of wood is crucial
- Variants made of wood are appealing
Wooden rubbish bin box
Building a trash can box out of wood has several advantages. For example:
- breathable (depending on the protective agent used)
- resistant material
- decorative
- easy construction
- diverse design options
But why should you even build a garbage can box yourself? The reasons for this are simple. Bins for household waste, organic waste or recycling are not exactly attractive and can therefore have a negative impact on the overall appearance of the garden or the driveway. In addition, the lids can be opened very easily. Food leftovers or their packaging are therefore particularly attractive
insects as well as other animals. These include, for example, mice and rats, but also Raccoons and foxes. Smaller bins in particular can easily be knocked over by larger animals.
The box provides additional protection that can reduce these problems. In the same way, you can prevent strangers from disposing of their rubbish at your place. Because the fixed cladding can be locked.
Structure and size
These two factors depend on the following points:
- Number of tons
- Size of the vessels
- personal preference
- available space
For tons with a volume of 240 liters, the cladding must of course be larger than for variants of 120 liters. If you only want to accommodate two residual waste bins, you will of course need less space than for four tonnes, which also includes recycling.

Therefore, measure each bin and calculate a surcharge per garbage can box of at least ten centimeters in width, depth and height. The measurements required for this should be carried out at the widest, deepest and highest points. Also take the handles into account.
Another important point is how the structure should be designed. Orientate yourself to the local conditions. If you can remove the bins on the right and left, this is ideal, for example, for locations on narrow paths. Doors at the front, on the other hand, make more sense if it is a narrow niche.
lid
When it comes to covering the garbage can box, the following questions also arise: How, where and how many should be attached. Each variant has its own advantages and disadvantages. Lids that can be opened from the side do no damage to the wall behind. However, they should be used individually. Otherwise, the necessary stability is not given, or only given for a short time, because the weight is too great.
If you only use one lid, you can get to all the bins at the same time. That saves time and effort. However, this is heavier and therefore more difficult to open. However, a single lock is sufficient to secure all the bins.

Tip: No matter how many cover sections you choose, make sure when planning and building that you create a slope. This allows the rainwater to drain off better. This in turn extends the service life of the cladding.
Body and doors
Stable and tight connections are essential for a stable construction of the garbage can box. In addition, you have to pay more attention to the doors and the body. This includes the following points, among others:
- Attaching the handles
- Alignment
- size
- height
- Clasp
Orientate yourself again to the local conditions. In a larger courtyard or on a wide driveway, there are completely different options than, for example, on a narrow path.

The doors can be attached in narrow niches depending on the space available and the number of vessels. With two tons, side doors are just as ideal as doors that can be opened to the front.
With several tons, side openings alone are often impractical, since several vessels then have to be moved.
Material & tools
If you want to build a garbage can box yourself, the appropriate utensils are required first. The required material and tools are:
- Drill or cordless screwdriver
- Miter saw
- Handles
- Wooden strips or square timbers
- Wooden panels
- Wood preservatives
- Measuring device, such as a folding rule or tape measure
- Brush or paint roller
- Hinges
- Grinder
- Screws
- Jigsaw
instructions
1. Measurement: First measure the height, depth and width of the respective barrel. For the height of the cladding, you should measure at least the diagonal of the vessel. For example, define the lower left corner and the upper right corner as measuring points.

2. Planning: Make sketches of different designs of the garbage can box. This makes it clear which version best suits your needs. Put all components to the appropriate scale.
3. Sawing: When you have decided on a variant, saw the wooden panels accordingly. Then grind the cut surfaces to create flat edges. It is ideal if you either design the rear wall or the front ten centimeters higher and saw the side walls at an angle. In the case of a one meter high barrel, the rear wall could be 120 centimeters high and the front 110 centimeters high. The side parts are cut off at an angle at the top so that there are no gaps.

4.Square timbers: Screw square pieces of wood to the long sides of the two side walls so that they have exactly as much distance from the outer edge as the hinges need. The square timbers serve as the basis for the back and the front as well as the floor and give the cladding more stability.

5. Connect elements: Now screw the back wall and the bottom to the square timbers and the side walls. Make sure there is a tight seal. With hardwood it may be necessary to pre-drill thinner holes.

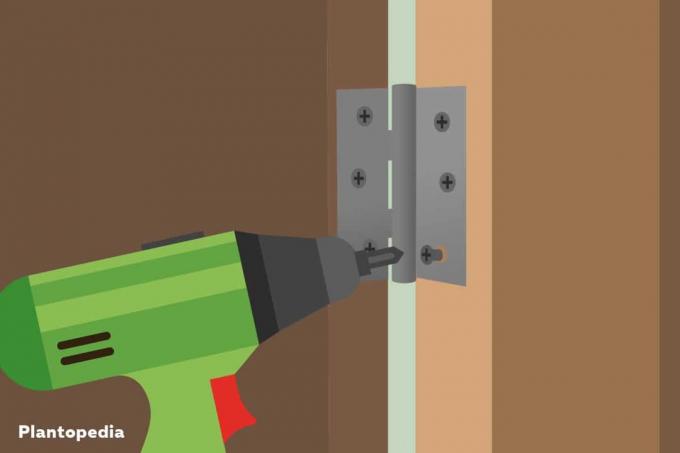
6. Fix the hinges: Use two or three hinges per door for more stability. First screw them to the doors and then also to the square timbers. Make sure that the distances between the hinges are even.

7. Attach the lid: The positions for the hinges are now also determined on the rear wall or the side panels. Again, you should use at least two hinges per lid. First screw these to the cover and then to the rear wall or the side panels. The positions depend on whether the lids should open upwards and backwards or to the side.

8. Fix handles: One of the final steps is to attach the handles for the doors and lid. Simply screwing on is sufficient for this.

9. Apply protection: Before the wooden garbage can box can be used, the natural material must be protected again. Again, when choosing, make sure that the agent is for outdoor use. Above all, focus on the transitions on the hinges, screws, and handles that weakened the initial protection in those places.

Tip: You can also apply the protection to the wood before assembling the garbage can box. This will ensure that you can easily reach every nook and cranny.
If you build a garbage can box yourself and want or need to attach the doors to the side, attach the square timbers to the back wall and the front instead of the side walls. However, the further procedure does not differ from the steps described.
Tip: When applying the wood protection, make sure that the agent can penetrate into all cracks and grooves. Otherwise these become potential problem areas.
Suitable types of wood
Building a garbage can box yourself offers many possibilities. The main advantage is that it can be customized. Regardless of how many tons you want to accommodate or what size they are: The best solution can be created with your own creation made of wood. For this, however, among other things, the selection of the right wood is necessary.
Important factors are:
- Resistance and durability
- Resin content
- hardness
- natural protection against fungi and parasites

Suitable types of wood are, for example:
- Douglas fir
- Oak
- larch
- Black locust
- teak
These prove to be weatherproof and withstand moisture.
Wood protection
A potential disadvantage of the material is that it requires ongoing maintenance and regularly applied protection. Depending on the variant chosen, the wood protection must be renewed every one to three years. For example:
- paint
- glaze
- oil
- wax
Apply the wood preservative to the trash can box and let it dry completely before starting the assembly.

Tip: Make sure that the agent you choose is suitable for outdoor use. In addition, it should not give off any toxic fumes. Even distribution is also critical.
frequently asked Questions
Metal and plastic panels are also possible solutions. However, they are more difficult to process and condensation can form on the inside in both summer and winter. This makes cleaning difficult and can intensify unpleasant smells.
This is easily possible through regular care and cleaning of the wooden garbage can box. Also lubricate the hinges and watch out for discoloration, which may indicate a fungal attack and must be treated separately.
It is not absolutely necessary. However, it keeps animals away and prevents other people from accessing it. If you're building a trash can box yourself, those are the main goals so a lock can make sense.
