Designer pieces instead of simple furniture - we explain how to conjure up an amazing eye-catcher from a normal table and a few succulents.
DIY instructions for a succulent table [music: www.bensound.com]
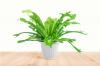
Succulents are as pretty and easy-care houseplants extremely popular and are also suitable as a pretty decoration for people without green fingers. And the typical small table from the Swedish furniture store can also be found in many apartments. But both succulents and the small piece of furniture are not eye-catchers in themselves, but seem uncreative and boring. It looks different, however, when you combine the two: A self-made succulent table doesn't just put an end to it boring flowerpots, but also transforms your piece of furniture into a distinctive design object that every apartment shines brings.
contents
-
DIY instructions for a succulent table
- You need that for that
- Tinker a succulent table: that's how it works
- Planting succulents properly
- This is how to properly care for your succulents
DIY instructions for a succulent table
You don't always have to pay a lot for unusual pieces of furniture: with a little manual talent, you can even make unmistakable unique items from the widespread Ikea furniture.
You need that for that
It doesn't take much to turn a normal coffee table into a beautiful eye-catcher.

In fact, all you need is:
- A small table (for example the "LACK" model from Ikea)
- Tape measure
- duct tape
- Pen and cutter
- Plastic wrap
- Planting clay
- Cactus soil
- Succulents
Tinker a succulent table: that's how it works
If you don't feel like having a boring coffee table anymore and instead dreams of an individual succulent table, you can quickly turn this idea into reality. In fact, it only takes a few steps and some manual talent to create a green succulent table.

First of all, the future planting area for the succulents must be recorded. To get the most accurate template possible, it is advisable to work with a measuring tape. We decided on a planting hole with a length of 30 centimeters and a width of 23 centimeters, because these dimensions both enough space for setting the scene for the plant, as well as a sufficiently wide border (for example for placing glasses) permit. Of course, the shape and size of the later succulent bed can be individually adjusted, so smaller planting areas are just as possible as imaginative shapes.
After sketching, the space for the succulents must be cut out. So that the cuts are particularly straight and precise, the measuring tape can be laid out along the cut and fastened with adhesive tape. The line can be trimmed straight with a craft knife, just like on a ruler. When all four sides of the pre-drawn square have been cut out, you can carefully lift the cut-out table top with the blade of the cutter and carefully remove it. A honeycomb-shaped cardboard appears underneath: In this layer, too, you run the craft knife along the sides and remove the cardboard as neatly as possible from the table.
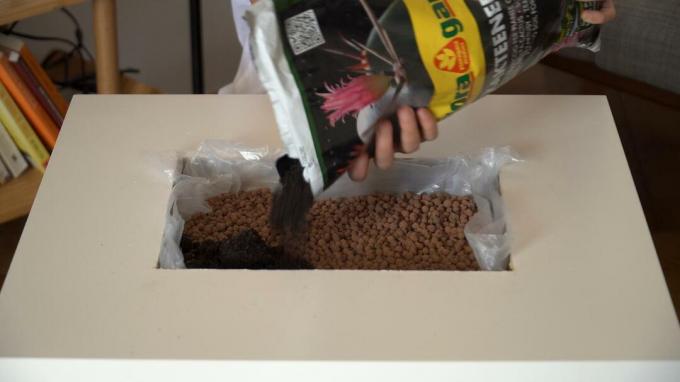
A film is then inserted into the hole created in this way. This is particularly important for the succulent table, as otherwise it would swell up after a few weeks due to the moisture of the irrigation water and ultimately be destroyed. That is why it is extremely important that when lining up you make sure that the film has no holes or tears and that all parts of the hole created are covered. If you want to be on the safe side, you can use a small tub or bowl instead of a foil.
Planting succulents properly
After the space for the plants in the table has been prepared, you can start with the preparations for the Repot the succulents kick off. First the hole in the table is filled with planting clay. This improves the drainage properties of the subsequent substrate and thus ensures that the risk of waterlogging is reduced. This drainage layer is particularly important when planting a succulent table, because there are no drainage holes through which excess water could run. After that, the hole will be about halfway up Cactus soil filled up. In contrast to normal potting soil, this is better suited for the cultivation of succulents because it is better is adapted to their soil and nutrient requirements and thus a more optimal environment for them to grow offers.
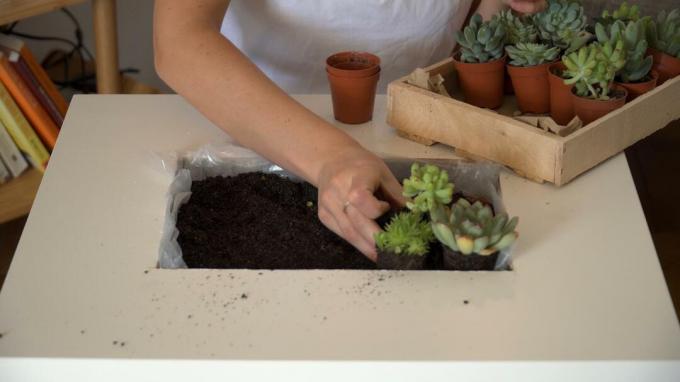
Now the individual succulents can be carefully removed from their old pots. The old soil that sticks to the root ball of the plant is carefully removed, but the fine roots of the plants should not be damaged under any circumstances. The potted plants can now be rearranged in their new home - is that If a suitable arrangement is found, the remaining gaps are filled with cactus soil and these are easily filled pressed on. Excess earth on the table can only be carefully removed from the edge with your hand or a damp cloth.
This is how to properly care for your succulents
After completing the succulent table, proper care of the plants is especially important as repotting puts a lot of strain on them. In the first week, the plants should therefore not come into contact with direct sunlight, as this puts additional stress on the plants. In addition, succulents should not be watered until a week after repotting to relieve the weakened roots. If the first few weeks have been successfully completed, the succulents impressively prove why they are so are popular: if you offer them a bright, sunny spot, the robust plants hardly need them anymore Care. In fact, excessive watering can actually damage the plants, which is why you should always make sure that the plant substrate is completely dry before each new watering. The easy-care succulents also hardly need fertilization - depending on the species, they can even thrive without any additional nutrients.
Succulents love brightness and therefore need a location with plenty of light. If the plants are in a place that is too dark, they wither or so-called "horny shoots" occur. This means that the succulent plant develops long and very thin shoots in order to receive as much light as possible. So a location directly at the window or in a light-flooded winter garden is ideal. If it is not possible to find a place with sufficient light for the succulent table, a special plant lamp can be set up for additional light.

A location with lots of light is also indispensable in winter. It is also an advantage if the succulent is in a cool place. For example, stairwells, unheated winter gardens or bright places in the basement are ideal for wintering. It is also possible to spend the winter at normal room temperature, but it is essential to ensure that there is sufficient distance to heat sources such as heaters. Otherwise the succulents could dry out. It is particularly important that watering is restricted in winter. The root balls should never dry out completely, but the soil should not remain moist for a long period of time. In general, the cooler the location of the plant, the less water the succulent plant needs.
You can find more information on this topic in our article on Care of succulents.
Many thanks to Floragard for their support!