The fiery chilli can also be grown here. Here you can find out everything you need to know about the location, time and procedure for planting chilli.

The freshest Chillies (Capsicum) without a doubt come from your own garden. With their delicate, white flowers and colorful pods, chili plants decorate many a garden or balcony. Chilies belong to the plant genus paprika (Capsicum) and thus belong to the large nightshade family (Solanaceae). Within the genus Capsicum A distinction is made between five different types, which are estimated to be between 2,500 and 3,000 Chilli varieties split up. With their fiery spiciness and great variety, they have long been an integral part of Asian and Latin American cuisine. But here too, dishes flavored with chilli are becoming more and more popular. Would you also like to plant chillies in your own garden? In our article you will learn everything about planting chilies, including the right time to plant, the location and the sowing of the fiery pods.
contents
- Planting chillies: the perfect location
- When should you plant chillies?
- Pull chillies yourself
- Plant out the chillies
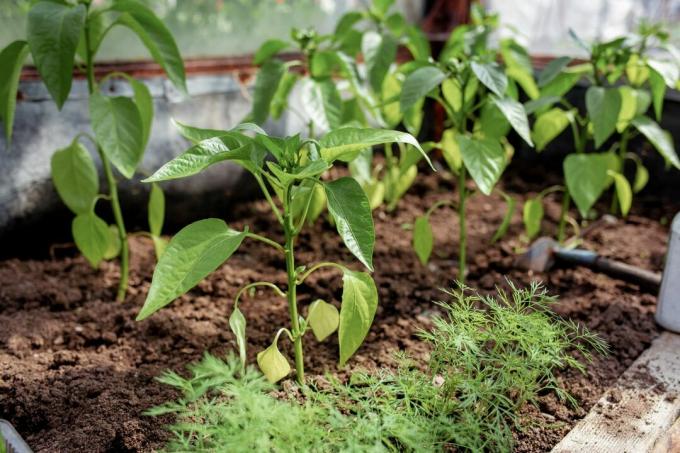
- Should you plant chillies in a greenhouse or outdoors?
-
Plant the chilli in the pot
- Grow chilli on the balcony
- Grow chilli as a houseplant
- Planting a chili tree
- Care for chilli after planting
Planting chillies: the perfect location
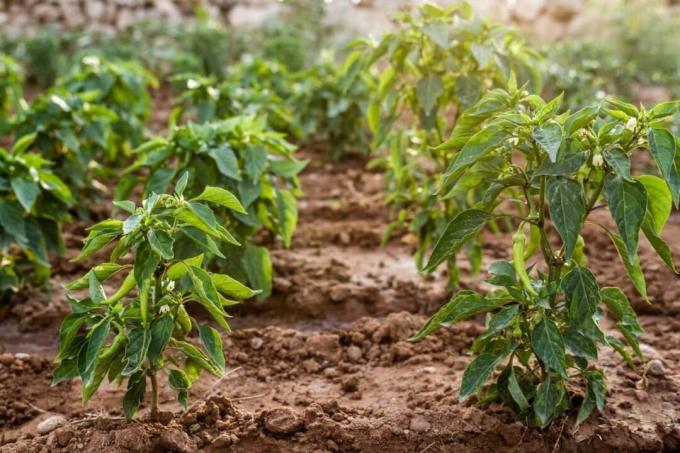
In order to understand the demands of the chilli, one has to deal with the origin of the plant: Researchers assume that the plant genus Capsicum and thus the ancestors of our chilli peppers today come from the Mexican area - an extremely warm and sunny region. Keep this in mind when choosing a location for your chilli plants: a light, sunny and airy place is perfect for them. All chilli varieties can be cultivated in pots as well as in the garden bed. Chilli can also find a place in the greenhouse or on a sunny house wall so that the plant is particularly warm.
Chili also places special demands on the substrate. But what kind of soil does the chili plant need? Basically a moist, loose and nutrient-rich substrate is preferred by the plant. If you want to plant chillies in the garden, you should make sure that the soil ideally has a neutral to slightly acidic pH value. It is also advisable to fertilize the soil well with compost before growing the chillies. In this way, the heavily consuming plant is provided with enough nutrients for its growth. Alternatively, there is also a fertilizer with an organic long-term effect, such as ours Plantura organic tomato fertilizer, to improve the nutrient supply in the earth.
A good tomato and vegetable soil, like this, is best for planting chillies in pots Plantura organic tomato & vegetable soil: Due to its increased potassium content, the soil improves the cell wall stability of the chillies and ensures thereby for a higher plant health, especially the resistance against fungal Pathogens.

The right location for chillies in a nutshell:
- Sunny and warm
- Airy
- Moist, nutrient-rich substrate
- Neural to slightly acidic pH
- Add horn shavings and compost or primarily organic long-term fertilizers to the soil when planting
Tip: You can grow low-growing chilli varieties in the open air in mixed culture. Good neighbors for chillies are fast-growing summer salads such as arugula (Eruca sativa), radish (Raphanus sativus var. sativus) or parsley (Petroselium crispum ssp. crispum). In the greenhouse, chili plants like to share space with low herbs like basil (Ocimum basilicum).
When should you plant chillies?
Because of their long development time, chilli plants are sown as early as January and planted outdoors from mid-May. Plants that have been placed in the greenhouse or cold frame will find their way outside as early as mid-April. Even before the planting date, you can put the plants in the sun during the day so that they get used to the sunlight. In addition, the additional light promotes the development of the plants.
Pull chillies yourself
Anyone who has been involved in growing chillies in their own garden for a long time will sooner or later also deal with the sowing of chillies. Particularly exotic chilli varieties are often only available as seeds, not as young plants. The propagation of one's own chilli plants can only take place via the seeds. In fact, it's not that difficult to grow chillies yourself. The early cultivation time alone should always be taken into account: Many chilli varieties need from the Sow well over 100 days until the first harvest, which is why you should start growing as early as possible should. Depending on the variety, the chillies should be sown between mid-January and early March.
However, before you start sowing the chillies, the seeds can already come out of their hibernation to be woken up: To do this, they are soaked in lukewarm water a few hours before sowing placed. During the swelling process, substances are released from the seed coat which, through their germ-inhibiting effect, slow down the sprouting of the seeds. In addition, the seed can absorb water, which it needs to break through the seed coat.
In the meantime you can already prepare the pots for the plant: Classic growing pots are ideal for growing the chillies in the house. A good potting soil, like ours, is recommended as a substrate for sowing the chilli Plantura organic herb & seed compost. The airy, loose structure of this earth and the comparatively low nutrient content have a positive effect on the root growth of the plants and thus sustainably support the healthy development of the Young plants.

After the seeds have spent a few hours in a warm water bath, three to four seeds per seed pot can be pressed into the soil. Since chilies are among the dark germs, it is important to make sure that each seed is carefully covered with soil. The chillies need about 10 to 20 days to germinate in a light location that is at least 20 ° C warm. During this time, the substrate should remain moist throughout - regular watering is therefore important. A mini greenhouse or a nursery box also help to create ideal conditions for the chilli seedlings. However, these should be ventilated regularly.
As soon as the second pair of leaves shows up on the plants, it is time to prick the chillies - that is, them with the help of a pricking stick or wooden stick and then into new, more nutrient-rich soil plants. In a larger pot with a high-quality vegetable soil, the home-grown chilies can now wait to move into their final place in the bed or greenhouse. In this phase, too, it is important that the soil of the chillies is kept permanently moist without waterlogging.
Summary of pulling chillies yourself:
- The sowing time is from January to March.
- Soak seeds in warm water for several hours before sowing to reduce sprout inhibition.
- 3 to 4 seeds can be put in nutrient-poor potting soil per potting pot.
- Cover the seeds with soil.
- During germination, it needs temperatures of at least 20 ° C and a bright location.
- The substrate is kept permanently moist.
- Greenhouse should be ventilated regularly.
- As soon as the four-leaf stage has been reached, the prick can be done.
tip: Growing chillies is particularly easy with ours Plantura chilli growing kit: In addition to exciting chilli varieties and the necessary accessories for cultivation, we also offer you a free online basic course with the set. This course guides you through all the important steps - from sowing to harvest.
Plant out the chillies
Once the optimal location for the chillies has been found and the temperatures are stable and warm, the time has come to plant them. Before planting, you can loosen up the soil well and enrich it with compost and an organic long-term fertilizer. The plants are now placed in the ground at a distance of at least 40 centimeters so that the entire root ball is embedded in it. A plant stick to which you attach the chilli plant is best to provide the necessary hold. Finally, water the young plants well.
Instructions for the process of planting chilli:

- Loosen the soil well
- With compost or with a primarily organic slow-release fertilizer like that Plantura organic tomato fertilizer, enrich
- 40 cm plant spacing
- Attach the plant to the plant sticks
- Water well
Tip: You can use a mulch film when planting in the garden. This suppresses the weeds very well, protects against evaporation and the soil warms up faster. It is simply laid out and slit where the plants are to be placed.

Should you plant chillies in a greenhouse or outdoors?
Since chillies love warmth and are sensitive to frost, the greenhouse offers several advantages. Heated greenhouses in particular protect chillies from late frosts in spring or early frosts in autumn. But a non-heated greenhouse is also very suitable to a certain extent as protection against cold and weather. Especially in combination with the long growing time of the chilli, this weather protection offers enormous protection Advantage: Chillies can be planted earlier in the greenhouse as they are less dependent on temperatures and weather are. This minimizes the risk that the chili peppers will not ripen by winter.
When growing chillies in the greenhouse, however, regular ventilation is essential: On the one hand, pollination can help in a closed greenhouse, because this requires insects or at least some air movement will. On the other hand, the humidity in closed greenhouses is often too high, which opens the door to fungal diseases. Regular ventilation is therefore mandatory in order to keep the plants healthy and to achieve a high yield. In summer you can often leave the windows of the greenhouse open all day when the temperature is high.
Summary: planting chillies in the greenhouse or outdoors?
- Planting in the greenhouse can increase yields through warmth and ensure ripeness until the end of summer.
- Regular ventilation is very important to ensure pollination and prevent fungal infections.

Plant the chilli in the pot
The advantage of growing chillies in pots is that you can quickly warm up the plants when the weather is too cold. However, the growth of chillies in pots is limited, so that the plants usually develop a little worse than in the garden bed. To plant your chillies in a pot, you need a sufficiently large planter that can hold at least 6 liters. It should also have a drainage hole and drainage layer.
In summer, the chillies in the pot can then be placed on the terrace or in a sunny, sheltered place in the garden. Chilies love a slightly acidic pH of 6.5. A high-quality vegetable soil - such as the peat-free one - is the ideal substrate for chillies in pots Plantura organic tomato & vegetable soil - at.
Grow chilli on the balcony
Growing chillies on the balcony? Yes, that works: In fact, many types of chilli can be grown in pots on the balcony without any problems. However, not every balcony is suitable for growing chillies - the orientation of the balcony must be taken into account if you want to grow chillies there. South balconies are ideal for the heat-loving plant, because this is where the chillies can soak up the most sun. The chilli plant can also grow on east or west facing balconies, provided that it is exposed to the sun for at least five hours. A north-facing balcony, on the other hand, is anything but ideal due to the low level of sunlight.
Choosing the right chilli variety is just as important for balcony growing: Owners of smaller balconies should Look out for chilli varieties that remain small, such as ‘Habanero White’ (height approx. 50 cm) or ‘Royal Black Chili’ (height approx. 75 cm) keep. Because many well-known chilli varieties with a size of up to 1.60 m are only conditionally suitable for small balconies. Balconies in partial shade, on the other hand, should be made with particularly fast-growing and robust chilli varieties such as ‘Siberian house peppers’ or ‘NuMex Twilight’ are planted - these thrive even in less than ideal conditions Reliable.

Special features when growing chilli on the balcony:
- South balconies are best, but east or west balconies are also possible.
- Chilli species that are as small as possible should be chosen.
- For balconies in partial shade, robust and fast-growing varieties are recommended.
Grow chilli as a houseplant
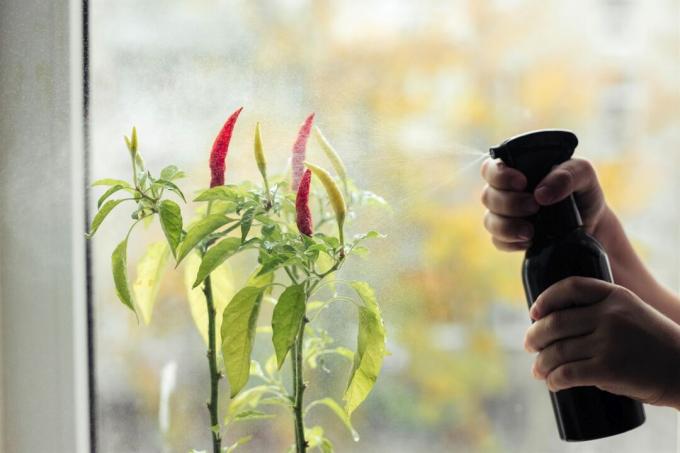
It is a special eye-catcher when chilli plants are not in the garden, but are kept as indoor plants. In fact, all types of chilli are suitable for indoor growing, although small varieties are often preferred for reasons of space. In fact, indoor cultivation for chili plants is often positive, as the consistently warm temperatures are very beneficial to the heat-loving plant. However, when growing the chilli indoors, you should make sure that the plant gets enough light. If you cannot serve with large windows and bright rooms, you should definitely use a plant light to provide the sun-hungry chillies with sufficient brightness. In addition, the humidity of chilli plants in the home plays a major role: dry heating air causes them to wither quickly. The optimum is a humidity of 50%, which can be achieved by regularly spraying the plant with water or water bowls near the radiator.
If you want to keep your plant indoors all year round, you also have to help with pollination so that the plant bears fruit. Since pollinator insects or the necessary draft for a transfer of the pollen in the house are often missing, you have to pollinate the chillies by hand. To do this, you carefully go from flower to flower with a real hair brush to pick up and distribute the pollen.

Special features when cultivating Chile in the house:
- Use chilli varieties that remain small
- Choose a bright, sunny place
- Use a plant light if the brightness is too low
- Keep the humidity at least 50%
- If necessary, pollinate flowers by hand to obtain fruit
Planting a chili tree
When planting the special tree chilli (Capsicum pubescens) you can proceed in a similar way to planting normal chillies in the pot as well as in the bed. A sheltered location is particularly important for tree chillies. They also prefer a partially shaded location instead of full sun. With a stick you offer the plant more stability.

Important tips and tricks for Cultivation of tree chillies we have put it together for you here.
Care for chilli after planting
Proper care is crucial for the quality of the chillies. The chilli must be watered sufficiently and regularly, especially during the fruit set. Chilies prefer a permanently moist soil, so it should be watered regularly, daily in summer.
To be able to reap a bountiful harvest is one Fertilizing the chillies recommended with a slow release fertilizer. Our Plantura organic tomato fertilizer With an organic long-term effect, your chillies provide all the important nutrients by releasing them to the plants in a long-term and soil-friendly manner. Long-term fertilization when planting out the chillies is ideal. In addition, the chilli plants need a lot of nutrients to form their flowers, which is why additional fertilization of the chillies is generally recommended.
If you have a lot of nettles in your garden, you can make your own fertilizer that is quite high in nitrogen and potassium - the Nettle manure. Such a liquid, organic fertilization should only be used as a supplement to the basic fertilization. It cannot completely replace them without permanently draining the soil. Liquid fertilizers can remedy acute nutrient deficiencies particularly quickly and support the chilli shortly before the flowering and fruiting phase. Even our liquid one Plantura organic tomato & vegetable fertilizer contains mainly nitrogen and potassium and is a fast-acting alternative for those who do not have nettles on hand to make liquid manure.
Weeds should be regularly cleared from the chilli bed during the entire period of growth, as this competes with the plants for important nutrients. It is also important that there is a humidity of 75% when growing in the greenhouse. This is ideal for the chillies to grow. Too high humidity promotes the formation of harmful fungi. On the other hand, if the humidity is too low, evaporation and dehydration are too rapid and can even lead to insufficient fruit set due to drying flower organs.
Tip: If you want to look forward to a particularly rich harvest, you should break out the first flower buds on the plant. This ensures additional branching and thus a higher number of flowers and fruits.
What about the spiciness of chillies and how you can make yours Get chilies particularly hot, find out here.
