Not the dumbest farmer, but the smartest gardener has the thickest potatoes. With these tips you too will soon have a rich potato harvest.

Potatoes have topped the list of the most popular vegetables for years. But the tubers are not only welcome on the plate, the potato is still very popular with gardeners. After all, it not only brings healthy food to the table, but can also be cultivated without any problems. With these ten tips we will show you how you too can grow potatoes in your garden.
contents
- Tip 10: Quality pays off
- Tip 9: give yourself a head start
- Tip 8: the right location
- Tip 7: Now is the time to plant
- Tip 6: water regularly
- Tip 5: more is more
- Tip 4: pile up
- Tip 3: harvest time
- Tip 2: potatoes on the balcony?
- Tip 1: into the basement
Tip 10: Quality pays off
If you buy cheap, you buy twice - this is probably not the case with any other seed as it is with the potato, after all, the tubers come from a mother plant. If this was already sick or infected by insects, it is almost inevitable that your offspring will also be affected. Often an affected tuber is enough to trigger a domino effect: other plants are also infected. In the end, it takes a lot of time and money to save the field from total failure. Instead, you should use certified seeds from the start. This is controlled and definitely free of disease.

Tip 9: give yourself a head start
So that the small tubers have a good start to their garden life, it helps to let them grow in the apartment. To do this, you put them in a flat box filled with earth and let them develop shoots in a bright room at around 15 ° C. You can start driving in March, after about six weeks the tubers can then move into the right bed. The advantage of driving forward is not just an earlier harvest date. Since the potato that has been driven forward also grows in cool weather, it is not so much affected by late blight. As a result, the yield can increase by up to 20% compared to normally planted potatoes.

Tip 8: the right location
The potatoes prefer to be warm, which is why a location with lots of sun is ideal. In contrast, they are undemanding in terms of the nature of the soil. The potato grows in almost any soil, but it finds sandy and loose loam soils best. When choosing your bed neighbors, however, you should take a closer look. Tomatoes and potatoes should never be placed next to each other. If you want to have both in the same garden, you should calculate the wind direction, because both plants can be attacked by the same types of fungus and infect each other. Even with itself, the potato is not well tolerated: at least four years should pass, except for the same Potatoes can be planted again on a piece of bed, otherwise pathogens that overwintered in the soil could affect the new plants destroy.

Tip 7: Now is the time to plantt
As soon as night frosts are no longer expected, the potatoes can finally be planted. A floor temperature of 9 ° C is to be assumed as a guide. If it takes too long to wait for the right weather, a little can help. If the bed in which the potatoes are to be covered with black garden fleece, the heat is stored and the soil is more likely to reach its "operating temperature". The potatoes are then placed in the planting trenches approximately as deep as a spatula at intervals of 30 to 40 cm. As a support, potatoes are happy to have a handful of compost or horn meal extra in their planting hole. The first green should appear after about two to three weeks.

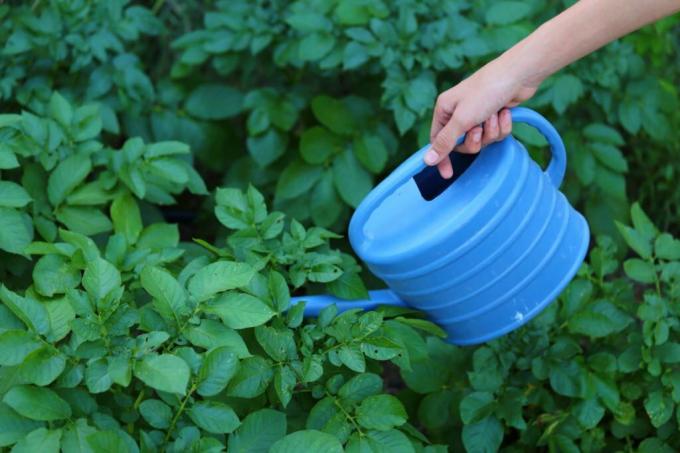
Tip 6: water regularly
Water is important to the potato. Only with sufficient water supply will the plant form many of the small tubers that will later end up in our pot. Still, you shouldn't overdo it with the water. When waterlogged, the potato becomes susceptible to disease and can begin to rot. About once or twice a week, when the soil around the potato has dried thoroughly, you should water the tuber. You should always pour the base and use the morning or evening hours. Wet leaves can be susceptible to disease and, in the worst case, burn in the blazing midday sun.
tip: Also other measures of the Potato care can help you get a bigger harvest.
Tip 5: more is more
Fertilizing for the potato cannot be started early enough. The bed should be dug up in autumn before planting and then covered with manure or compost. In spring, the last remains are incorporated so that the soil has a stable nutrient base. The potatoes can also tolerate fresh fertilizer while they are growing. Horn shavings and manure that are brought directly to the earth have proven particularly useful. Synthetic fertilizers are considered to be more nutritious, but they can adulterate the taste and are not exactly beneficial for a healthy soil life. A primarily organic bio-fertilizer like ours is very suitable Plantura organic tomato fertilizerwhich is worked into the soil when planting. It develops its effects over three months and contains all the nutrients the potato needs.
Tip 4: pile up
Piling up is probably one of the most important maintenance measures for potatoes. The soil between the rows is pulled up to the perennials as soon as they are about 20 cm high. This is repeated every two to three weeks from now on. The piling prevents the potatoes from coming into the daylight and from having inedible (and poisonous) green areas. In addition, as the piling increases, the yield increases because the plant begins to produce more daughter tubers. If you combine the regular piling up with the removal of weeds, the potato has ideal conditions for a rich harvest.

Tip 3: harvest time
On average, it takes potatoes three months to mature. The right time can be easily recognized when the potato leaves turn yellow and then brown and finally wither completely. The potatoes can now be harvested, preferably on a sunny, dry day. To do this, dig up the plant and loosen the potato from the sprouts. If the potatoes are ripe, this should be easy and the skin of the tuber should be resistant to abrasion. If you don't want to harvest all the potatoes at once, you can carefully expose the roots and only remove the largest tubers. The rest disappears underground and can be harvested at a later point in time.

Tip 2: potatoes on the balcony?
The potato is not only suitable for the garden. The plant can also thrive in the tub and the potato harvest can be moved to the balcony without further ado. To plant the potato, all you need is two flower pots. Cut a viewing window into one, then place it in the other. Now the potatoes are planted in the tub. On the balcony, the potato needs the same care as in the bed, only with the water supply you should pay more attention that it really does not come to waterlogging. When the potatoes are ripe, they can be easily harvested. To do this, simply pull out the inner flower pot. The tubers can be easily accessed through the viewing window without having to dig up the plant. You can find detailed instructions with video here.

tip: It is best to use a nutrient-rich vegetable soil such as our pre-fertilized Plantura for growing in pots Organic tomato & vegetable soil without peat.
Tip 1: into the basement
The harvest is over, the bellies are full - what to do with all the potatoes that are left over? Potatoes can actually be stored wonderfully. In a dark room, so that they do not form green spots, at 4 to 6 ° C, the potatoes will keep all winter. Rotten or injured tubers should be sorted out before storage. These can infect other potatoes and also cause them to rot. Even under optimal storage conditions it can happen that individual potatoes start to rot. These should also be sorted out at an early stage, which is why it is advisable to check the potatoes regularly.

More information on how to Store potatoes properly, can be found in this special article.