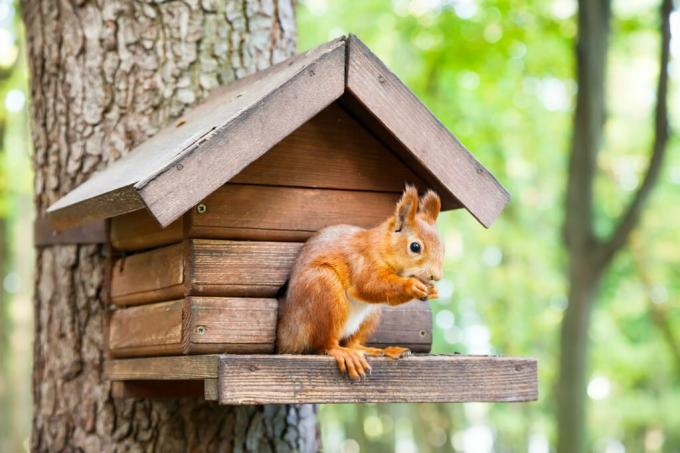
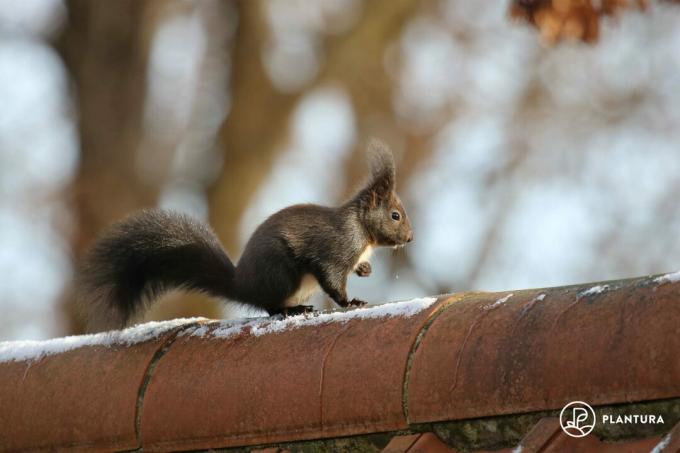
Squirrels don't have it easy, especially in autumn and winter. We'll show you how to build a squirrel house can build to help the little rodents.

Hot summer, too little rain: this autumn in particular, the cute squirrels have a hard time finding food. Because many trees have developed very few or no nuts. With a little extra food you can help the fluffy animals to collect enough supplies for the winter. But how do you make sure that the nuts reach the squirrels? Instead of simply throwing them on the ground, where they may not be from squirrels but from mouse, Rats and Co. are eaten, a feed box is a great idea to give the cute animals a feast prepare. We will show you how you can build your own feed box with a little manual skill.
contents
-
Instructions for building a squirrel feeder box
- Framework of the squirrel house
- Assemble the squirrel feeder
- Install the roof of the squirrel bird feeder
- Quick guide to building a squirrel feeder
These are the materials you will need if you want to help the squirrels in your area find food for the coming winter.
- Jigsaw, possibly circular saw
- Drill and cordless screwdriver
- screwdriver
- Sandpaper
- Smooth edge board (200 x 17 x 1.8 cm)
- Plexiglass (approx. 18 x 18.5 cm; 2 mm thick)
- Plastic plate (approx. 19 x 23 x 3 cm)
- Wooden strip (approx. 10 x 15 mm)
- Two hinges
- Four cylinder head screws with matching nuts
- Countersunk head wood screws (also known as quick-assembly or Spax screws)
Instructions for building a squirrel feeder box
In the following, we will explain step by step how you can build a feed box for your garden dwellers who love to eat with just a little material.
Framework of the squirrel house
First, the dimensions of the various parts are transferred to the wooden board. Both the bottom and the back wall should measure 17 x 14 cm. The two side parts each have a height of 28 cm on one side, but only 22 cm on the other side. This creates a roof slope later so that rainwater can reliably drain away. So that both side parts have the same slope, draw the two parts right next to each other so that you only have to saw one bevel.
Now the individual parts can be carefully sawn out with the jigsaw. You should round off the corners of the bottom and back wall so that there are no sharp edges on which the rodents can injure themselves. Carefully sand down all the saw edges with the sandpaper. This also minimizes the risk of injury to humans and squirrels.
A groove (notch) is now sawn on the inside of both side walls, which is 1 cm away from the edge of the shorter side. This later serves as a fixation for the viewing window, through which you can see whether there is still enough food in the house. The groove is best made with a circular saw set to a cutting depth of 8 mm. Note: If you do not have a circular saw, you can alternatively build a guide for the disc using two square strips. So that you can hang up the feed box later, you should already drill two large holes in the top of the back wall, because this is often difficult after assembly.
Assemble the squirrel feeder
The side panels will later be attached to the outer edge of the base plate and the rear panel. Try to see if the individual parts fit together and mark the places where they should be connected with screws. Now you can pre-drill the holes to minimize the risk of the wood cracking when screwing. Then you can finally screw: First attach both side parts to the base plate and finally screw on the rear wall.

Since the dimensions of the finished house can vary slightly, you should measure the values for the Plexiglas pane again. This should fit well into the groove (or guide) and leave a gap of about 2.5 cm between the top edge of the disc and the lid. If the plexiglass does not fit, it should be corrected with a saw blade made for plastic. Then you can insert the plexiglass into the groove (or the guide rails) from above.
To stabilize the viewing window, a square strip is placed behind the pane and screwed on from the outside. Alternatively, the square bar can also be screwed to the pane, so you can easily remove the pane later to clean the box
Install the roof of the squirrel bird feeder
Now the lid is missing: the edges should protrude 1 cm on the sides and 2 cm on the front to provide sufficient rain protection. Saw the plastic sheet to size and round off the corners with sandpaper. The finished lid can be attached to the rear wall with two hinges.
Finally, you can attach a lid stopper to prevent the lid from opening all the way up or rainwater running along the back wall into the box. To do this, simply screw a wooden strip a few centimeters above the lid onto the back wall. The squirrels can then use the lid on top of the bird feeder to get the nuts out.
If you want to get creative, you can give the bird feeder a nice coat of paint. But make sure that the colors are environmentally friendly and non-toxic so as not to endanger the squirrels. But even without a protective coating, the feed boxes often last for years.
Quick guide to building a squirrel feeder
- Mark and saw out parts. The bottom and back are 17 cm long, the two side parts are 28 cm on one side and 22 cm on the other, creating a slope.
- Round off the corners of the base and back and sand the saw edges smooth.
- Saw the groove for the viewing window in the shorter sides of the side parts.
- Drill holes for suspension in the rear wall.
- Mark and drill spots for screws; Screw the individual parts together.
- Cut the plexiglass lens and insert it into the groove. 2.5 cm should remain free between the upper edge of the pane and the lid.
- To reinforce the washer, place a square strip behind it and screw it on.
- Saw the cover out of the plastic sheet (1 cm overhang on the sides, 2 cm to the front).
- Sand the edges and attach the lid with hinges to the back.
- Mount the wooden strip as rain protection and cover stopper a few centimeters above the cover on the rear wall.
- Voluntary: Treat the feed box with environmentally friendly and non-toxic paint / varnish.
In case you're also interested in how to get one Easily build a bird feeder yourself we have a special article on the subject for you.