With Ollas you put an end to daily watering: With the help of clay pots, your garden plants are evenly supplied with water for several days.

Watering plants with Ollas has been a method that has been known for thousands of years to make work easier and save water in the garden. How to use ollas for irrigation, what advantages they offer and how to build ollas yourself, you can read in this article.
contents
- What are ollas and how do they work?
- Use ollas correctly
- Build Ollas yourself: Instructions
What are ollas and how do they work?
Ollas (pronounced "Ojas") are bulbous clay pots that are used for watering the garden. But how do ollas work? The often amphora-like clay pots are buried up to their necks in the earth and can then be filled with water. Due to the porosity of the clay, the water is released slowly and continuously into the ground. The way Ollas works is related to the soil water tension, also called suction tension. This is bigger, the drier the floor is, because then it becomes "more absorbent". Only when the suction tension in the substrate is greater than that of the clay pot does water leave the olla. Conversely, this means that the soil is only moistened when it is dry - and all by itself, as long as the container is full.
Tip clay cone: Clay cones, which are mainly used for watering indoor plants, work with the same functional principle as Ollas. In contrast to Ollas, the water reservoir is not located underground in the clay pot itself. Instead, an upturned bottle of water is placed on the clay cone about the size of a finger. Read here how to use clay cones correctly.
What are the benefits of watering with ollas?
- Reduced workload: With ollas for irrigation, the daily watering comes to an end. Because of the slow release of water through the clay walls, the plant roots are supplied with water for a longer period of time. Ollas are therefore also suitable for watering the garden during a short vacation.
- Reduced water loss: Since it is a so-called underfloor irrigation, i.e. underground irrigation, the evaporation is reduced. This means that less water evaporates from the surface of the soil. This saves up to 70% water compared to irrigation using irrigation. So the liquid is used a lot more efficiently.
- Less weeding: Because the soil surface remains drier, the seeds of weeds will germinate more poorly. The likelihood of weeds sprouting in your bed is reduced.
- Less diseases and pests: Moisture-loving fungal diseases like that Downy mildew or the Late blight and brown rot put an end to watering with ollas, as the leaves of the plants do not get wet when watering. Snails also have a harder time crawling over the dry soil surfaces.
- Deeper root formation: In contrast to conventional watering, irrigation with ollas not only makes the upper soil layer wet, but also moisturizes the soil deep down. Your garden plants will be stimulated to form deeper roots.
- Cost less: Irrigation with Ollas is an inexpensive alternative, for example to a drip hose system. This is especially true if you build the ollas yourself. You can find out how this works further down in the article.

The many benefits of watering with ollas have been known for thousands of years. This type of irrigation was already described in the oldest agricultural guide in China, the "Book of Fan Shengzhi". Irrigation with clay was also known in the ancient cultures of South America: the word Olla comes from Spanish.
Tip: Ollas are particularly suitable for watering beds on slopes. Because there the irrigation water runs off quickly and cannot penetrate deep into the ground.
Use ollas correctly
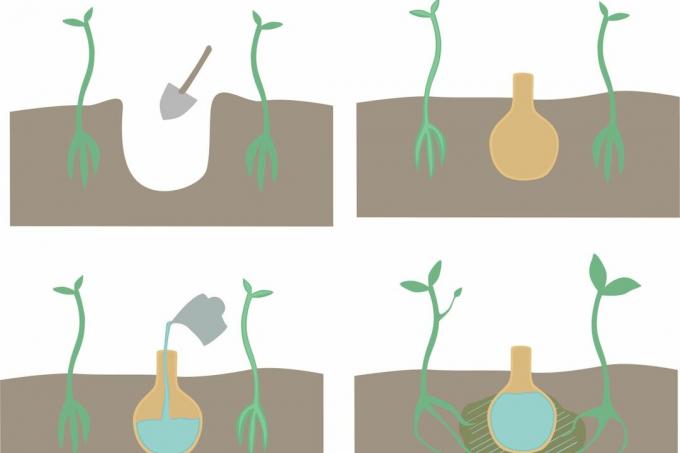
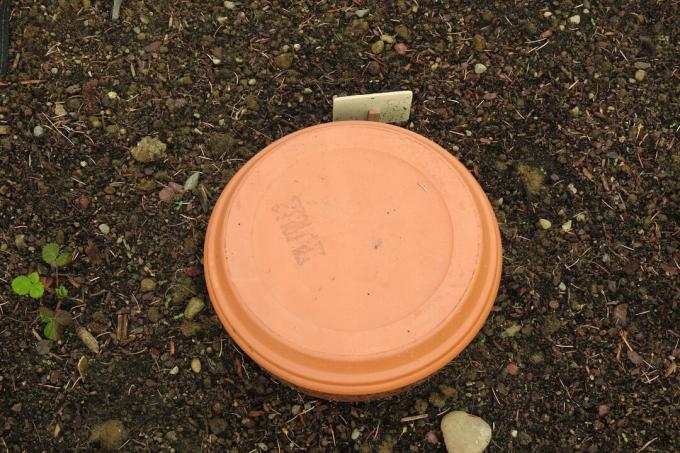
The first step is to dig a hole in the earth where the olla is to be placed. This is best done at the beginning of the year, when the garden plants are still small and fewer roots are destroyed when digging. The olla is placed in the hole and covered with earth up to the neck. Then fill the olla with water and put a lid on the opening to prevent dirt and small animals from falling into it.
How often do you have to refill the olla? A rough guideline for filling up the ollas is to refill the water about once or twice a week. The frequency depends strongly on the garden soil, the amount of precipitation, the water requirements of the plants and the porosity of the soil. Sandy subsoil, for example, is less able to store water than clayey and loamy soils, but can also build up less suction due to its small percentage of fine pores. On the other hand, the Olla empties clayey substrate more efficiently thanks to its high suction power. Thirsty plants, wind, high solar radiation and dry soil also accelerate the emptying of the olla.
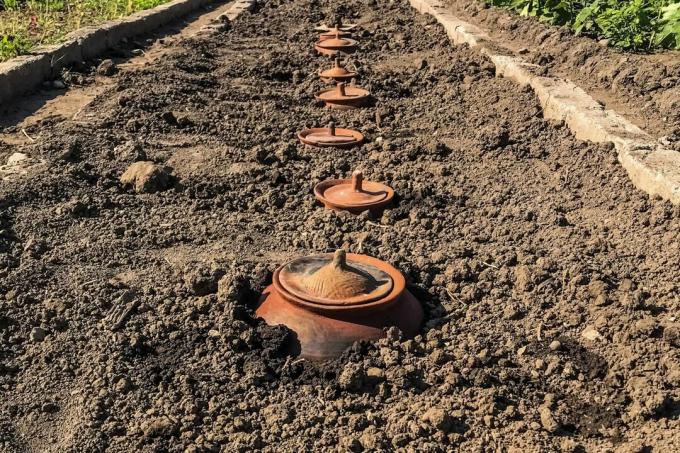
Which area can be irrigated with an Olla? There is no general answer to this question either, because that depends heavily on the size of the olla and the type of soil. As a rough guideline, plants within a 50 to 100 cm radius benefit from watering with ollas. In sandy soils, the water seeps away faster than it can spread laterally. The radius in which the plants benefit from the Olla is therefore smaller. Therefore, a closer distance between the ollas must be maintained in sandy soils. The area that benefits is greater in silty and clay-rich substrates. It is advisable to place the plants in a circle around the olla. Creeping plants such as the pumpkin (Cucurbita maxima), because these will grow around the Olla all by themselves.
tip: Ollas are ideal for watering raised beds. Usually an olla is enough. Due to the lower volume of soil in raised beds, the soil dries out particularly quickly here. Irrigation with Ollas can help.
Mulching is the perfect complement to watering with ollas. Because the mulch layer means that even less water evaporates from the ground and you have to water even less. For example, use lawn clippings, leaves or a permanent variant like ours Plantura organic pine bark. Regular checks make it less polluting than the frequently used bark mulch and its coarse structure means that it stays on the bed for a particularly long time to protect the soil.
Build Ollas yourself: Instructions
Instead of buying the bulbous clay pots, you can simply make the ollas for irrigation yourself. You need:
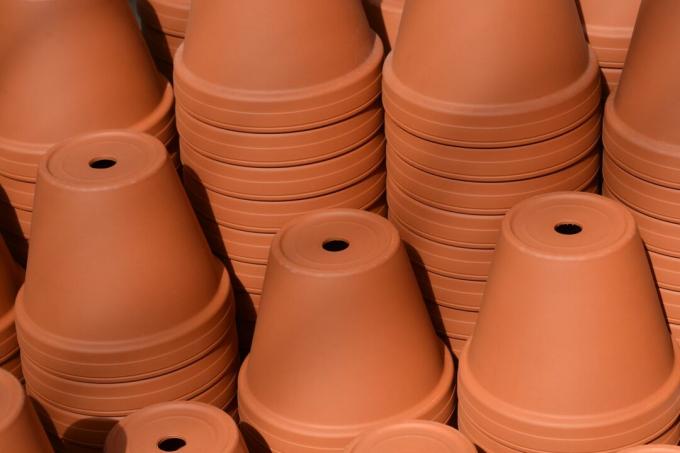
- Two terracotta / clay pots (absolutely unglazed)
- A plant pot coaster
- Hot glue, tile glue is also suitable
- An uncompromised pottery shard
You can build Ollas yourself in 3 simple steps:
- Glue the two clay pots together with the opening. No more water should get through the gap.
- Now glue the bulging pottery shard to one of the drainage holes. As an alternative to the pottery shard, there is, for example, some mortar, silicone, a flat stone or a cork, which you can seal with a little glue.
- You can fill the self-made olla with water (possibly with the help of a funnel) via the unsealed drain hole in the other pot. The saucer serves as a lid for the self-made Olla.
Olla is done! Even a clay pot with a closed drainage hole can be enough as an olla. It is easier to fill but has a smaller volume.
Other methods of Plant watering on vacation see our article on the best tips for the vacation season.