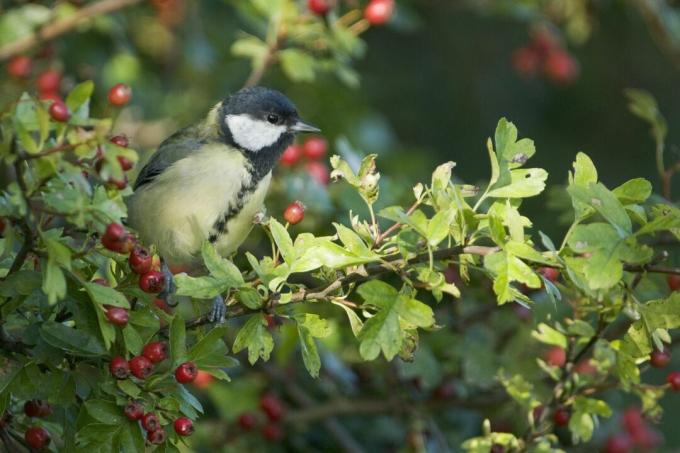
A hedge is not only a privacy screen, it can also be a retreat for insects and birds. In this article you will find out what is important when planting a new hedge.

Not only are they popular as privacy screens, hedges absorb a certain amount of street noise. In addition, your green is better protected from the wind. However, it can take a few years for hedges to grow lush green and tall, depending on the size of the plants purchased. If you are planning to plant a hedge and are wondering when is the best time to do so and what you need to consider, you will find answers in this article.
contents
-
Planting a hedge: When is the best time?
- Plant deciduous and evergreen hedges
- Plant evergreen hedges
- The right location
- Distance for hedge plants
- Planting hedges: step-by-step instructions
Planting a hedge: When is the best time?
Depending on what you want to plant, a different time of the year is best. You should also pay attention to the form in which you buy the hedge plants. Container plants, i.e. plants in pots, can in principle be planted all year round, but of course they have to be watered more when it is hot and receive a more drastic pruning. Bare-rooted plants or high-quality balled goods from the tree nursery are a bit more sensitive - the best possible planting time should be chosen here.
Tip: When planting in the growth period, you can also cut immediately after planting so that the plants sprout more branched. The cut should be superficial, i.e. the tips are cut.
Plant deciduous and evergreen hedges
Deciduous and evergreen hedge plants are best planted in autumn (mid-October to mid-December) during dormancy. This minimizes water loss through transpiration. In addition, the roots can already grow in before they sprout in spring and take care of the new leaves of the plant. Planting before they sprout in spring is also very possible if there is a good water supply.
Examples of deciduous hedge plants: field maple (Acer campestre), European beech (Fagus sylvatica), common privet (Ligustrum vulgare), honeysuckle (Lonicera xylosteum), dogwood species (Cornus alba, C. mas, C sanguinea), dark red barberry (Berberis x ottawensis ‘Superb’)
Examples of evergreen hedge plants: Low honeysuckle (Lonicera nitida), hornbeam (Carpinus betulus), wintergreen privet (Ligustrum vulgare ‘Atrovirens’), Wintergreen Medlar (Cotoneaster x watereri)
Tip: Evergreen plants are those that turn their foliage slightly brown but do not shed over the winter. The sometimes already brown leaves are attached to the plant and serve as winter protection. In the spring, the old leaves are thrown off at once as the new ones sprout.
Plant evergreen hedges
Planting an evergreen hedge is possible almost all year round with the right water supply - only spring should be avoided as a time for planting.
Examples of evergreen hedge plants: Red-leaved medlar (Photinia x fraseri), yew (Taxus baccata), holly (Ilex aquifolium), royal barberry (Berberis julianae), obelisk juniper (Juniperus chinensis 'Obelisk'), Firethorn-Species (Pyracanta spec.), for low hedges: Skimmie (Skimmia japonica)
The right location
Here it is important to find out individually which hedge plants are suitable for which location. Because not every hedge plant can cope well with extreme soil conditions such as drought or a high clay content. Even a very shady location is not suitable for all plants. For example, if you want to plant a flowering hedge, it is important that the location is not too dark. Likewise, only plants should be chosen that are hardy in our latitudes.
In our special article you will find 6 easy-care hedges, which thrive in many locations.

Distance for hedge plants
When planting new hedges, there are a few things to consider, especially when it comes to spacing. We answer the most important questions below:
How much distance do you have to keep to your neighbors?
This point in particular is important so that there are no disputes with your neighbors when the hedge is fully grown. The neighborhood law of the individual federal states states which border distances must be observed. Roughly speaking, the larger the plants get, the greater the distance to the border must be. In Saxony and Bavaria, for example, a distance of two meters to the property line must also be maintained if the plant is more than two meters high. Such a large distance is not prescribed in other federal states. Nevertheless, you should always inform yourself about the currently applicable regulations in your federal state.
How far away should you be from a fence?
As far as the distance between hedge plants and a fence is concerned, there are no legal regulations – unless the fence marks the boundary. However, it should be borne in mind that the hedge needs an annual cut, not least so that the fence does not overgrow. Depending on the later growth width, a sufficient distance is necessary for this. It must be taken into account in advance that the hedge plants become wider with age. And even if you want to plant a narrow hedge, the distance to the fence should allow easy trimming.

How much space must there be between the hedge plants?
When planting a hedge, the larger and wider a hedge plant will grow, the larger the spacing can be. If there is too much space between the hedge plants after planting, it will take a long time before they become opaque and windproof. Planting too close together can kill individual plants. To avoid this unnecessary waste of time and money, the right distance should be maintained.
The table below lists some plant examples with the appropriate distance per linear meter for reference.
| German name (botanical name) | Appropriate Height (cm) | Minimum width (cm) | Plants per linear meter |
| Mount Boxwood (Buxus sempervirens 'Suffruticosa') |
20 – 100 | 10 | 4 – 8 |
| Common privet (Ligustrum vulgare) |
100 – 300 | 100 | 2 – 3 |
| yew (Taxus baccata) |
100 – 500 | 100 | 1 – 2 |
When you buy the plants, the seller can usually give you information and recommendations for certain plants. Often even varieties of the same species differ in their growth range, so it is better to get detailed advice.
Planting hedges: step-by-step instructions
Once you have decided on a hedge, it's time to plant it. You can read how to do this in this step-by-step guide to planting a hedge:
Step 1: Planning
First determine the desired location for the hedge planting. You should also pay attention to the soil conditions. Once you have chosen a hedge plant that is suitable for the site, the distance to the property line, a fence and other plants can be planned. The type of plant also determines the right time to plant.

Step 2: Buying the hedge plants
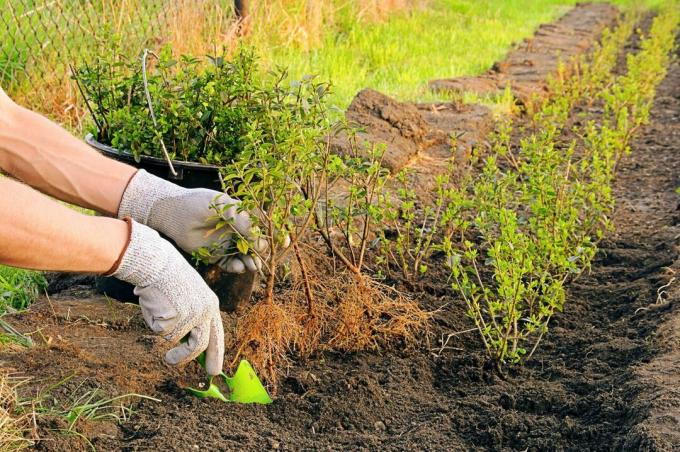
Once you have decided on a type of plant, you can buy the plants. The plants are usually available in different sizes. There is also a selection of different qualities. The plants are either sold bare root, balled, wire balled or in containers (pots). Container goods are usually slightly inferior and cheaper and take a little longer to arrive at the new location. However, it can be planted almost all year round. Balls are more expensive, of higher quality, grow better - but should not be planted in summer. Bare-rooted plants are very cheap to buy, but need good care to ensure they grow safely and without drying out.
Step 3: Create a planting trench
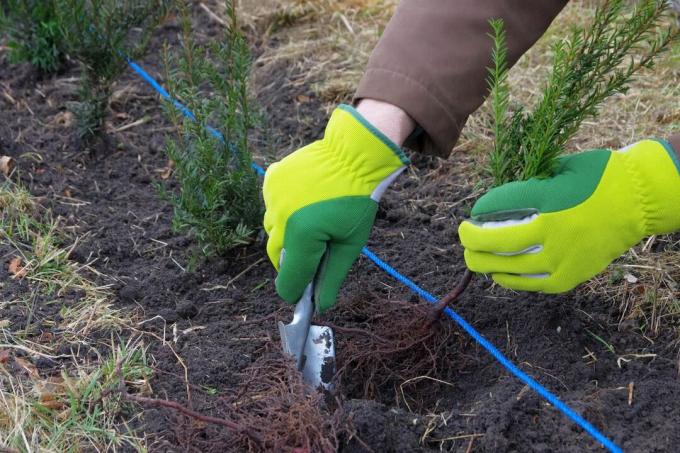
Now the planting trench has to be dug. This should definitely be twice as deep and one and a half times as wide as the root ball. It is best to use a previously stretched cord as a guide.
Step 4: Distribution and orientation of the hedge plants
In the ditch it is now time to distribute and align the hedge plants. It is important to keep the desired and required distance of the plant directly. Straight alignment works very well with the string stretched between two sticks. Use a folding ruler and fix the plant balls with some well-trodden earth in the place where they are to be planted.

Tip: prepare the root ball
Prepare container plants: For optimal growth of the roots, it is necessary to loosen the cylindrical ball of the container plants a little. This step is important because the root injury allows for increased branching and therefore better and faster rooting. Prick the root ball 4 to 6 times with a spade, or pull it apart vigorously with both hands so you can feel some roots snapping. Loosen the container bale just before placing the plant in the ditch.
Prepare bare root plants: In the case of bare-rooted plants, the roots of all plants can be shortened by a maximum of one third before they are distributed in the planting ditch.
Prepare bale goods: Bale goods are wrapped in jute cloth or wire when delivered. The balling is only opened directly before filling with soil. The burlap cloth can be removed when the bale underneath is firm and stable. It is organically degradable and can therefore also be buried if you simply untie it at the root neck and open it. Wire balls remain on the ball, but it makes sense to open the wire at the root collar as well. Sometimes this can be achieved by bending it open, sometimes wire cutters have to help. The wire also decomposes quickly in the ground as it is not rustproof. After just a few years, there are hardly any residues left in the ground.
Small root balls should also be well moistened before planting in the soil. Repeated watering with the garden hose is recommended for this purpose. This procedure is not recommended for large root balls as they become too heavy to move. These plants should therefore only be watered at their final location.
Step 5: Loosening the excavation
The excavation of the ditch should be loosened up with a hoe to enable the hedge plants later to grow their roots as well as possible. A soil activator can also be added for better growth. This is more suitable for planting than other fertilizers, as it supports root growth with a moderate nutrient content. For example, you can use our Plantura organic soil activator to use. This contains living mycorrhiza fungi, which enable the plants to have a better supply of water and nutrients.
Step 6: Set plants
Plants need to be straight and upright to ensure even growth. You can orientate yourself on the cord. After filling in the remaining excavation, it is advisable to firmly tamp down the soil around the plants, which will fill in any voids in the soil. A watering rim is modeled from the remaining soil, which encloses the entire hedge.

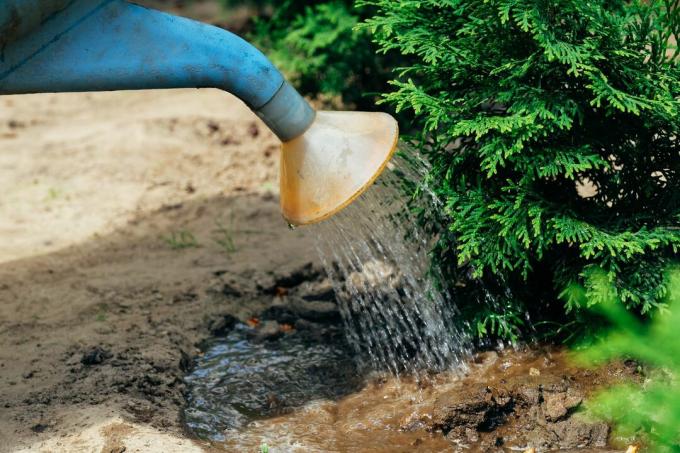
Step 7: Water the hedge
Even in wet weather, the hedge plants should definitely be watered. This closes open cavities and moistens the soil well. This enables the plants to grow in optimally. To do this, the pouring rim should be completely filled. In warm weather in spring and summer, the new hedge should be watered daily, in winter, however, only when it is dry.

Tip: By buffering soil moisture and temperature, mulch improves hedge ingrowth. Our peat-free, for example, is suitable for this Plantura organic pine bark in rough screening. This also prevents strong weed growth, and pine bark also offers good protection against the cold, especially in winter. Further Benefits of Mulching can be read in our special article.
Would you like to plant a flowering, robust hedge? Then the privet could be something for you. Read our special article for more tips on Planting of privet.


