
With a caper bush you bring Mediterranean holiday flair into your own garden. We reveal what you need to consider when planting capers.

A caper bush (Capparis spinosa) is definitely an optical enrichment for the garden, the balcony or the terrace. And on top of that, he also supplies delicious capers that you can enjoy in a salad or on a pizza. Although capers like it sunny and warm, it is not impossible to grow them here too. That's why we're telling you everything you need to know so that the caper bush can grow and thrive in your home too. In this article we explain the ideal location and the correct procedure for planting capers.
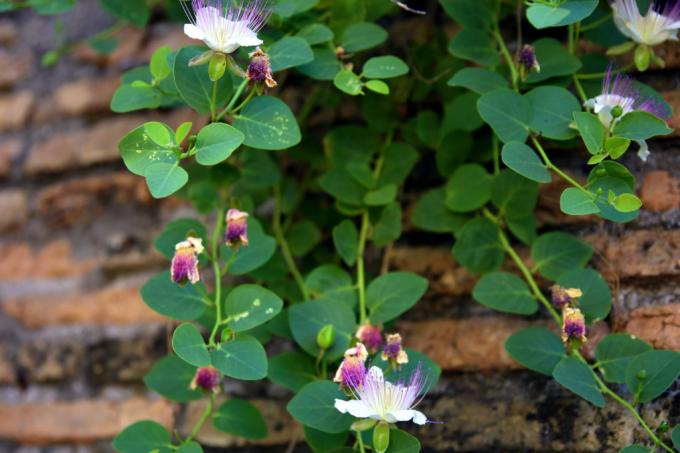
Anyone who decides to harvest capers from their own bush needs staying power. It takes a very long time for a caper bush to grow from the seed. In addition, the roots of the caper bush are extremely sensitive and do not easily forgive even the smallest damage. However, those who are patient and cautious will be rewarded: the shrub develops fine flower buds that can be harvested and preserved as capers. If the buds remain on the bush, they will develop into beautiful, exotic flowers. In order for the planting of the Mediterranean plant to be successful, expert knowledge is required, because capers are rarely found in our latitudes. But you can change that now by growing your own caper bush.
When should you plant capers?
Unfortunately, the question of when is the best time to plant capers is not so easy to answer. Because caper seeds cannot simply be planted in the ground. This requires some preparation. First of all, the seeds have to be stored in a cool and damp place for two months in order to be able to germinate at all. You can start with this from January to the end of February. The best time to plant the germinable seed is from the beginning of March to the end of April. From then on you have to wait and see, because capers need two to three months before they start to germinate. If you have bought a caper bush that has already been planted, it is best to plant it between April and May.

Summary: when to plant capers?
- Preparation: January to February
- Sowing: March to April
- Germination period: 2 - 3 months
- Planting: April to May
What is the perfect location for capers?
Capers are very sensitive to cold and therefore cannot survive the winter outside in our country. This means that you can only plant your caper bush in a pot. This allows the shrub to move to a warmer quarter in winter. In summer, however, the caper likes to stand outside on the balcony, terrace or in the garden. There the shrub should be protected and kept as warm as possible. A good place is therefore on a house wall or a wall. In terms of light conditions, the following applies: sun, sun and even more sun. The lighter and warmer it is, the better your caper bush will feel.
As far as the location is concerned, it does not differ from its Mediterranean fellow plants, which mostly prefer dry and calcareous soil. It is imperative to avoid waterlogging. So the soil should be as permeable as possible.
Overview: Where to plant capers?
- Capers are not hardy, so cultivate them in pots
- Sunny to full sun location
- Protected and as warm as possible
- Dry and calcareous soil
- Avoid waterlogging
Tip: The long branches of the caper bush quickly bend downwards. That is why it can also be used as a hanging plant to decorate dry stone walls or traffic lights.
How do you go about planting capers?
In order to plant capers, the seeds must first be prepared. First soak the seeds in lukewarm water for 12 hours. In the next step, the seeds have to be stratified, i.e. made germinable by a cold stimulus over a certain period of time. To do this, place the seeds moist – for example in a plastic bag or in a cloth – in the vegetable compartment of the refrigerator. The seeds rest there for a full two months. When the eight weeks have passed, take the seeds out of the refrigerator and soak them again in lukewarm water for a day.
Prepare capers for planting:
- Soak caper seeds in lukewarm water for a day
- Seeds moist for 2 months (eg. B. Store in a plastic bag or cloth) in the refrigerator
- Then soak it again in lukewarm water for a day
Once the seed has been prepared as described above, you can proceed with planting. First prepare the planter and the substrate. Capers do not like substrate that is too heavy or too rich in nutrients. We therefore recommend mixing normal potting soil with sand in a ratio of 1:3 or using special cactus soil for the capers. Next, a drainage layer is laid. Expanded clay or potsherds are suitable for this, for example. Then fill the planter with the appropriate substrate. The caper seed is placed one centimeter deep, lightly covered with substrate and watered. in one homemade mini greenhouse or in a sunny, warm place on the windowsill, the best conditions for germination prevail. The temperature should not be below 20 °C. Now, as I said, be patient, because it can take two to three months for the caper seeds to germinate. If you have managed to germinate your caper seeds, the work is not yet done. The seedling must now be nurtured and cared for until it has grown properly. Again, this can take several months. Until the young plant has finally grown, it must be watered regularly, as it can dry out very easily.
Sowing capers - step-by-step instructions:
- mix the substrate
- create a drainage layer
- Fill the planter with substrate
- Sowing depth: 1 cm
- humidify
- Germination temperature: over 20 °C
- In mini greenhouse Or put it on a warm window sill
- Keep substrate regularly moist
- Water young plants conscientiously until they are established

If you have already bought a caper bush that you have already planted, it also needs a planter with a drainage hole and saucer. Special substrate and a drainage layer are also a must. Fill the container about a third full with substrate and only plant the plant as deep as it was in the container. Then fill the container completely with substrate and water the plant lightly.
Summary: How to plant a caper bush?
- mix the substrate
- create a drainage layer
- Fill the vessel one-third full with substrate
- Plant the bush in the middle
- Plant only as deep as it was in the container
- Fill the planter with substrate
- Pour lightly
Warning: Capers have a very sensitive root system and react extremely sensitively to damage or injuries to the roots. As such, you should always exercise extreme caution when planting and handling your caper bush.
More information on caring for and harvesting capers you can read here.
