
There are several ways to start the gardening year earlier than usual, such as pre-cultivating different plants indoors. However, if you want to plant them directly in the garden, a cold frame is particularly suitable for hobby gardeners.
Since you can easily build a cold frame yourself from a wide variety of materials, this is one inexpensive alternative to expensive greenhouses to protect your plants from cold and frost protect.
contents
- What is a cold frame?
- Build a cold frame yourself: instructions
- Plant cold frame
What is a cold frame?
A cold frame is basically a slightly smaller greenhouse, usually less than 1 m high, and is therefore only suitable for low-growing plants. The cold frame is primarily used to bring vegetables earlier, to protect them from late or night frosts and thus extend the growing year forward. In addition, the bed can be used for pre-cultivating a wide variety of plants, which are then taken out of the cold frame when the temperatures are warmer. Since cold frames can be opened upwards, even larger plants can theoretically be planted in the bed if they are left open when there is no frost. In order to work at comfortable and back-friendly heights, there are also cold frame attachments for various raised bed shapes.
There are basically two different types of cold frames to choose from, namely so-called warm and cold cold frames. For a warm cold frame, dig a hole about 0.5 m deep the size of the cold frame. Half of this is filled with horse or other animal manure mixed with straw or wood shavings. Compact this layer well and now fill the rest of the hole with good garden soil and some compost. The microbial degradation of the animal manure now generates heat, which naturally heats the cold frame from below. With the help of the resulting heat, young plants that need more warmth can be grown and cold-tolerant plants can be planted out a little earlier. The extra effort is therefore worth it, especially if you want to start the gardening season very early. You can find more information about plant selection at the end of the article.
Build a cold frame yourself: instructions
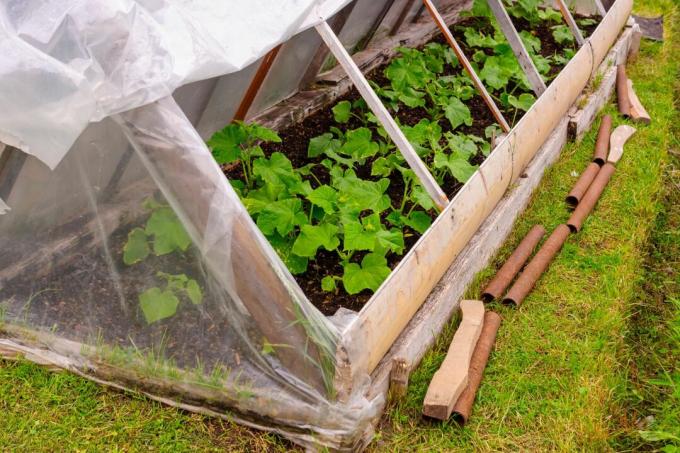
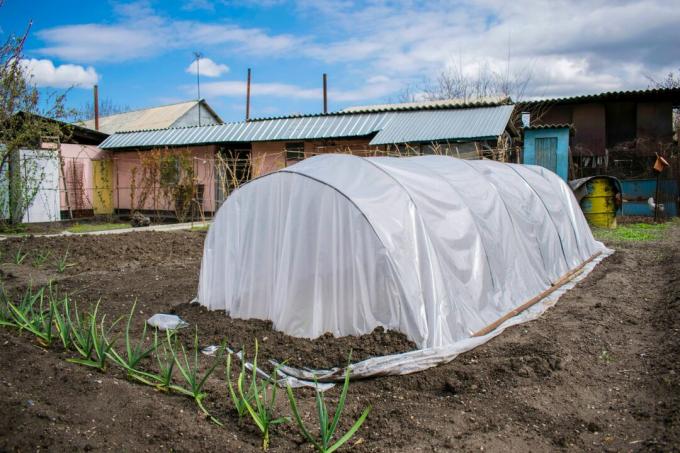
There are several ways to build a cold frame yourself. For example, you build a kind of small foil tunnel with a wooden or metal framework.
It is also a good idea to build a cold frame yourself from old windows. Windows with a window frame are best, so that the window lifting mechanism can still be operated. To do this, simply fasten four boards around the window so that it can be opened upwards. If you don't have old windows to hand, other materials such as Plexiglas or normal panes of glass are also suitable. There are almost no limits to creativity when building a cold frame. The most important points to consider during construction are, on the one hand, that the cold frame is as tight as possible to prevent the cold from penetrating. On the other hand, it is important to ensure that enough sunlight reaches the plants through the pane and that the cold frame can be opened for occasional airing. It is best to align the cold frame in a southerly direction.

It's also important to remember that different constructions offer different levels of protection from the cold. Cold frames with glass panes are better insulated against frost than simple constructions with foils.

Material list for the cold frame:
- (Plexi) glass pane, old window pane or similar
- Wooden boards or boards for the box and lid, depending on the desired size
- Possibly. Squared timber to stabilize thin boards
- Hinges or similar mechanisms for opening
Instructions for a cold frame:
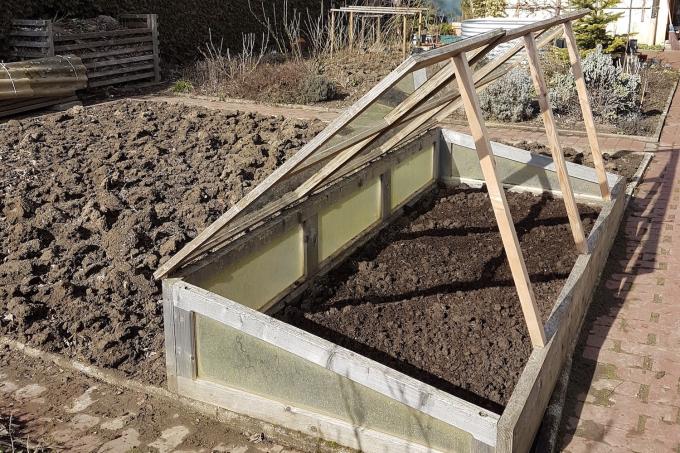
- First you have to screw together a square box. It is best if there is a slope towards the front, as shown in the picture example, so that water can run off the panes and the incidence of light is improved. Glass panes were also worked in here on the outside - but only boards or plate materials can also be used. In the case of plates and very thin boards, however, squared timber should be attached in the corners for stabilization, otherwise the screws will not provide any stability. In addition, no pressboards or similar should be used, as they absorb a lot of water and are not very weather-resistant. Woods such as pine or larch offer good value for money.
- You can simply use old windows for the cover or build your own frame out of wood and attach glass panes to it. It is important that the size fits the previously built box so that the lid fits snugly and there are no large gaps. The frame in this example was glued, but thicker strips can also be used and screwed. It is best to sit a little lower in the frame so that it cannot slip out. Then the pane can be attached with silicone or similar adhesive materials.

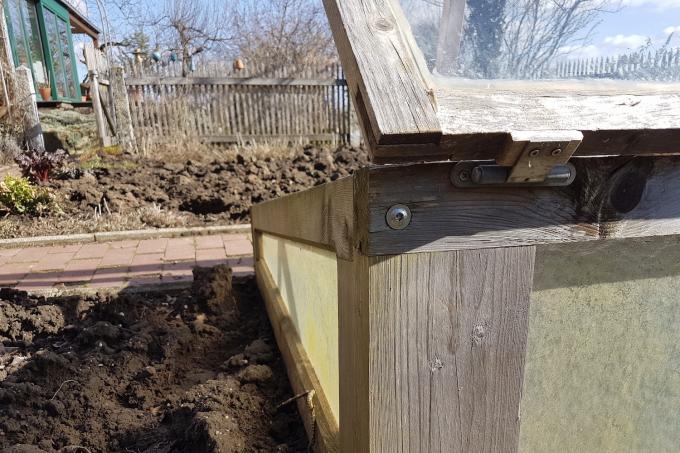
- In the last step, you only have to connect the box and lid. Movable parts such as hinges are suitable for this, so that the cold frame can also be opened. Depending on the weight and size, you need more or less for this - but at least 2 hinges per pane. Since the cold frame is relatively large here in the picture, 3 panes that can be opened separately from each other, each with 2 hinges, were used.
Plant cold frame
Once the cold frame is ready, you can start planting. If you opt for the “warm” variant filled with manure, you can get started as early as February. After about a week, the activity in the soil should generate enough energy to warm the plants sufficiently. When making your selection, it is important to choose plants that are already very cold-tolerant and can cope with lower temperatures. For example, vegetables are suitable salads (Lactuca sativa), Kohlrabi (Brassica oleracea var. gongylodes), radish (Raphanus sativus var. sativus), carrots (Daucus carota subsp. sativus) and much more.
If you don't have natural underfloor heating, you should wait with planting until the hardest night frosts are over and the temperature drops only slightly below 0 °C. Vegetable varieties that are not sensitive to the cold for the cold bed are, for example, suitable winter cress (Barbarea vulgaris), spinach (Spinacia oleracea), Lamb's lettuce (Valerianella locusta) and winter purslane (Claytonia perfoliata) at.
It should also be noted that the cold frame can of course also be used to extend the gardening season backwards. The cold frame is used as a late frame to grow vegetables or other plants well into autumn.
Cold frames combine well with raised beds to work at a comfortable height. That's why you'll find instructions here on how to easily create one of your own build a raised bed can.

