
The ivy is very frugal, but needs a little care from time to time. Everything you need to water, cut and fertilize the ivy can be found here.

the ivy (Epipremnum) is one of the most popular indoor plants for the home or office. It is considered indestructible and extremely easy to care for. But she can't do without care. In our article we tell you everything about proper ivy care.
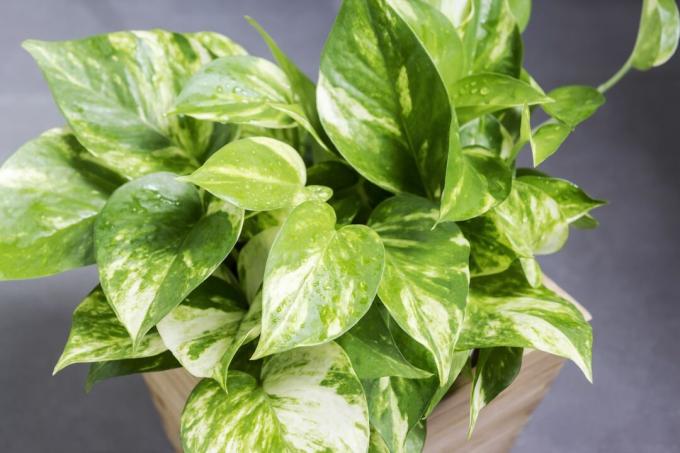
Many people know the climbing, evergreen plant, but don't even know what it's actually called. We are talking about the ivy, which belongs to the aroid family (Araceae). Also many other houseplants like that window leaves (monstera) or the leaflets (Spathiphyllum) belong to the aroid family. With the ivy (Hedera helix) the ivy only has the name and the property of the tendrils in common. The two plants are not related.
contents
- pour ivy
- Cut ivy
- Fertilize ivy
- Repot ivy
- Yellow leaves in ivy: causes and countermeasures
pour ivy
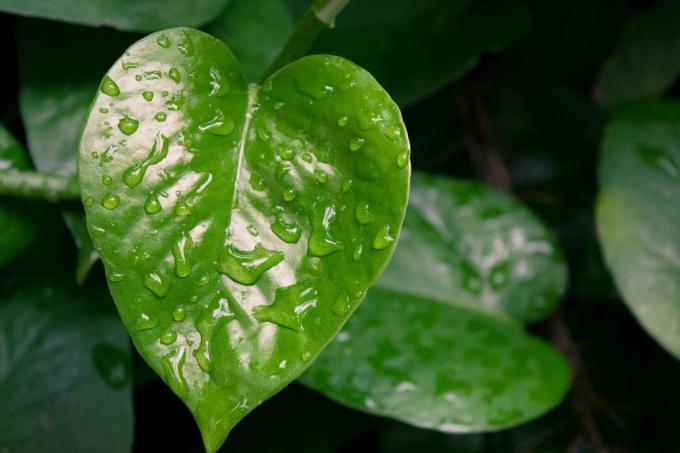
Since the ivy requires little care, it is ideal for beginners and gardeners with little time. It easily withstands short periods of drought. If you water the ivy, the general rule is that you should dry the substrate between waterings, but not let it dry out completely. With the finger test you can test whether the upper substrate has dried enough. If the top two centimeters feel dry, you can water again. If lighter and half-dried leaves appear on the plant, it is high time to water again, as the plant is too dry. It is best to use lime-free irrigation water, with rainwater being ideal.

If the pot gives off a foul, foul smell, the plant's roots are probably submerged and you've over-watered it. Even if drops form on the leaves, the plant tries to shed excess water by guttation. Therefore, the excess water should always be removed from the planter about 15 minutes after watering. In this way, the formation of waterlogging can be avoided. With the Efeutute, watering over the coaster is also an option. To do this, pour water into the saucer - and not from above onto the substrate - and wait until the plant has absorbed everything. Repeat this until there is water in the coaster. You can then remove this.
Summary: pour ivy
- Let the top layer of the substrate dry (finger test)
- Use lime-free water
- Remove excess water from coaster
- Alternatively, pour over coasters
- Light, dried-up leaves indicate drought
Tip: Ivy loves high humidity. They are therefore very happy to be sprayed regularly with lukewarm, lime-free water.
Cut ivy
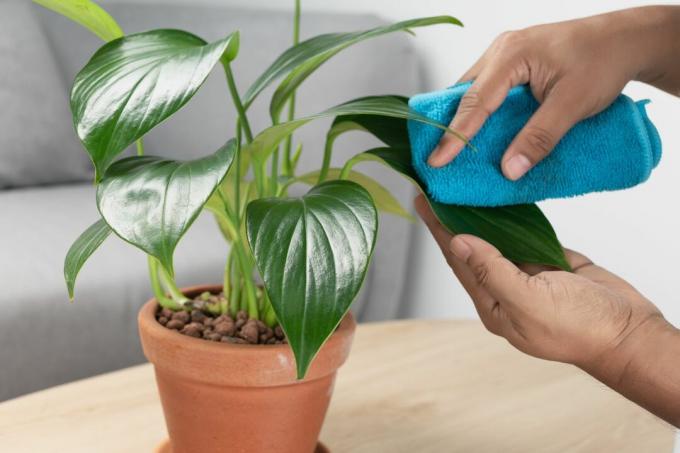
Although it is not necessary to cut off the shoots of the ivy, the tropical plant is very tolerant of pruning. You can regularly remove dead and wilted leaves. If you want to curb the growth of the ivy, you always have the option of using scissors. Spring is the best time to trim ivy. After that, the plant can still sprout well. As a rule, the shoots can be shortened by two thirds. The separated drive pieces can also be used if you multiply ivy want.
Unfortunately, it is not easy to branch out the Efeutute. A pruning directly at the leaf axils can lead to the plant growing bushier. However, the easiest way to achieve a bushy appearance is to simply plant several ivy plants in a pot.
Summary: Cut ivy
- Regularly remove wilted and dead leaves
- Cut back in spring
- To do this, shorten the shoots by a maximum of two thirds
- Cut frequently on leaf axils for bushy growth
- Use a sharp knife or secateurs
Tip: Since the Ivy poisonous you should always wear gloves when caring for the ivy - especially when cutting and repotting.
Fertilize ivy
Between March and October, when the ivy is growing diligently, you should fertilize the plant occasionally. A liquid fertilizer is ideal for this, which you can simply add to the substrate together with the irrigation water. For example, our primarily organic one is suitable for ornamental foliage plants such as ivy Plantura organic indoor & green plant fertilizer. The nutrients it contains support the development of strong roots and leaves. Fertilize about every two to three weeks during the summer months. In the winter months it is not necessary to fertilize the ivy, as it also grows less during this time.
Summary: Fertilize ivy
- Fertilize from March to October
- Add fertilizer to the irrigation water every two to three weeks
- Amount of fertilizer according to dosing instructions
Repot ivy
As easy to care for as the ivy may be, it also wants to be repotted from time to time. The time to repot is when the root system of the plant completely fills the flower pot. At the latest, however, you should repot the ivy every two to three years.
First, prepare the new pot for the houseplant. The new home for the ivy should be slightly larger than the old pot and have a drainage hole and a saucer or planter. Then create a drainage layer in the pot with expanded clay or pottery shards. In this way, the water can always drain off well and there is no waterlogging. High-quality potting soil, such as ours, is suitable as a substrate for the ivy Plantura organic universal soil. The peat-free soil contains all the nutrients for a successful start to growth and is made from sustainable raw materials.
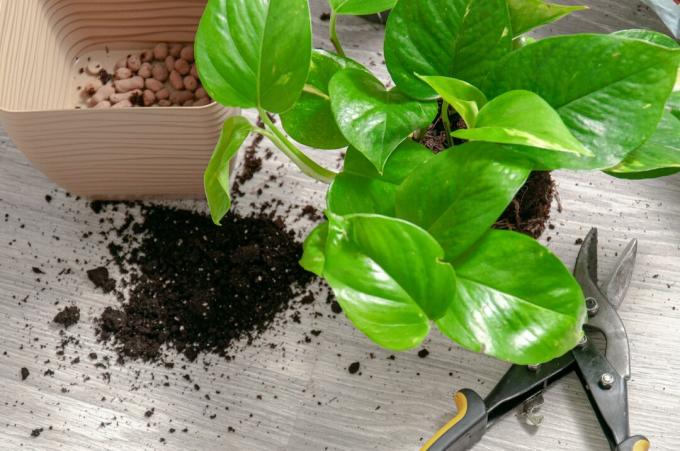
Now take your ivy out of its pot and remove the old substrate from the roots. This can be done by shaking off or washing off. Now that you have a good look at the root network, you can cut off any rotten or dried up root parts. If the root ball is very large, you can also shorten the healthy roots a little. Then the root ball is placed in the middle of the new pot and covered with soil. Finally, water the plant well.
Summary: repot ivy
- New flowerpot should be slightly larger than the old one
- create a drainage layer
- Fill the pot one-third full with soil
- Take the ivy out of the old pot
- Gently shake or rinse off the soil
- Possibly. pruning roots
- Place the ivy in the middle of the pot
- Fill up with substrate
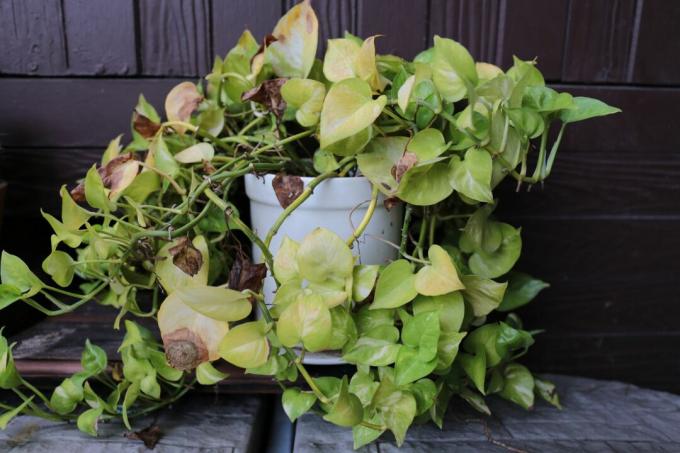
Yellow leaves in ivy: causes and countermeasures
If your ivy leaves turn yellow, there can be several reasons. Here we tell you possible causes and countermeasures.
Reasons for yellow leaves on the ivy:
- Intense light exposure: One reason for yellow leaves can be excessive exposure to light. The ivy comes from the partially shaded rain forests and does not like to stand in the blazing sun. The ivy should therefore be placed in a partially shaded location for a speedy improvement.
- Substrate too wet: A substrate that is too wet can also lead to yellowing. Remove excess water from the pot and aerate the root ball or transplant the ivy into fresh substrate and remove the rotten roots.
- Substrate too dry: When the plant dries up, its leaves turn yellow. As a first-aid measure, the entire root ball is placed in a bucket of room-temperature rainwater.
- Too dry air: Especially in winter, when the heating is on, the air in the room quickly becomes very dry. The ivy doesn't like that at all and reacts with yellow leaves. Therefore, ensure higher humidity by spraying the ivy and use lukewarm rainwater for this. You can also place a bowl of water next to the houseplant.
- nutrient deficiency: An acute nutrient deficiency can also lead to yellow leaves. The only thing that helps here is a quick supply of liquid fertilizer.
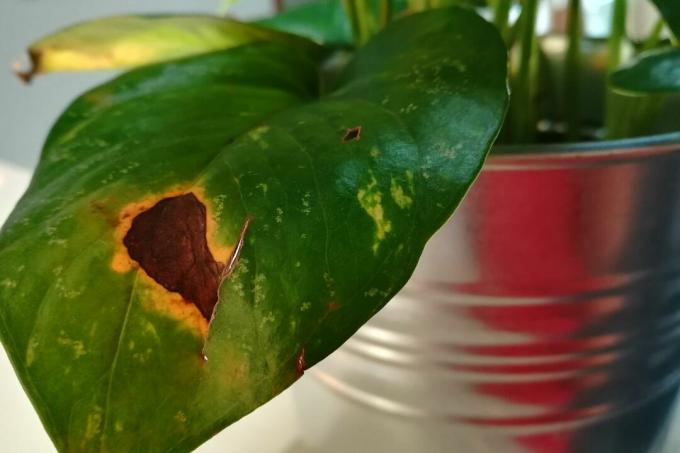
Is your ivy not growing? Many care mistakes can be the cause here. It can often help to repot the plant in such a case. It then has enough space, fresh nutrients and moist but not wet substrate. If the ivy gets brown spots on the leaves, the cause is usually too much or too little water or nutrients. Although the Efeutute hardly suffers from diseases, it can still lead to pest infestation by spider mites if the air is too dry.
tip: Too high a lime content in the water can also lead to what is known as chlorosis – i.e. yellow leaves. It is therefore best to water with lime-free water.

Summary: care for ivy
- Water only when the top layer of substrate has dried
- Remove wilted and dead leaves
- To cut back, shorten shoots by two thirds
- Prune at leaf axils for bushier growth
- Fertilize every two to three weeks between March and October
If you're all over Location, propagation and hibernation of ivy If you would like to find out more, then you can read on in our overview article on the popular climbing plant.


