table of contents
- Potting soil
- Mix soil
- quality
- Pricking earth
- Manufacturing
- Soil condition
- Outdoors
- Bucket keeping
tomatoes go through several stages of development before sowing, each of which requires a different soil in which the tomato plants can develop. This includes the cultivation soil, suitable soil for pricking and the substrate for the adult plants in the vegetable patch or pail until harvest. You can easily produce these substrates yourself and do not have to rely on expensive tomato soil from specialist shops, which would simply be too expensive for the sowing of many specimens.
Potting soil
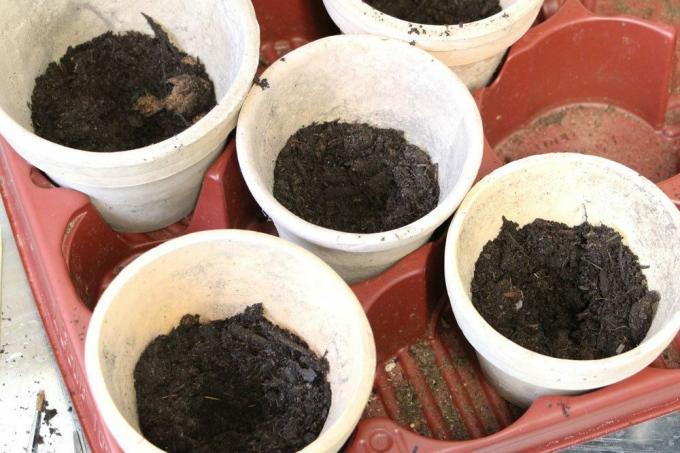
The potting soil is the first station for the future tomato plants and is used from sowing the seeds to pricking out the seedlings, which then need a different tomato soil. The potting soil differs fundamentally from the substrates for pricking and for the adult plants, as it is extremely poor in nutrients. The minerals in the soil would only clog the seedlings and burn them off. For this reason, a lean tomato soil is recommended. The following applies here: the more nutrient-poor the soil is for cultivation, the stronger the seedlings have to develop roots that seek nutrients in the soil.

The following substrates are suitable for this:
- Growing or seed soil from the trade
- Sand and pure peat in a mixing ratio of 1: 1
- White peat, natural clay and perlite (standard soil)
Note: If you cannot find pure peat or if it is too expensive to buy, you can also use coconut humus. This is very well suited as a peat-free variant and works against the drainage of the moor areas in Europe.
Mix soil
Mixing potting soil: a guide
If you do not want to use any of the substrates mentioned above, you should make the potting soil yourself. Since the basis for self-made soil for growing the tomato plants is simple garden soil, this is a cost-effective alternative to the rather expensive tomato soils available in stores. Except for the necessary sand, you can actually take all the components from your own garden or get them from friends or neighbors if you have the right connections.
You can make the potting soil yourself with the following ingredients:
- Garden soil
- Sand: Quartz sand is recommended as it does not compact the substrate
- Compost: compost made from green waste is recommended
When choosing the garden soil, you have to make sure that you do not simply use the top layer of soil. This lends itself poorly to the cultivation soil and heavily over-salted the seedlings. It is best to take garden soil from a depth of at least 15 centimeters and use this for the mixture. The agitated garden soil of a fresh molehill is an alternative. Now you can start mixing the tomato soil for cultivation.

1. Step: Before you can use the garden soil, you must first sterilize it. Sterilization frees the garden soil from the following, mostly damaging or pathogenic organisms.
- bacteria
- Insect eggs
- Viruses
- Spores of mushrooms
2. Step: Sieve the garden soil, pour it into a container that is heat-resistant, for example a casserole dish or a Roman pot, and put it in the oven. The garden soil remains there for 30 minutes at a temperature of 150 ° C in the setting for bottom and top heat. Alternatively, you can use a microwave mold and sterilize the garden soil at 800 watts within ten minutes.
3. Step: Now you can either leave the garden soil in the container or transfer it to a larger one. Depending on the amount of substrate required, it is advisable to refill it.
4. Step: Then mix the garden soil with the quartz sand and the compost in a ratio of 1: 1: 1.
5. Step: Fill the self-made tomato soil into the seed tray or container.
Tip: You can also use other sand instead of quartz sand. However, quartz sand has the best properties as it provides effective drainage due to the angular shape of the sand grains.

quality
Pay attention to quality
If you decide on a tomato soil from the trade or have to order or buy individual components, you should always pay attention to the quality. High quality tomato soil not only ensures a more productive harvest, but also for healthier plants that are not as susceptible to disease or Pests are. If possible, avoid substrates that consist mostly of peat. These have a negative effect on the tomato plants because they contain too many mineral salts and lime. This in turn leads to increased use of fertilizers and pesticides to keep the tomatoes healthy.
The following components indicate a recommendable substrate:
- Tone additions
- Perlite
- Humus, for example from bark
- organic slow release fertilizer
Pricking earth
After the tomato seedlings have grown sufficiently over the first few weeks, they must be pricked out. That means you have to put the tomato plants in individual pots that are filled with a completely different tomato soil. This is more nutrient-rich and supplies the hungry little plants for the next few weeks until they close strong young plants ripen, which are then planted in the garden or in separate containers can. If you choose purchased tomato soil, you should choose one of the following variants.
- classic vegetable soil, enriched with perlite, sand or peat in a ratio of 1: 2
- Standard soil with proportions of compost from green waste

Manufacturing
Making pricking earth: a guide
If you don't like using the above-mentioned pricking earths for your young tomatoes, you should make them yourself. As with the growing substrate, components from your own garden can be used for this, but more components are required compared to this.
For this you need:
- sterilized garden soil
- Perlite or coconut fiber
- Bark humus
- Compost from green waste
- Sand: quartz sand is also recommended here
The perlite or coconut fibers are necessary to store sufficient moisture in the pricking soil without submerging the soil. Waterlogging is not ideal for the tomatoes and can cause the young roots to rot, which are still extremely sensitive in this growth phase. Even if you have enough sand available for drainage, this can happen.
How to make your own pricking soil:
1. Step: Sieve and sterilize the garden soil (see above). Since you need less garden soil for the pricking soil, you don't even have to transfer the soil in most cases.
2. Step: Add the remaining ingredients to the garden soil and mix them together well. Make sure that there are no coarse parts or clumped parts left so that the tomato soil does not obstruct the roots of the young tomatoes. In doing so, you must observe the mixing ratio listed below.
- Garden soil: 1.5 parts
- Perlite / coconut fibers: 4 parts
- Humus: 1 part
- Sand: 1 part
- Compost 2.5 parts
3. Step: Then fill the tomato soil in the prepared pots for pricking and put the young tomatoes in them. This substrate gives the seedlings a real boost of energy, which they will need for the coming weeks in order to be able to mature into large tomato plants.

Soil condition
Outdoors
You will need to prepare your soil for the vegetable patch if it is not ideal for the tomato plants. Tomatoes need a soil that is endowed with the following properties.
- humus
- permeable
- nutritious
- fresh
- wet
- free of coarse components (parts of plants, bark, larger stones)
If you cannot provide the tomato plants with such a soil, you should cultivate it with the following components.
- nutrient-poor soils: Work in horn shavings, horn meal or garden compost
- sandy soils: loosen with betonite or zeolite
- loamy soils: Work in quartz sand or lava chippings (fine-grained)
It is also necessary to supply the soil in the garden with the necessary trace minerals in order to maintain the vitality of the nightshade plant. So that Solanum lycopersicum has sufficient minerals available, it is advisable to incorporate soil additives. A classic is primary rock flour, which is obtained from lava rock or basalt and optimizes the tomato soil. In addition, primary rock meal protects the tomatoes from pests such as snails and aphids. Furthermore, the pH value of the tomato soil has to be considered. The tomato plant thrives best in slightly acidic soils with an alkalinity between 6.5 and 7. If your tomato soil does not have these values outdoors, you should proceed as follows.
- acidic soils: Incorporate lime (rock flour, garden lime, algae lime)
- alkaline soils: Incorporate sulfur (blue grain before, Epsom salt after planting)

Bucket keeping
Keeping the tomatoes in a bucket turns out to be quite easy, since finished substrates can be used without any problems compared to the location in the vegetable patch.
The following are best suited for this:
- high quality vegetable soil
- high quality potting soil
- special tomato soil from specialist shops
You can mix these with the following ingredients to create an optimal basis for the formation of the coveted fruits. This does not apply to tomato soil from specialist shops.
- Horn shavings
- Horn meal
- mature garden compost
- organic fertilizers
- for drainage: chippings, perlite, pottery shards and gravel
The soil is simply filled into the tubs after you have selected a drainage and placed a garden fleece over it, which is air and water permeable. This prevents waterlogging, the roots can breathe and absorb sufficient nutrients from the earth.

