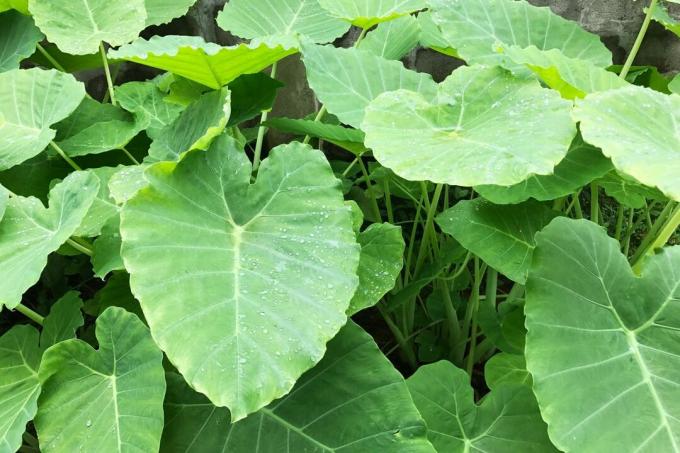
Although the elephant ear looks really impressive with its huge green leaves, the care of the tropical plant is not that difficult.

When a few principles are heeded, it thrives elephant ear (Alocasia macrorrhyzos) gorgeous. There are also tips for successful overwintering and propagation of the tropical giant arrowhead.
contents
-
Caring for the elephant ear
- Water, fertilize and cut
- Repot elephant ear
- Yellow leaves on the elephant's ear and other care mistakes
- Is the elephant ear hardy?
- Propagating elephant ear
Caring for the elephant ear
Not only because of the special leaves, but also because of its undemanding nature, the elephant's ear is a popular houseplant. If you have enough space in your home, you can enjoy the giant arrowhead for a long time. Important principles in elephant ear care are regular watering and fertilizing and ensuring high humidity.
Water, fertilize and cut
For most indoor plants, regular watering is the cornerstone for a healthy plant. You also have to water the elephant's ear - preferably so often that the soil is always evenly moist. A lot of water evaporates over the large leaf surface, which has to be absorbed again through the roots. However, it is important that no water builds up in the cachepot. Irrigation water that is still in the saucer after fifteen minutes must be removed.
The elephant ear loves high humidity: In addition to watering, a bowl with expanded clay and water should be set up for the elephant ear. The pot of the elephant ear can be placed on top of this, so that the environment for the plant always has increased humidity. Alternatively, the elephant ear can be regularly sprayed with water. Incidentally, high humidity also keeps pests such as spider mites away, which like to visit weakened plants when the air is dry.

Tip: Occasional wiping of the large leaves enables unhindered photosynthesis and ensures a beautiful shine.
From April to September, in addition to the irrigation water, nutrients are also required every two weeks. A liquid fertilizer such as ours Plantura organic indoor and green plant fertilizer reliably supplies the elephant's ear with all the important nutrients. The contained microorganisms ensure the support of the thick roots. The balanced ratio of nitrogen and potassium supports the plant in developing lush green leaves. From October to March it is sufficient to fertilize the elephant ear less often. Every six to eight weeks is sufficient with a warm hibernation of 18 °C or more. It must not be colder than 15 °C for the tropical plant in winter. If you overwinter the elephant ear in a cool place, i.e. at 15 °C, you should not fertilize at all.
You don't have to cut the elephant's ear. However, withered leaves can be removed at the base. You can also do this if the elephant ear plant gets too big for you. The disturbing leaves should be cut off at ground level if possible.
Repot elephant ear
Elephant ear plants grow relatively quickly. To encourage growth, you should repot the elephant ear annually, preferably in spring. Choose a pot about 4 cm larger in diameter and create a drainage layer. Since the giant arrowhead with the large leaves is rather difficult to handle, it is advisable to have two people repot it. Alternatively, the elephant ear can be carefully placed on its side and the old pot pulled off the root ball. Remove the old substrate - as far as possible - from the roots before you put the plant in the fresh soil. For example, ours is suitable for this Plantura organic universal soil. Due to its loose, stable structure and high humus content, it is ideal for elephant ears.
If you want the elephant ear to grow more slowly, choose the same pot size when repotting as before. Carefully trim the roots and remove some leaves with a sharp knife. This keeps the ratio of above- and below-ground parts of the plant balanced.

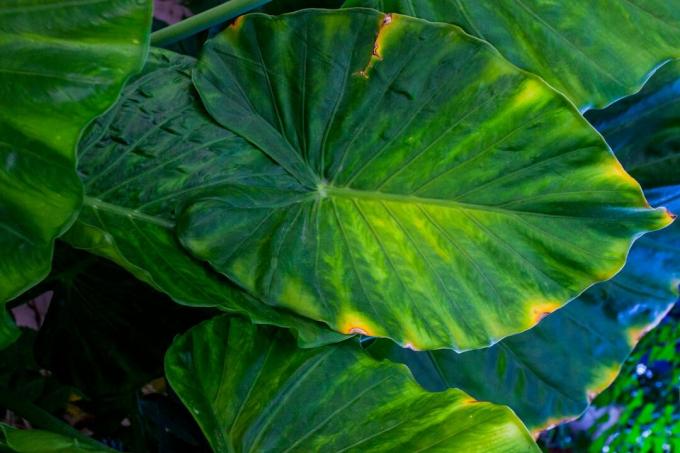
Yellow leaves on the elephant's ear and other care mistakes
It is natural for the outer leaves to occasionally turn yellow and die. As long as these are only isolated cases and a new leaf always grows in the middle, everything is fine. However, if several leaves are discolored or drooping, it is often a sign that the plant is not doing well. There are various causes that can cause the elephant ear to develop yellow leaves or floppy ears.
Possible causes of yellow leaves:
- Waterlogging and the associated root rot, which impedes water and nutrient uptake. In this case it should be repotted and a drainage layer laid.
- Lack of water due to infrequent watering. The elephant ear needs to be watered regularly.
- Nutrient deficiencies - especially nitrogen, magnesium and iron deficiencies - quickly lead to yellow chlorosis. It should be repotted and fertilized regularly.
Possible causes of brown spots:
- Direct sunlight can cause brown spots on elephant ear leaves. Place the plant in a light, semi-shaded spot.
- Waterlogging can also lead to brown leaf spots after a while.
- Pests such as spider mites tend to leave selective areas of lightening and appear above all when the air humidity is too low. They also leave white webs on the leaves. In the event of an infestation, the elephant ear should be rinsed several times with lukewarm water. In our magazine you will also find everything else you need to know about Control of spider mites.
Causes of drooping leaves:
- A lack of water can be the cause when the leaves of the elephant ear plant droop or curl up. Check if the soil is still moist. If it is too dry, it should definitely be watered more frequently.
Causes of dripping leaves:
- It is normal for the elephant ear to drip. Moisture is released through the leaves via the so-called guttation. Nevertheless, check whether the plant might be standing in water - this should be avoided at all costs.
Is the elephant ear hardy?
Since the tropical plant is used to warm temperatures all year round in its homeland, the elephant's ear is not hardy here. It should be overwintered in bright light at room temperature, but at least at 15 °C. In the cold season, the elephant ear also needs to be watered and fertilized less often.
Propagating elephant ear
The easiest way to propagate the elephant ear is to divide the rhizome of the plant when repotting. To do this, cut off parts of the rootstock with a sharp knife. The pieces should dry a little and then be stuck upright in potting soil. Ours is a suitable substrate, for example Plantura Organic Herb & Seed Soil, which not only promotes the emergence of new adventitious roots, but also contains no peat. Now you have to ensure even heat at 20 - 25 °C and high humidity. Such conditions are of course best achieved in the greenhouse. In the apartment you can, for example, use a greenhouse or put a glass bell or a transparent plastic bag over the cultivation vessel. It can take a few days to weeks for leaves to form - so patience is now required.
Do you like the large leaves of the elephant ear plant, but you just don't have enough space in your home? Then take a look at the sweetheart flower (Anthurium clarinervium) at. Its leaves are at least as beautiful, but the plant remains significantly smaller.