
Many would like to provide themselves with fresh, healthy vegetables from their own garden. We will tell you everything about the right location for a vegetable patch and accompany you step by step to your own patch.

Creating a vegetable patch is not rocket science and even beginners can do it. However, there are a few points to consider regarding location and planning. Our article will bring you a step closer to your goal of soon harvesting your home-grown vegetables.
contents
-
Creating a vegetable bed: the right location
- Create a vegetable patch on a slope
- Create a vegetable patch on the lawn
- When should you plant a vegetable patch?
- Create a plan for the vegetable patch
- Step-by-step instructions
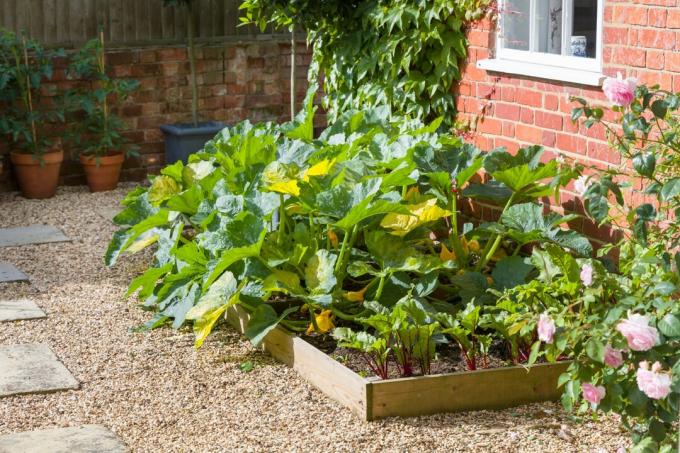
Creating a vegetable bed: the right location
When choosing the location of a new vegetable patch, you should pay particular attention to these aspects:
sun and weather exposure
Most vegetables enjoy a sunny spot, which is why they should not be planted too close to large trees or shrubs. Furthermore, a wind-protected, but not completely windless spot in the garden is particularly good. In this way, the plants are later protected from strong winds, but still benefit from the air circulation. This allows faster drying in heavy rain and thus offers fewer chances for fungal diseases to attack.
soil quality
Another important aspect is the soil in which the vegetables will later grow. Ideally, it is loose and rich in humus, contains enough nutrients and does not tend to waterlogging. A soil analysis can be carried out to determine which nutrients are already present in your soil. Like the present Determine the type of soil yourself, we explain in our article. In heavy, loamy soil, adding sand and compost will give better structure. If the soil is rather sandy, it can be optimized with some compost.
reachability
The last point that should be considered before creating the new bed is accessibility. You should consider placing the vegetable patch near the water connection, for example, to avoid long walks with heavy watering cans. The proximity to the compost heap can also be helpful so that garden waste does not have to be transported far when tending the bed.
Create a vegetable patch on a slope
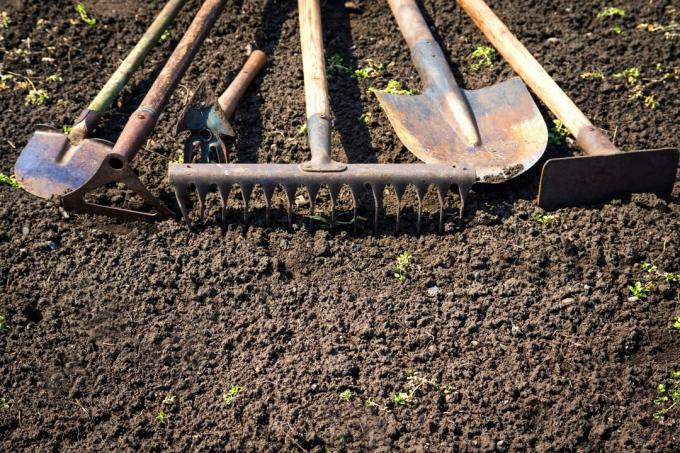
Not every garden is completely flat. That is why sometimes there is nothing left but to create the vegetable patch on a slope. Here the situation is complicated by the fact that the water drains away quickly. Thus, a small level for the bed must first be created. You can build such a terrace with wooden palisades or natural stones, for example, so that the area can be filled with earth. The construction should also withstand heavy rain. Depending on the incline of the slope, a flight of steps may be necessary to reach your new vegetable patch easily. Depending on the orientation of the slope, it is advisable to place the bed in the upper area. This is probably where the sun comes in the most. On the other hand, all the water often collects in the lower area of the slope, which means there is a risk of waterlogging.
Create a vegetable patch on the lawn
If you want to plant your vegetable patch on a lawn, there are different approaches: planting with digging or without digging, with the former requiring more work. A detailed guide to Creation of a bed without digging can be found in our corresponding article.
When creating with digging, the first step is to remove the turf to a depth of around 10 to 15 cm. This works best with a spade. You can use this to mark the dimensions of the bed. A width of about 1.20 m is recommended here so that the middle of the bed can also be reached later for maintenance and harvesting work.

trenches
Trenching is a tried and tested method of creating vegetable beds with digging. Here, the bed area is again divided into smaller, about 60 cm wide strips. From the first piece, the turf and the earth that has been excavated to the depth of a spade are put aside. The sod of the next strip is turned over, shredded and placed in the previously excavated part. This is filled up again with the excavated soil of the second sector. This cycle is repeated up to the last bed section, which is then filled with the turf and soil from the first strip.
After improving the soil, you should wait about two weeks before sowing and planting, so that the soil can settle. It may take a year or two for the sod to completely rot. During this time, particularly deep-rooted vegetables should be avoided or dug even deeper when planting.
If you have equipment such as a tiller or motor hoe at home, you can save a lot of work when creating beds. Otherwise, it might be worth renting an appropriate device for a day, for example from a horticultural association.
When should you plant a vegetable patch?
When the vegetable patch should be planted depends on the season. The best time to do this is in autumn or spring. Both have their advantages and disadvantages.
If the bed is dug up in autumn, for example, lumps of earth that are still compact on the surface are broken down by the frost into finely crumbly soil. However, the soil creatures that have reached the top through the digging are not protected from the frost either.
Tip: After digging up in the fall, sowing a frozen green manure is a good way to protect the soil from erosion, while loosening it and adding organic matter to enrich In our article about green manure in autumn you will find detailed information on this.
In the spring, the bed can be dug up after the ground frosts have ended. This protects the microorganisms and living beings in the soil over the winter and nutrients are not washed out. However, the cultivation schedule can be pushed back a little if there is a longer period of permafrost, as you have to wait and see. In addition, the work will probably be more strenuous than in autumn - the earth is very wet and heavy at this time.
Create a plan for the vegetable patch
The basis for the planting plan of the vegetable patch is the consideration of which vegetables you like to eat. In this step, it is already determined what is to be planted at all. The next thing to think about is how much of each vegetable you need in order to calculate the space required.
When planting later, attention must also be paid to the nutrient requirements of the plants. There are heavy, medium and weak consumers who need different amounts of nutrients in the soil. As a result, the so-called crop rotation can be maintained, in which a different type of vegetable is planted on the same spot every year. In a small vegetable patch, however, this method is not always useful or necessary. At the so-called mixed culture you can orientate yourself better. The point here is that different plants have certain interactions with each other and have a corresponding positive or negative effect on the other vegetables. For example should carrots (Daucus carota), the between onions (Allium cepa) are planted, pests such as the onion fly (Delia antiqua) keep away.
When planning, you should also pay attention to the cultivation periods of the various types of vegetables and coordinate them in order to use the space in the bed as sensibly as possible. A staggered harvest is also ideal for vegetables with shorter cultivation times.

Step-by-step instructions
- Choose a location: sunny, sheltered from the wind, easily accessible
- Specify bed dimensions: recommended width of 1.20 m
- Dig up the area in autumn or spring
- Amend the soil with suitable soil or compost
- Create a planting plan
- Sow and prefer plants
Which soil is suitable for creating a vegetable bed? The soil structure and nutrient content of your vegetable patch can be improved with the right soil. Our Plantura organic tomato & vegetable soil is particularly suitable for tomatoes (Solanum lycopersicum), vegetables such as zucchini (Cucurbita pepo subsp. pepo convar. giromontiina) and chili (capsicum). The organic tomato & vegetable soil consists of 100% natural raw materials and contains no peat. It ensures healthy plant growth and a rich harvest.
In addition to a vegetable bed, a small herb garden should not be missing. As you enter your own garden Create a herb bed, we explain to you in our special article.
