
The cherry laurel is one of the most popular evergreen ornamental and hedge trees. We will explain to you how you can most successfully multiply it yourself.
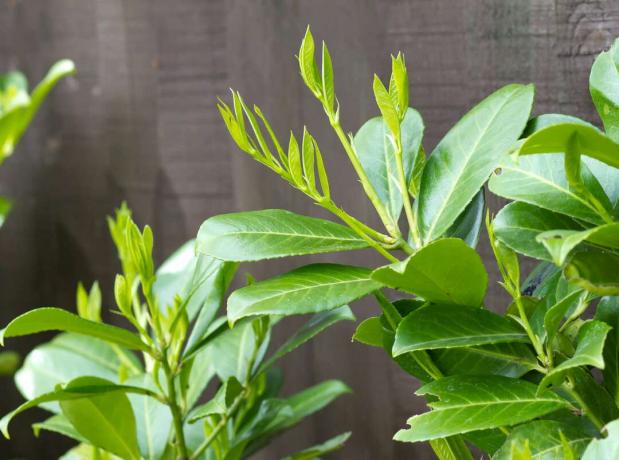
the cherry laurel (Prunus laurocerasus) is very popular with us. It is valued for its evergreen, glossy leaves and the fragrant white flowers that make it related to other trees in the genus prunus, such as the ornamental cherry, attest. As bee pasture, it makes a valuable contribution to insect protection. Further 10 bee friendly plants see this article.
contents
- Multiply cherry laurel: cuttings propagation
- Multiply cherry laurel: sowing
- Propagating cherry laurel: offshoots through cracklings
- Multiply cherry laurel: mossing or rooting in water
Vigorous types of cherry laurel also protect you and your garden from prying eyes. But what you may not have known: The cherry laurel is also extremely easy to propagate yourself. Below you will find a list of the possible methods and instructions for the different types of propagation.
Multiply cherry laurel: cuttings propagation
This type of propagation is also used in tree nurseries because it is simple, productive and, in contrast to propagation via seeds, guarantees varietal production. The first step is choosing the right mother plant. Of course, it should be healthy and sufficiently supplied with nutrients. The cuttings are cut in late summer. It is very important that the selected shoots are well mature, their tips should no longer be soft. This can only be achieved by avoiding high nitrogen doses in summer.
So between August and October you can check the firmness of the shoot tips and then cut them when they are firm. The cutting is cut off at an angle with a sharp knife and should be about 15 cm long.
Now the larger leaves are shortened to reduce water evaporation and some may be removed, leaving a leafless, bare area that can be stuck into the ground.
The shoot is placed in a 3:1 mixture of peat and sand (peat with lime to pH 6.5 - 7.5) or in special soil for cuttings, which can be bought in specialist shops. It is important that the soil for the cuttings is low in nutrients, so never use compost or even fertilizer. Our plants Organic herbal & seed soil is ideal for the propagation of cuttings. The pots used for propagation should have holes underneath so that excess water can drain off and no waterlogging occurs.
Proceed as follows when propagating cuttings:
- Fill the pots with the dry soil to the brim. Now lift it several times up to 10 cm and let it fall from this height. Repeat the process five times. The substrate will collapse in this way and later provide the cutting with the necessary contact with the ground. If necessary, top up with more soil and compact again until the fill level is satisfactory for you.
- Now insert the prepared cuttings at a slight angle and quite flat. If necessary, use a pricking stick or a thin pencil to make a hole for the cutting to enter. A few centimeters of the bare stem should be stuck in the substrate.
- If you feel that the cutting is too loose and about to fall out, press it lightly into the soil. But don't press it too hard, otherwise not enough oxygen will get to the interface and rooting will be inhibited.
- Now water the pots extensively. If you notice soil being washed away from the surface, you can sprinkle more soil loosely.

The culture vessel should now be placed in a warm place (over 20 °C) with high humidity. Cold frames or propagation boxes, for example, are suitable for this. If you have put the cuttings in pots, you can also use a transparent plastic bag and fix it to the edge of the pot with a ribbon, for example. However, you should ventilate them occasionally to avoid the colonization of fungi.
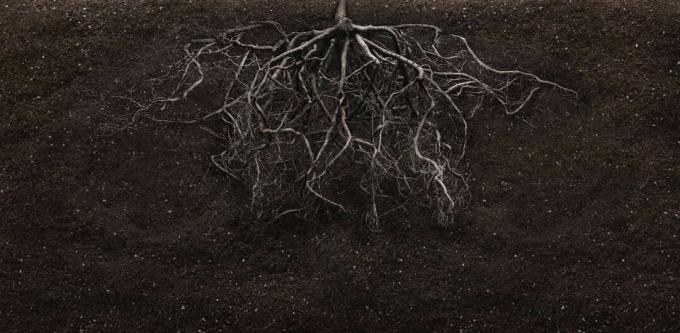
Make sure that the moisture is even - neither waterlogging should form nor should the substrate dry out. After about four weeks the cuttings are rooted. At slightly lower temperatures it can also take a little longer. Separate the rooted cuttings into pots. In the spring, the seedlings can be planted out as normal.
Propagating cherry laurel by cuttings:
- Select mature, firm shoots from healthy plants in late summer.
- Cut into 15 cm lengths, shorten the leaves, remove some at the bottom.
- Prepare culture vessels with nutrient-poor soil for cuttings.
- Insert cuttings flat and at an angle and then water.
- Set up at over 20 °C and increased humidity; Avoid dryness and waterlogging.
- It takes at least 4 weeks for the cuttings to root. Then separate into pots with normal potting soil and plant out in spring.

Multiply cherry laurel: sowing
If you already have a cherry laurel plant, you may have noticed that small new plants occasionally appear in their vicinity. This is because the cherry laurel multiplies independently through self-sowing. In theory, you can dig up these seedlings and plant them in a spot where you want a new shrub. But one thing to keep in mind: these little cherry laurel plants grew from seed. These seeds were formed through sexual pollination in the flower of your plant. And now comes the crucial point: During sexual reproduction, the genes of the parent plants are first mixed with each other and then with each other. In addition, the cherry laurel is a cross-pollinator, it cannot "pollinate itself" as some plants (for example pea, potato, bush bean) can. Inevitably, the small seedlings must be hybrids of your plant and another that is not genetically identical to it. They can therefore never have exactly the same characteristics as the mother plant, so true-to-variety propagation is not possible in this way.
Propagating cherry laurel by sowing:
- Seedlings are not identical to the mother plant
- Can be transplanted in spring or autumn

Propagating cherry laurel: offshoots through cracklings
Not everyone is necessarily familiar with this type of propagation, but it quickly produces very robust and somewhat larger young plants. The process is very straightforward: in the spring, find a healthy mother plant that will produce new shoots on its rootstock, close to the ground. This happens quite often. Heap these shoots with an airy substrate mixture, for example finely divided soil mixed with some wood shavings or peat substrate. This provides the necessary ventilation and moisture for root formation.
Repeat the mounding several times over the summer as the young shoot grows. The bottom 20 cm should eventually be covered with the substrate. If the summer is very dry, moisten it moderately if necessary.
By autumn, the shoots should have taken root in their substrate. Separate them as deeply as possible from the mother plant with a sharp knife or rose shears.
The rooted shoots are now smashed in a sheltered place over the winter. This means that they are placed in a hollow with a loose substrate and possibly protected against frost with a cover. This procedure is necessary because they would probably not survive being planted out. The following spring, when severe frosts are no longer expected, you can plant out your new cherry laurel plants as usual.
Propagating cherry laurel by cracklings:
- Choosing a healthy mother plant with parent shoots in spring
- Mound the shoots with airy substrate; repeating the mounding as the shoot grows over the summer; possibly moisten
- In autumn, separate rooted shoots as deeply as possible from the mother plant
- Tuck up shoots in a sheltered place over the winter
- Plant out in spring when severe frost is unlikely
Multiply cherry laurel: Moss off or rooting in the water
Cherry laurel can also be propagated by removing moss or by rooting in water. These two methods are less reliable than the first. However, for the sake of completeness, they are presented briefly.

With the mossing method, a healthy shoot is selected in the spring. About 15 centimeters below the tip of the shoot, a 1 cm wide strip is peeled off down to the cambium. The wound is coated with a rooting hormone. Then he is surrounded at this point with a handful of moist cuttings soil and wrapped with foil so that a kind of bag is formed that is open at the top. This can be done with plastic wrap, which will ensure the soil stays moist. The bag is completely filled with cuttings soil. If necessary, you can water from above, otherwise the opening should be closed with a ribbon. Root formation must be controlled. If there are enough roots, the shoots can be separated from the mother plant and potted. To protect them from too much water loss, they should stand in a shady place with sufficiently high humidity (cold frame, plastic bag) for the first few days. They can be planted out next spring.
Multiply cherry laurel by mossing:
- Lightly injure a shoot in spring; Coat injury with rooting hormone or “willow water”.
- Surround injury with a handful of moist moss or peat (pH 6.5-7.5), wrap with plastic wrap leaving an opening at the top
- Water if necessary, check for rooting after a few weeks
- Pot and keep shady and moist for the first few days
- Plant out next spring

A cherry laurel cutting can also be propagated in water, without any soil at all. For this purpose, a young shoot is selected in the spring. The vessel used should be darkened. It is filled with water and ideally the cutting is attached over the vessel so that it hangs freely in the water. With this method, too, it takes several weeks at around 20 °C before roots form. The cuttings are ready to be potted when the roots are a few inches long. They will be planted outdoors next spring.
Multiply cherry laurel in water:
- Cut young shoots from healthy plants in spring
- Pour into a darkened container filled with water and place at around 20 °C
- When the roots are a few centimeters long, pot them in normal potting soil
- Plant out next spring
Tip: Previously prepared "willow water" can be used for more reliable and faster root formation. It can be used as a substitute for rooting hormone as it also contains the hormones needed. For this purpose, young willow shoots are peeled, cut into pieces about two centimeters long and placed in water for 24 hours. After removing the pieces of willow, the "willow water" (also diluted) can be used for rooting.

Once your cherry laurel has rooted, the next step is to plant it out. How it works and helpful tips cherry laurel plants can be found in our special article.