Preparing seeds often requires a warm, humid climate. We show how you can easily make a mini greenhouse for the window sill yourself.
The window sill is ideal for germinating seeds and cultivating them before moving them to a larger pot or outside in the bed. But even if it is often warmer here due to light and heating air, this is often not enough for the sensitive plants. Since their roots are not yet sufficiently developed, they find it difficult to absorb the much-needed water. This can be remedied by a small "greenhouse" in which there is a warm, humid climate that supports the seedlings in growing. We will show you how you can quickly and with few resources build a mini greenhouse in which your little protégés will feel right at home.
contents
- Materials needed for a mini greenhouse
-
How to build a mini greenhouse
- Summary of building a mini greenhouse yourself:
Of course, there are a number of constructs specifically designed for germination that can be purchased. But ultimately the principle is always the same and can be accomplished with the help of the simplest tools.
Materials needed for a mini greenhouse
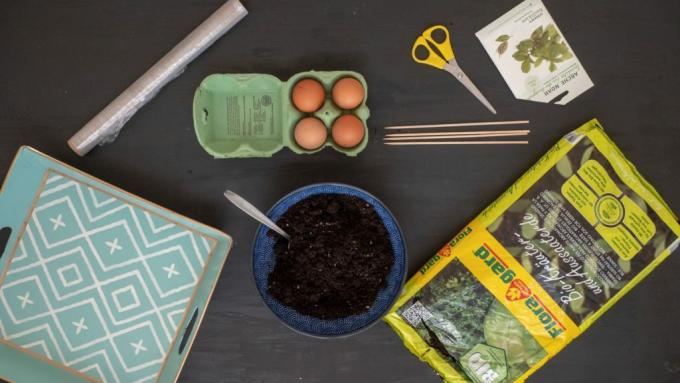
You actually have everything you need for a mini greenhouse at home. You need the following materials:
- Empty egg carton as a seed tray
- The desired seeds
- seed soil
- wooden skewers
- cling film
- scissors
- spoon
How to build a mini greenhouse
First, the seeds have to move into their new home. We use an empty egg carton for sowing, but theoretically you can also buy special seed trays. If you choose alternative sowing vessels made of newspaper, egg shells, pomegranate and Co., you can read more here. The first thing to do is cut off the lid of the egg carton, as it will only get in the way later. A longer wooden skewer (e.g. for shish kebabs) is now inserted into each corner of the box. Then the vessel can be filled with substrate. We advise you to use special seed soil for the cultivation. This provides the necessary water and air permeability at the beginning and is particularly low in nutrients to stimulate the root formation of the young plants.

Then the seeds are added. Depending on whether they are dark or light germs, they must be lightly covered with soil or can simply be sprinkled on the substrate. What the two types of germination is different and which plants have which needs, you can read here. Now it is watered for the first time to start germination.
Then it's time to attach the "roof" of the greenhouse. To do this, cut a sufficiently large piece of cling film and hold the chopsticks together at the upper end. The foil is now stretched around the tent frame that has been created in this way. The film can be easily lifted on one side at any time to provide the seedling with the water it needs. The construction should now be placed in a warm and bright place, for example the window sill is ideal. After a few weeks, the young plant should be big enough to repot. At this point the greenhouse can also be removed.

Summary of building a mini greenhouse yourself:
- Remove egg carton lid
- Attach a stick to each corner of the egg carton
- Fill the egg carton with substrate
- add seeds
- casting
- attach foil
- Position in a bright and warm place
...and receive concentrated plant knowledge and inspiration directly in your e-mail inbox every Sunday!