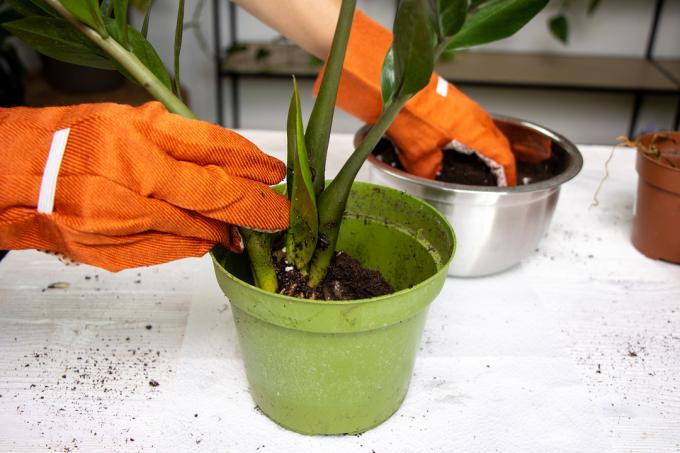
The Zamioculcas is an attractive houseplant that is easy to propagate with cuttings. In addition to leaf cuttings and division, offshoots are also a possibility. You can read here how propagation via offshoots succeeds.
In a nutshell
- Identify offshoots on the plant
- only propagate healthy mother plants
- Carefully separate the young plants from the old plants
- plant in their own pots
Table of Contents
- recognize offshoots
- Control mother plant
- The right time
- material
- instructions for propagation
- frequently asked Questions
recognize offshoots
Offshoots are smaller specimens of the mother plant, which it forms all by itself after a while. They usually consist of several leaves and a young rootstock. The young plants need at least three to four leaves to continue growing independently.

Control mother plant
It is worth only offshoots of healthy ones lucky feathers to use. Since these are genetically identical plants, these diseases can take over from the mother plant. Striking are:
- brown, black, or whitish spots
- yellow leaves
- dried leaf tips
- curled or drooping leaves
A notice:pests should be treated before planting the offshoots and removed as completely as possible.
The right time
Offshoots can be separated from the Zamioculcas at any time for propagation, but they grow best in spring or early summer. The dormant phase of the plant in winter is unsuitable because then neither leaf nor root growth takes place. It is also good to separate the offshoots when the mother plant is to be repotted anyway. It can then be planted straight away in a new pot with fresh substrate.

A notice: The better the mother plant is cared for before repotting, the more vital the young plants will be later.
material
- bucket of water
- as many pots as there are offshoots
- larger pot for the mother plant
- Drainage material, at least kitchen paper
- permeable potting soil
- knife or secateurs (clean and disinfected)
- spray bottle with water
instructions for propagation
- Carefully remove the entire plant from the old pot. For larger plants it is better to work in pairs. If the plant does not come loose on its own, tap the bottom of the pot from below or loosen the soil on the sides with a wooden stick. The whole Earth as good as possible from the lucky feather remove.
- Untangle all existing roots a little and check them. Healthy roots are light and plump. Dried roots appear darker. Remove damaged root parts.
- Carefully separate the young plants from the mother plant with a knife or secateurs and set aside. Preserve as many roots as possible. Store the prepared plants in the bucket with water. This allows the roots to absorb enough moisture.
- Prepare the new pots. Smaller pots are sufficient for the young plants, the mother plant gets a pot that is larger than the one in which it was last.
- Cover the drainage holes with drainage material or kitchen paper to prevent the substrate from falling out.
- Fill the pots loosely with the potting soil up to about halfway. The soil should be slightly moist but not wet. If it is too dry, it is moistened with the spray bottle.
- Place the young plants carefully in the ground. Try not to damage the roots. And cover well with soil.
- Fill the rest of the soil into the pot and press it down firmly, this gives the lucky feather more support. If the plant is still not secure, a wooden stick to which it is tied will help. This remains in the pot until the plant has grown.
- Repot the mother plant as well. Thorough watering is particularly important for her. For the young plants, it is sufficient to moisten the soil slightly with the spray bottle.
- Place the young plants and the mother plant in a suitable location and continue to care for them.

frequently asked Questions
Division works very well with older plants. To do this, the rootstock is separated with a sharp tool and the individual parts are planted again. Leaf cuttings are a bit more complicated, but they can be used to grow a wide variety of plants. The leaves are simply put in potting soil and rooted there.
The young lucky feathers need a warm and bright location. The temperature should be around 20 degrees. It is better to avoid too much sun exposure. In the beginning, the plant cannot absorb water through the roots as quickly as it evaporates through the leaves.
Depending on the size of the pot, the young plant does not have to be repotted until the second year. However, until then, it needs regular fertilizer.
