
When implementing your own garden design, you can easily complete numerous projects on your own. In our guide, we present 6 projects for creating your garden, including the costs.
In a nutshell
- often inexpensive to implement
- already available materials can be used
- no professional help necessary
- Material costs are often less than 1000 euros
Table of contents
- gravel path
- cost calculation
- Pallet raised bed
- cost calculation
- garden pond
- cost calculation
- Fireplace
- cost calculation
- herbal spiral
- cost calculation
- metal border
- cost calculation
- frequently asked Questions
gravel path
Gravel paths are the absolute classic of garden design and can be used for numerous concepts. It doesn't matter if you have one romantic fairytale garden have in mind or are looking for a simple connection solution between your patio and the garden shed, you have a number of options with a gravel path. We will explain to you how to plan and implement the route. We determine the material costs for each meter.

materials and utensils
- Gravel 16 – 32 mm
- Antifreeze Gravel 0 – 32
- weed fleece
- guideline
- 4 x ground nails
- wheelbarrow
- spade
- shovel
- earth pounder
- rake
This way is a simple variant that does not require edge attachment. For a small garden path with a width of 50 centimeters you need about 25 kilograms of gravel per meter. Ideally, use 15 to 20 percent more so you have enough gravel available (about 30 kilograms). You will also need about 115 kilograms of antifreeze gravel.
cost calculation
- 30 kg of gravel: 3 to 10 euros
- 100 kg of antifreeze gravel: 10 to 30 euros
- Roll of weed fleece: 10 to 50 euros (depending on version)
- 10 m guide line: 1 to 2 euros
- 4 x pegs: 1 to 4 euros
- Total material costs: 25 to 96 euros
A notice: These and all of the following cost examples serve primarily as a rough guide. The prices for building materials etc. are of course subject to regional fluctuations.
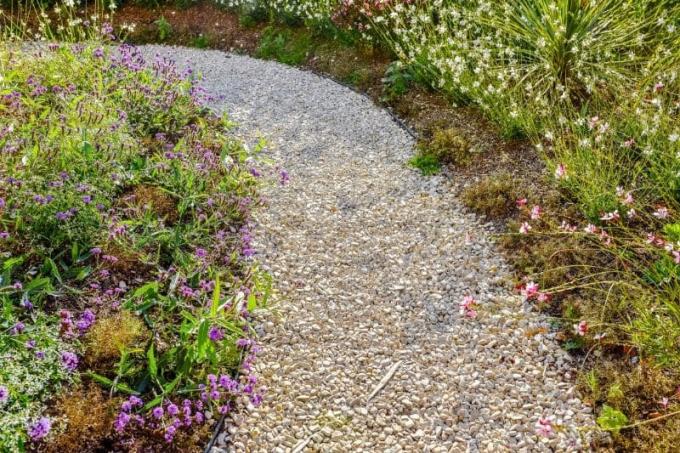
Instructions
- Begin by staking out the desired route. Use the pegs and the guideline for this. Since this example is a short path, the ground pegs will easily suffice.
- Then dig a pit 20 centimeters deep. To do this, first pierce the sides with the spade and remove the soil with the shovel. Compact the pit with the hand tamper so that the path is level at the end. Then lay the weed fleece over the whole area. It must protrude a few centimetres.
- Pour a first layer of antifreeze gravel into the pit. It has a total height of 10 centimeters and is then compacted.
- Now follows a second layer, also 10 centimeters high. Also compact. Ideally, the total height of the gravel layer is a few centimeters below the top of the pit. This will prevent much of the gravel from being removed.
- Then lay out a 5 centimeter high layer of the final gravel. This does not have to be compressed. Use it to attach the overhanging fleece. Finally, use a rake to make the path as level as possible.
A notice: Depending on your needs, you can use natural stones, metal lawn edges or palisades to limit the path. The costs for this vary greatly, depending on taste and distance.
Pallet raised bed
Raised beds are a smart solution for use on your own property. When you lay out your garden, provide extra space to growing ornamental crops, fruits and vegetables. Raised beds are particularly recommended in gardens that are only slightly suitable for cultivating vegetable and fruit plants. Another advantage is accessibility in old age or in the case of physical impairments. In these instructions we will explain how to implement a raised bed made of Euro pallets.

Due to the use of six pallets, it has the following dimensions:
- Length: 140cm
- Height: 80cm
- Depth: 120cm
materials and utensils
- 4 x Euro pallets (120 x 80 cm)
- Raised bed bubble wrap
- mole grid
- cordless screwdriver
- 16 x Self Tapping Wood Screws 10 x 80mm
- staples and staples
- pincers
- working gloves
Bubble wrap and mole grids are usually available in rolls, which makes purchasing much easier. It is also important that you ensure a level surface. If you use your terrace as a location, you don't have to worry about it in advance. If the bed is to stand on earth, you will also need stone slabs or point foundations to ensure a firm footing.
cost calculation
- 4 x Euro pallets: 25 to 50 euros
- 1 x roll of raised bed bubble wrap: 15 to 30 euros
- 1 x roll of mole mesh: 10 to 15 euros
- Wood screws: 5 to 10 euros
- Total material costs: 55 to 105 euros
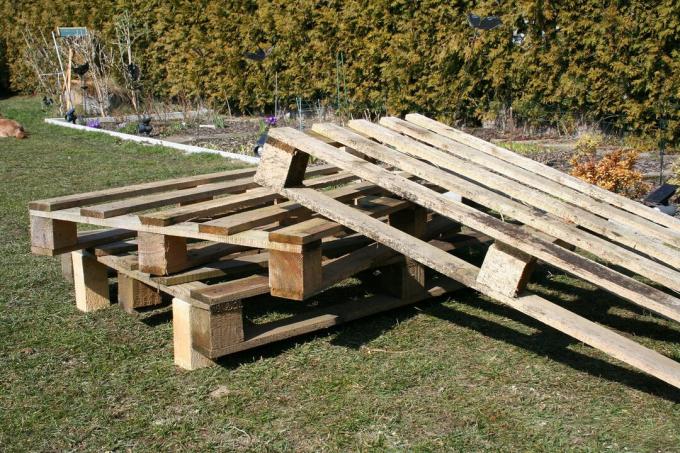
Instructions
- Place two of the pallets at right angles to each other. The palette on the short side is placed against the corner of the long side. Ideally, you should have a helping hand for this, otherwise the pallets could slip. The feet of the pallets point outwards. This allows you to use the outside of the raised bed as a hanging option for flower pots.
- The two pallets are now attached with the screws. To do this, attach the screws to the thin intermediate boards, not to the feet. Since these are self-tapping screws, pre-drilling is usually not necessary. Use two screws for each intermediate board.
- Repeat this step with the other pallets until the basic framework is in place. Now cut the mole grid to size. To do this, lay it in the bed down to the ground and cut it off. An overhang of 5 centimeters is important to attach it securely.
- The mole grid is attached with the tacker. Make sure the trellis is secured all the way to the bottom of the pallet raised bed so it offers the most protection from pests.
- Next, place the foil in the raised bed. It is important that it is loose and not stretched, otherwise it will tear quickly.
- Fasten it with the stapler as well. Be sure to fasten it at the top and bottom in order to make filling easier. Now the bed is ready.
A notice: The instructions do not include the cost of tools such as hammers or screwdrivers. The focus is specifically on the material costs.
garden pond
For many, the garden pond is one of the highlights on their own property. Fortunately, these days there are inexpensive options that are suitable for even the smallest of gardens. The design doesn't matter. You can implement the shape and equipment as you wish. The implementation itself is basically the same. If you want to keep fish, a depth of at least 120 centimeters is necessary.
Like in the cost calculation As you can see, a garden pond can easily cost several thousand euros. If the pond is larger, you can expect cost savings on the one hand, but you also have to invest more in technology. At the latest when the idea of a garden pond develops into a swimming pond project, this can quickly amount to tens of thousands. A swimming pond costs on average ~1,000 euros per m² of space Incl. Technology. This is where it can make sense to invest in finance your own home.
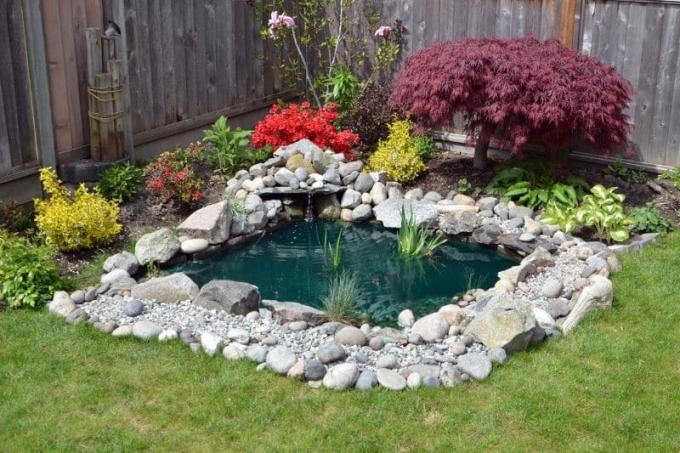
The instructions given here explain step by step how to build a garden pond with the following dimensions:
- Depth: 120cm
- Length: 400cm
- Width: 300cm
- Overhang: 60
materials and utensils
- 1 mm thick EPDM pond liner
- 300 g/m² garden fleece as protection
- pond substrate
- Natural stones to weigh down (of your choice)
- Pond pump for 4,000 l/h (ideally with filter)
- guideline
- pegs
- shovel
- spade
- wheelbarrow
- cutter knife
Furthermore, there is of course planting, decoration and pond dwellersthat you can schedule. We only list the basics for the garden pond so that you can get an idea of the cost of the pond itself. The finished design depends on your taste, which also has a significant impact on the price. The pond in our example has a volume of about seven cubic meters because we are creating several levels. For a garden pond in the style of a pool, it would be 14.4 cubic meters. That means a pump with a delivery volume of 4,000 l/h is perfectly sufficient for the natural form. Furthermore, EPDM pond liner is ideal due to its longevity and tear resistance. Around 25 m² of this is required to cover the entire pool including the overhang. The pond substrate is determined as follows:
- required layer thickness: 8 to 10 cm
- about 30 l pond substrate per m²
- 12 m² pond size = 360 l pond substrate
Ideally, add 15 percent more to this value, since the pond is laid out in stages. This corresponds to about 420 liters of pond substrate.
cost calculation
- 25 m² pond liner: 380 to 500 euros
- 25 m² garden fleece: 30 to 50 euros
- 360 l pond substrate: 150 to 200 euros
- 4,000 l/h pond pump: 35 to 100 euros
- 20 m guide line: 2 to 4 euros
- 12 x pegs: 3 to 12 euros
- Total material costs: 600 to 866 euros
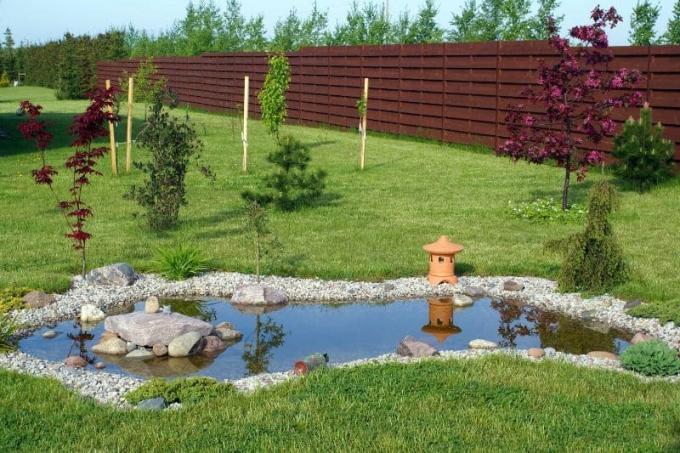
Instructions
- Mark out the garden pond with the plumb line and pegs. In the example, the pond is a natural oval. Then dig out to a depth of up to 120 centimetres. The pit is excavated at a gentle angle and with several steps.
- The levels as follows: wet zone: edge area up to 5 cm, swamp zone: up to 10 cm, shallow water zone: 10 to 40 cm, underwater zone: 40 to 120 cm
This allows you to use it different plants. - Now lay out the garden fleece. It has an overhang of 60 centimeters and is precisely adapted to the steps. Do the same with the pond liner. Just be careful not to damage them. Fix it over rocks and gravel at the edge. Ideally, the film is then no longer visible. Let your imagination run wild.
- Fill the pond with the substrate and install the water pump. It is installed at the lowest point.
- Now you can plant and decorate the pond. To finish, fill, switch on the pump and use fish, when the timing is good. Spring is a great time for this, for example.
A notice: You can even create your garden pond as a natural pool or swimming pond if you like to go swimming. While the cost of these swimming facilities is higher, it is not as prohibitive as a typical pool.
Fireplace
Romantic, warming or for grilling. Fire pits are an interesting addition to the garden for many. As a project, fireplaces can be attractively created in the garden, even at low cost. The most important thing in such a garden project is safety, so that there is no risk of fire. Best of all, you can equip the fireplace with additional elements, such as a tripod for preparing food. Our instructions explain how to build a square fire pit with a side length of one meter and what you need for it.

materials and utensils
- 38 sandstone bricks (40 x 20 x 10 cm)
- 0.1t lava mulch
- Joint chippings 1 – 3 mm
- spade
- shovel
- earth pounder
- rubber mallet
- level
- folding rule
- guideline
- 4 x ground nails
- trowel
- hand broom
In our example we use sandstone bricks, which are fireproof and very easy to lay. Of course you can like other stones basalt or porphyry to use. Lava mulch is used as a thin layer of soil on which to place your fire pit. For this purpose you will need 0.1 tons of the material. When it comes to joint chippings, a 25 kg bag is usually sufficient. The fire pit is not cemented in place as it is quite small.
cost calculation
- Bricks: 200 to 400 euros
- Lava mulch: 30 to 100 euros (depending on the version)
- Joint chippings: 5 to 15 euros
- 10 m guide line: 1 to 2 euros
- 4 x pegs: 1 to 4 euros
- Total material costs: 237 to 521 euros
Instructions
- Set the frame from 100 to 100 centimeters. Dig a pit 30 centimeters deep. The pit is ideally slightly inclined to facilitate insertion. The edge should also be removed at a depth of ten centimeters and a width of 20 centimetres.
- Now place 20 of the sandstones in the pit as a frame. They fit snugly to keep moisture out of the fireplace. The stones are aligned using the spirit level and fixed with a rubber mallet. Caution: The stones should protrude every 10 centimeters from the pit.
- Dense the edge. Then fill it with a layer of grout. Smooth out the layer with the mason's trowel. Now place the remaining 18 sandstones on the gravel bed. It serves as a frame for the fire pit. It is important that the stones are straight so that there is a final frame.
- Put more joint chippings between the frame stones. This is also the name of the stones in the pit. Sweeping up the grit is even easier with a hand brush.
- Fix the outside of the fire pit with earth. Just press them down.
- To finish, fill the lava mulch into the pit. The layer should be 5 centimeters high. The layer can be leveled with a bricklayer's trowel. The fireplace is now ready for use.
herbal spiral
Already fall at first sight herb spirals in the eye. They are a special bed shape that is particularly suitable for the cultivation of herbs and flowers that are dependent on different locations. For example, you can create the spiral in your garden in such a way that Mediterranean herbs get significantly more sun without getting their feet wet, while planting shade herbs away from the midday sun caught.

Our instructions show you how to build a herb spiral with the following dimensions:
- Diameter: 200cm
- Height: 80cm
materials and utensils
- about 300 bricks
- Drainage gravel 16 – 32 mm
- 1 ton of garden soil
- Quartz sand 0 – 4 mm
- shovel
- spade
- guideline
- peg
- rubber mallet
- wheelbarrow
Of course, suitable plants for the individual zones should not be missing. A little overview:
| zones | Herbs |
|---|---|
| dry zone | Marjoram (Origanum majorana), Rosemary (Rosmarinus officinalis), sage (Salvia officinalis), thyme (Thymus vulgaris) |
| normal zone | Coriander (Coriandrum sativum), Mint (Mentha), Chives (Allium schoenoprasum) |
| wet zone | Basil (Ocimum basilicum), wild garlic (Allium ursinum), chervil (Anthriscus cerefolium), Parsley (Petroselinum crispum) |
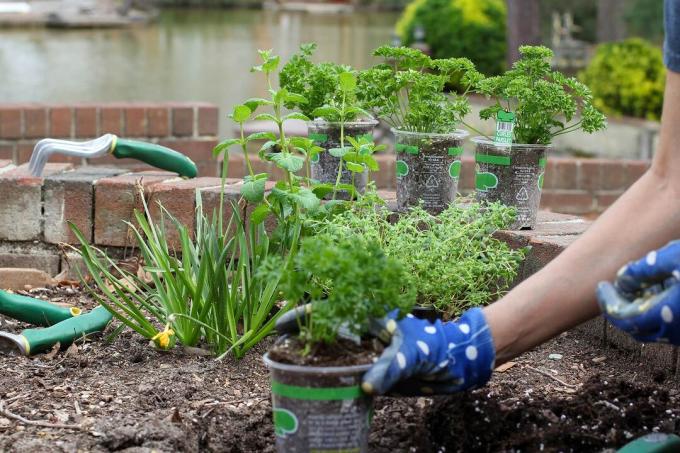
For this project you will need about 0.35 tons of crushed stone for the drainage layer and another three to four tons to fill each zone. Since the dry zone is already 80 centimeters high, a gravel layer of 60 centimeters is all that is needed. You also need about a ton of quartz sand to improve the substrate. This is an empirical value for this herb spiral size.
cost calculation
- Gravel: 300 to 400 euros
- Bricks: 300 to 400 euros
- Quartz sand: 150 to 300 euros
- Guideline: 1 to 2 euros
- Ground nail: 0.25 to 1 euro
- Total material costs: 751.25 to 1103 euros
Instructions
- At the beginning, choose the place for the spiral. Place the ground peg in the middle and measure two meters of plumb line. Now walk in a circle around the peg with the cord and draw a line with your foot or pin the line. You now have the exact diameter for the pit.
- Dig the pit as a large hole. It has a height of 10 centimeters and is then filled with gravel. Now put the first layer of stones in the form of a spiral. Make sure that there is enough planting distance between the rows. They are fixed with a rubber mallet.
- Once the foundation stones are in place, layer the remaining stones from bottom to top. The walls of the spiral are gently increased. The center of the spiral should have a final height of 80 centimeters. Be sure to stack the bricks as accurately as possible as no mortar is used.
- Now fill the entire spiral with crushed stone. The layer of gravel should always be about 10 centimeters below the respective edge of the wall. That would be 70 centimeters in the middle. In addition, always add some crushed stone to secure the gaps between the bricks.
- Finally, fill in the substrate for the respective zones. It doesn't need to be compressed.
- The herb spiral can be planted after a waiting period of at least two weeks. The Earth could drop at this point. In this case simply refill.
A notice: If desired, you can create a water zone for herbs such as watercress (Nasturtium officinale) at the beginning of the wet zone. This is a mini pond that is planted with water herbs.
metal border
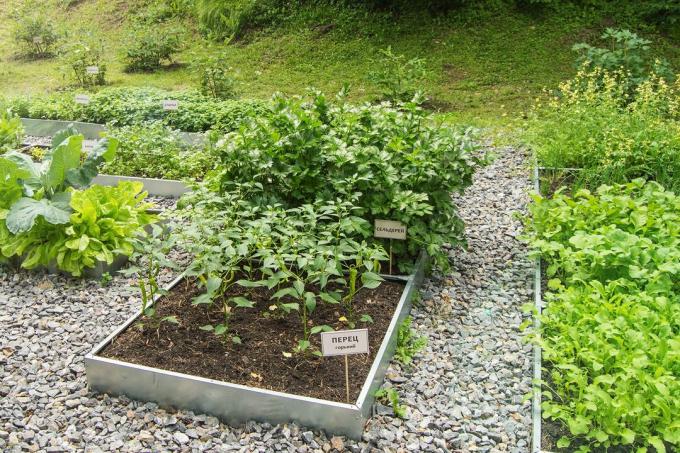
In this example we will explain how you a bed border implement from metal elements for your garden design. In our example, the bed is 200 centimeters long and 100 centimeters wide. The border is required for all sides, resulting in a total circumference of 600 centimeters. Of course, many beds can be larger or smaller, which has a corresponding effect on the costs and work involved. Fortunately, the use of the metal elements is possible without a foundation, since it is not a load-bearing demarcation.

materials and utensils
- 600 cm lawn edge
- spade
- guideline
- 4 x pegs for pegging
- angle grinder
- Metal cutting disc (115 to 230 mm diameter)
- rubber mallet
- working gloves
- safety goggles
- folding rule
- earth pounder
The lawn edging is available either in individual elements with connecting hooks or as a roll. Curvy or wavy beds can also be edged with a roller. The material should be weatherproof. For this reason, lawn edging made of the following types of steel is ideal, which also has an effect on the costs per metre:
- galvanized steel: 4 to 20 euros
- Corten steel: 10 to 30 euros
cost calculation
It should be ten to twenty centimeters high. The thickness is usually between eight and ten millimeters. The costs for the bed edging in this example are as follows (both materials in comparison):
- 6 m lawn edge (galvanized steel): 24 to 120 euros
- 6 m lawn edge (CorTen steel): 60 to 180 euros
- 10 m guide line: 1 to 2 euros
- 4 x pegs: 1 to 4 euros
- Metal cutting disc (depends heavily on the manufacturer): 1 to 20 euros
- Total material cost (galvanized steel): 27 to 146 euros
- Total material costs (Corten steel): 63 to 206 euros
Instructions
- At the beginning, mark out the desired distance for the bed edging. To do this, use the guideline and pegs that you place at the corners of the bed.
- A cut through the earth is now drawn with the spade along the guideline. The border should protrude two to three centimeters at the end. Adjust the depth accordingly.
- Cut out the metal elements. They should not exceed the respective page length.
- Now insert the lawn edge straight. It is fixed with a rubber mallet. If you use elements for plugging, connect them at the corners.
- Fix the edging with soil. The bed is straightened at this point with the tamper. The mount is now ready for use.
frequently asked Questions
Classifieds are useful for this purpose. For example, you can search private individuals for the stones you want for a herbal spiral. With luck, the costs will be significantly cheaper than buying materials from a hardware store. Often, materials for their own garden projects are even given away.
No. Luckily, you can rent equipment like electric saws or plate compactors from hardware stores, online retailers, and individuals for a fee. Hourly, daily, weekend or weekly rates are offered depending on the size of the project. You can rent hand-held circular saws for 15 to 20 euros per day, for example.
That depends on the respective project. If you want to build a pergola, depending on the state, you must not exceed certain sizes so that you can build it without a building permit. This also applies to garden ponds or fireplaces. Check in advance whether the planned project requires a permit.


