

table of contents
- Materials and tools
- 1. Determination of the location
- 2. Determining the shape and size
- 3. Mark out and dig a pit
- 4. Work in the substructure
- 5. Build a sandpit yourself
- 6. Filling the sandpit
- frequently asked Questions
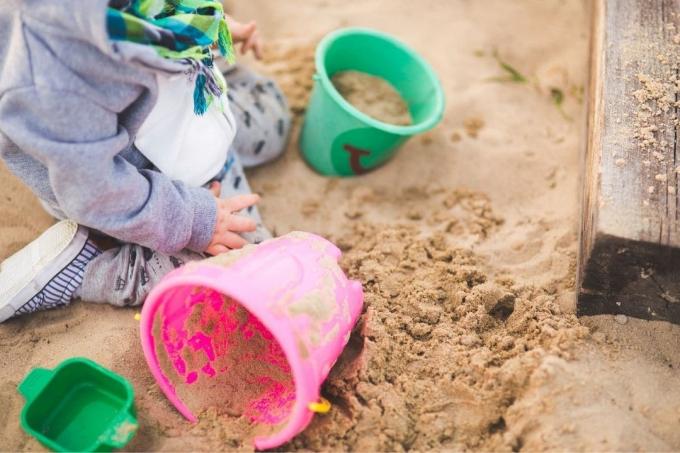
If you want to make your children really happy, you can build them a sandpit in your own garden. There they can let off steam and have a lot of fun. Building a sandpit yourself is not difficult, but it does take some time.
In a nutshell
- a sandpit in your own garden will bring joy to children
- mostly in square or rectangular shape made of untreated wood
- Lid or Covering to protect the sand from dirt and moisture should be mandatory
- should not be too small so that, in case of doubt, children who are friends can also play
Materials and tools
The sandpit is usually made of wood. To do this, you will need the following materials:
- eight wooden boards of the length you specified with a minimum thickness of two centimeters
- four wooden boards with a width of 20 centimeters and a thickness of also two centimeters
- Elbows of metal
- various countersunk screws and nails for attaching the boards
In addition, for the Substructure still required:
- 200 to 250 kilograms of fine gravel
- a fleece or a cover sheet
Both Tools A circular saw with a saw blade for wood is required as standard. In addition, there should also be:
- hammer
- small shovel
- Cordless screwdriver
- Stapler
- Tape measure
1. Determination of the location
The question of where exactly the new sandpit should be placed is not as banal as it might sound at first. Two points are particularly important:
- for security reasons, always be clearly visible from the house
- Never stand in the blazing sun at any time of the day, but always have some shade.
In addition, a sandpit must never be near places where, for example native birds or other animals nest. The background noise that cheerful playing children make would inevitably drive the animals away. If you want to build a sandpit yourself, you should therefore think about the right location in the garden in advance. It is the first step so that everyone involved is permanently happy with the new venue.
2. Determining the shape and size
The normal shape of a sandpit is a rectangle. Often this rectangle is even a square, as this shape is usually easier to realize. In addition, the size before construction begins is a very important point. The usual minimum size for sandboxes are side lengths of 1.5 x 1.5 meters. This area is perfectly adequate for one or two children. However, a sandpit is always a place of communication, where children meet and exchange ideas while they play with each other. Therefore, the area of the sandpit should not be too tight. In addition, it must be taken into account that children also get bigger and therefore need more space from a certain point onwards.

Tip: The size of the sandpit should be rather generous. A minimum size of 2 x 2 meters is recommended.
In addition to the length of the sides, the depth of the sandpit is also important. A depth of around 30 centimeters is common and advisable here. However, the full 30 cm should not be filled with sand, but only about 20 cm of it. We therefore need a good 1000 kg of sand for our sandpit. This usually corresponds to around 45 bags of 25 kg each.
3. Mark out and dig a pit
Once the location and size have been clarified, the actual implementation can finally begin. To do this, the side lengths must first be staked out. To do this you need
- Folding rule
- four wooden pegs
- line
- possibly a spirit level
- hammer
The four wooden pegs form the corners of the later sandpit. They must therefore be hammered into the ground in the right places. The lengths of the sides between the pegs are precisely measured in order to determine the distances from the outset. Then she connects the pegs with the cord.
Tip: A spirit level is helpful to get the straight line of the cords as possible. The position of the pegs may also have to be corrected for this.

The cord is wrapped around the respective peg. Once that is done, you have a rectangle in front of you and you can start digging the pit for the sandpit. It is best to use a sharp-edged spade for this. With this spade, part of the earth is first cut off along the cord in the inner area of the rectangle. It makes sense to use the spade to make a cut that is as straight as possible. First you create a parted frame, then you start the actual excavation. If the frame is correctly cut, the hole can be dug with a shovel and possibly with a rake.
Tip: When digging out the pit, check the maximum depth of 30 cm from time to time.
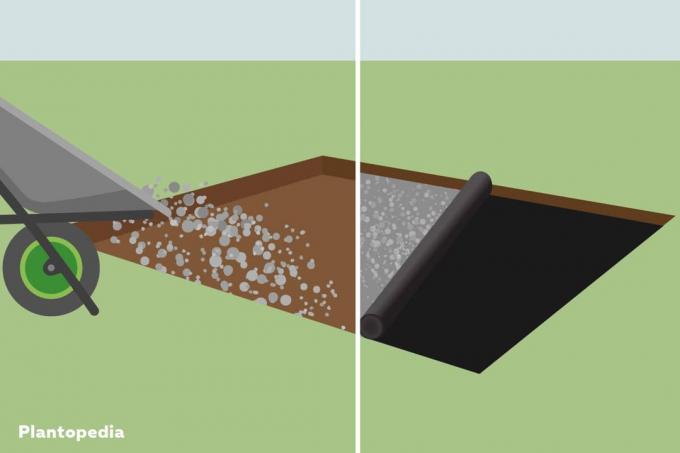
4. Work in the substructure
A proper substructure is required at the bottom of the pit so that the rainwater in particular can flow well out of the sandpit. A 2 cm thick layer of gravel, over which you put a fleece, is ideal. The fleece also prevents that at some point weed sprouts in the sandpit.
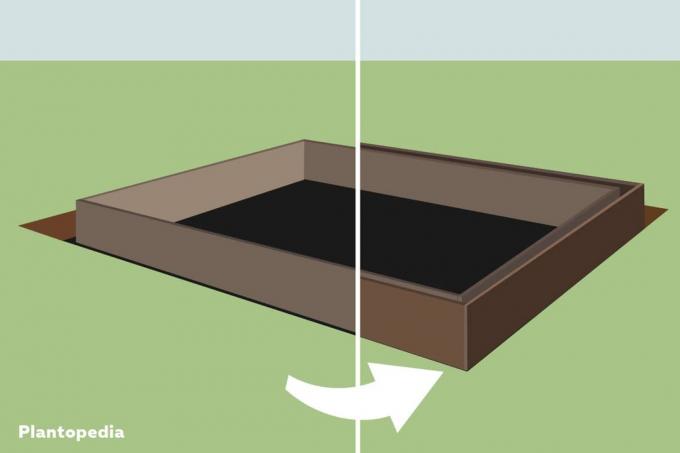
5. Build a sandpit yourself
Now it's time to assemble the actual sandpit. The sandpit is known to be built from wooden boards. To do this, cut four boards according to the side lengths you specified. The easiest way to do this is with an electric wood saw or a circular saw. The boards should be about the depth of the sandpit. Place the four boards on the matching sides in the excavated pit and screw them together at the edges so that they form a stable rectangle overall.
Tip: The fleece previously placed on the gravel base can now be attached to the finished frame. To do this, it is simply attached to the wood with a staple gun. For this, the fleece or the film used should be around five centimeters larger than the base area on each side.
The internal construction would then be completed. Now it comes to the outer construction. In principle, it is built like the internal structure. The frame produced in this way is then placed outside the internal structure. The distances to the inner part must be exactly right so that it does not get stuck. There should be a gap of around 20 centimeters between the boards of the inner and outer construction. You then close this gap by attaching the seat boards.
Tip: When screwing the seat boards, you must make sure that the screws actually land in the wood and not just next to it.
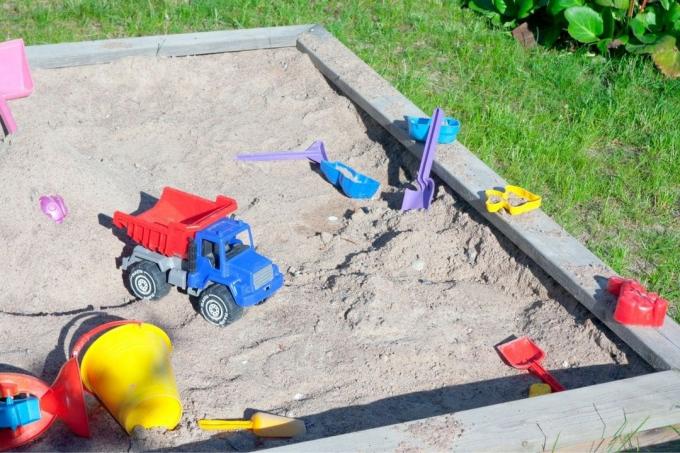
6. Filling the sandpit
A sandpit needs sand, of course. It is best to fill it with a special sandpit sand that is now available in many hardware stores. Alternatively, conventional building sand can also be used. Humus is absolutely not recommended as it can lead to a weed problem. After all, our sandpit requires an amount of around one tonne of sand. It also makes sense if you always have a certain amount of sand in stock to make up for any losses that inevitably arise when the children play.
frequently asked Questions
Larch or Douglas fir are ideal if you want to build a sandpit yourself. In principle, inexpensive spruce wood is also suitable, but it is not as weather-resistant. In any case, you should choose a type of wood that is untreated and planed smooth so that the children cannot injure themselves on a protruding slate while playing.
The easiest way to do this is with so-called metal angles, which are screwed onto the respective sides. The best way to do this is to use weather-resistant wood screws that you insert with a cordless screwdriver.
It is helpful if you use a breathable film instead of the fleece described above. It also protects against weeds relatively reliably. By the way: you should not fight animals or weeds with poisons. They definitely have no place in a sandpit.
Not necessarily. Depending on the type of wood, however, it may be advisable to apply a glaze that protects the wood from moisture. The glaze should then be absolutely non-toxic and safe for children.
Either with a waterproof film from the hardware store or with a cover made of boards, which you can also build yourself and attach to the side walls with hinges.