
Table of contents
- Preparation
- swimmer
- lime deposits
- toilet inlet valve
If you are struggling with not enough water in your toilet cistern, this article will help you. Solution approaches are offered for the individual causes in order to rectify the problem.
Preparation
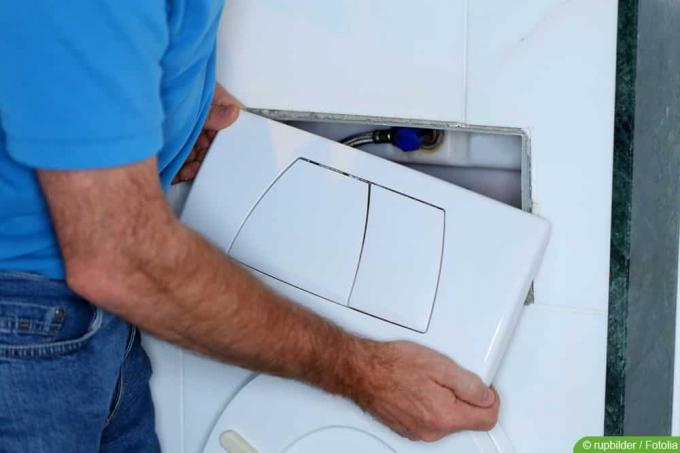
Before you can deal with the individual causes of the low water level in the toilet cistern, you must first open the cistern. The cistern is closed with a lid that can be opened easily or with a little force, depending on the age and condition of the toilet. Some models have screws that need to be loosened first. After opening, lift the operating arm up and close the water inlet valve so that no more water can run into the box. A concealed cistern is much more difficult to open because it sits directly in the wall. In order to reach this, the cover must first be removed. In this case, it is advisable to rely on the help of a professional who, at the same time, will be able to determine what the real problem is.
Tip:
If the tank lid is locked and you don't have enough strength, just ask family and friends for help.
swimmer
Float problems are the number one cause of low water level in the rinse tank. The float or float valve regulates the water level and allows too little water to flow into the cistern when it is no longer working properly. There are therefore some points that you should check in relation to the float:
- calcifications
- The float's guidance is stuck
- Sponge soaks up (older toilets only)
There is a solution to all these problems. In the event of calcification, close the toilet inlet valve and dismantle the float. Clean it with a descaler and then reinstall it. An older model with sponges inside is replaced by new variants with styrofoam or plastic. These cannot become soaked and can therefore be used for much longer. If the float is stuck, check the reason and eliminate it. In many cases it is material fatigue, since floats are usually made of plastic and can bend. If so, replace it.
Tip:
Sometimes it happens that the float is not directly damaged, but only the seals inside the component. Check the seals for scale, dirt and damage and replace if necessary.
lime deposits
If you notice numerous limescale deposits in the cistern, these may be the reason why there is significantly less water. In this case, it is advisable to completely descale the cistern so that the water can flow freely. Home remedies can be used for descaling:
- Citric acid: 2 tsp to 1 liter of water
- vinegar essence: 1 part to 2 parts water
Prepare as much descaling agent as will fit in your toilet tank. The inlet valve should remain closed and the actuator arm held up during the two hour exposure time. After the exposure time, open the valve and lower your arm again. If you're lucky, the deposits will be loosened and will be removed with the next rinse. Check whether enough water is now fed into the cistern.
toilet inlet valve
More rarely, the cause of the low water inlet is problems with the inlet valve. The cistern receives water via the inlet valve, which is used for flushing. In older toilets that have not been used for a long time, the valve is often calcified and must be replaced. Other causes of possible damage or even blockage are not excluded If there is a suspicion of a If there is a problem with the inlet valve, contact a professional as the cistern will have to be dismantled to change it must.

Tip:
In addition to the inlet, the corner valve that is also located in the concealed cistern can be damaged or calcified. If that is the case, you should also seek the help of a professional.
 Home editorial office
Learn more about wastewater / sewage treatment plants
Washing machine drain adapter: which one fits?
Connecting a washing machine is usually easy. However, due to structural features or if the device is to be located at a different location, an extension or an adapter may be required. Here you can find out what to look out for.
Soakaway packing – Lay drainage correctly in 6 steps
Large amounts of water are often a significant problem for house and garden owners. The garden becomes waterlogged, the lawn and plants wither. Damp and moldy walls even endanger your own health. Homeowners can find out here how professionally installed drainage can help.

Drainage gravel as splash protection| Which drainage gravel grain is there?
Drainage gravel is ideal as a splash guard for house walls, but also to keep the basement dry and to create inexpensive paths. But what should be considered when choosing? Grit, prices and tips can be found here.
Laying and connecting KG pipes: instructions | sewage pipe in the ground
If you want to lay sewage pipes yourself, you don't need a lot of experience - but the right instructions. Because although the introduction of the sewage pipe is comparatively easy, a number of factors and requirements must be taken into account.

Build a septic tank yourself What else is allowed?
Building a septic tank to collect rainwater and waste water yourself can save money and is a sensible solution when there is no connection to the sewage system. But what is allowed, what is forbidden and what needs to be considered when mooring?

Revision shaft for waste water - which material is suitable?
When a house is built, the question of the sewage system also arises here. Depending on the municipality, an inspection shaft is also required here. But as a layman, the question often arises as to which material is better suited for such a shaft, concrete or plastic.
