
Table of contents
- The best kiwi varieties for the garden
- Female Kiwi Varieties
- Male kiwi varieties
- Self-pollinating kiwi varieties
- location claims
- soil condition
- Plant
- Soil preparation and planting
- Pour
- Fertilize
- hibernate
- Cut
- multiply
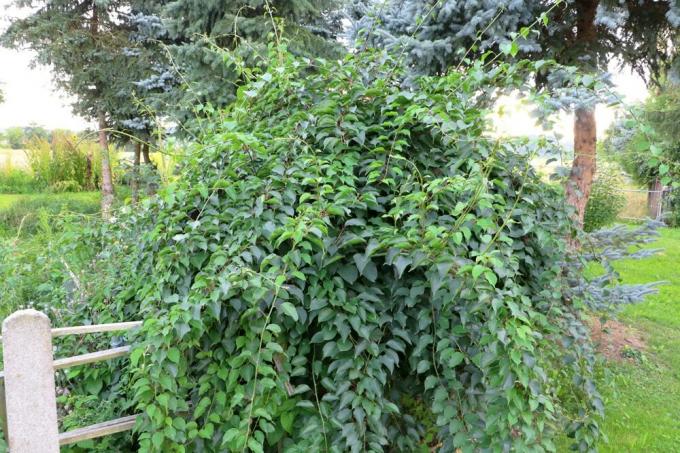
The cultivation of kiwis is very demanding and comparable to the cultivation of grapes. These fast-growing, liana-like, perennial plants need stable trellis and climbing aids. Cultivation and pruning of their meter-long tendrils are existential for the kiwi and the main part of care. They are a prerequisite for a high fruit yield. Now it's just a matter of choosing the right variety.
The best kiwi varieties for the garden
There are different kiwi varieties, which are divided into "female", "male" and "self-pollinating" varieties:
Female Kiwi Varieties
Actinidia chinensis 'Hayward'
This kiwi variety produces large, approx. fruit weighing 100 g. The skin is greenish-brown, the flesh is juicy with a slightly sour taste. It flowers a little later and can be harvested from November. The male variety 'Atlas' is suitable as a pollinator.
Actinidia chinensis Starella
'Starella' is a fast-growing, high-yielding and particularly frost-hardy variety with 5 - 6 cm large, aromatic fruits. Ripening time is around the end of October. It also requires a male pollinator variety.
Actinidia arguta 'Ken's Red'
An early-ripening, high-yielding variety with striking purple-colored 3-4 cm fruits and purple-colored flesh. The 'Nostino' variety is suitable as a pollinator.
Mini Kiwi Weiki (Actinidia arguta Weiki)
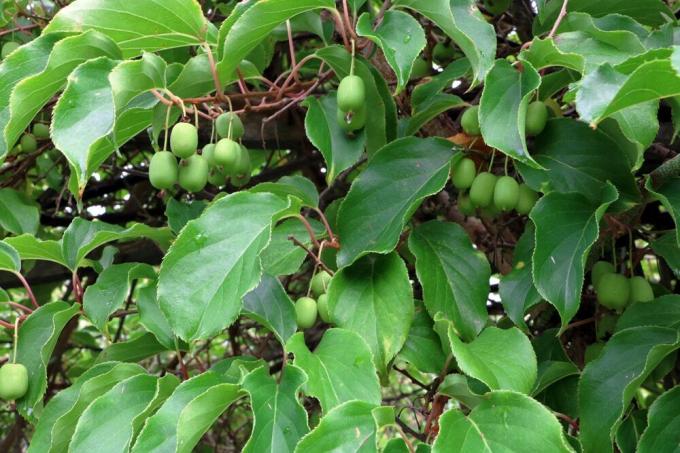
The mini kiwi Weiki impresses with a very good winter hardiness and from the 3. Standing year with walnut-sized, smooth-skinned fruits. They have a sweet, aromatic taste. Harvest time is from September to October. There are male and female plants of this variety.

Male kiwi varieties
Actinidia Arguta Nostino
This variety does not produce fruit itself, but is a good pollinator for all smooth-skinned Arguta varieties. In principle, a single male specimen is sufficient as a pollinator for up to ten female plants.
Actinidia chinensis Matua
'Matua' is up to 100 cm high, universally applicable pollinator variety for all Actinidia chinensis varieties. It flowers early and is therefore particularly good at pollinating early flowering varieties.
Actinidia chinensis 'Atlas'
This male plant, up to 100 cm high, does not bear fruit itself either. It can be used very well as a pollinator variety for the female 'Hayward'.
Self-pollinating kiwi varieties
Actinidia chinensis 'Solissimo' 'Renact'
Like all self-fertile varieties, this one is significantly smaller than others with a growth height of up to 100 cm. The fruits are a bit smaller but with an excellent spicy taste. Harvest is from late October to early November.
Actinidia chinensis 'Jennny'
The fruits of this variety are large and bulbous to cylindrical with initially firm and refreshingly sweet flesh. They are ripe for picking from the end of October to mid-November. High yields can be expected after 5 - 6 years at the earliest.
Actinidia arguta 'Issai'
The green, smooth-skinned fruits of this variety are the size of a gooseberry and are very sweet. They are really productive after about 2 - 3 years at the earliest.
Tip:
Self-pollinating varieties usually do not need a pollinator variety. However, an additional variety could significantly increase their fruit yield.
location claims

The right location is of central importance for the fruit ripening of the kiwi. They thrive best in warm, bright and wind-protected locations. The fruit, leaves and young shoots of the kiwi are very sensitive to wind. The tender young shoots required for fruiting can easily break off in strong winds. Planting with fast-growing wild trees such as dogwood, whitebeams, hawthorn or black elder can offer protection. A proximity to trees with high water requirements should be avoided, they would be a direct competitor for the kiwi.
soil condition
Kiwi plants can climb up to 500 cm in height and 800 cm in width. For this they need a loose, nutrient-rich, humus-rich and lime-poor soil. It should contain at least one-third compost. Soils with a pH value in the slightly acidic range are particularly suitable, while calcareous soils are not tolerated. They can be improved by mixing in some rhododendron soil or peat. If the soil is poor, adding compost is a good idea. Light and very sandy soils as well as heavy clay soils are completely unsuitable.
Plant
The best planting time is from mid-May to August, when there is no longer any risk of late frost. At least one male and one female variety must always be planted, with one male being sufficient for several females. An extra male plant can also increase yields of self-pollinating ones.
Soil preparation and planting
Planting should be preceded by good soil preparation, ideally with green manure with deep-rooted green manure plants such as alfalfa, broad beans, oilseed radish or manure lupine. In addition, stubborn weeds such as couch grass, bindweed or thistles should be carefully removed. Now it's time to plant.
- First water the root ball thoroughly
- During which an approx. Dig a 50 x 50 cm planting hole
- Loosen the soil in the planting hole well
- Mix excavation with compost or horn shavings
- Depending on the variety, keep planting distances of 150 - 300 cm
- Plant as deep as it was in the pot before
- Fill up with excavated earth and tamp down
- The last step is thorough watering
Kiwis are strong climbing plants that cannot do without an appropriate trellis. This should be very stable to support the weight when the fruit is full. Ideally, the respective scaffolding should already be attached during planting.
Tip:
Horn shavings and compost should never be placed directly in the planting hole. Since the salt content of these fertilizers is difficult to assess, in the worst case the roots could be burned.
Pour
For fruit development and due to the high leaf mass, the water requirement of these plants is very high. Consequently, they need to be watered regularly in the summer, especially from July to September. Otherwise they could stop growing the fruit and the fruit itself would lose its aroma. It is best to water deeply once a week so that the soil is well moistened to a depth of 30-40 cm. Due to the sensitivity of the kiwi to lime, it should only be watered with rainwater.

Fertilize
In the first two years after planting, you can usually do without fertilization, provided the soil is humic and rich in nutrients and the pH value is between 4.5 and 5.5. You can start fertilizing from the third year.
- Fertilize three times a year if possible
- Organic and mineral fertilizers are suitable
- The first time in early spring when the leaves sprout
- Another time to flower in summer
- The last time for fruiting in August
- Nutrient requirements are particularly high when fruit begins to form
- From the third year, an additional dose of horn shavings or well-rotted manure is advisable
Tip:
When using mineral fertilizers, you should always dose carefully, because over-fertilization can occur very quickly.
hibernate
While some varieties are very hardy, others only tolerate frost to a limited extent. The varieties of Actinidia arguta have the best winter hardiness. Varieties of Actinidia chinensis, on the other hand, are limited hardy. Here the root area should be protected with leaves, brushwood or a layer of mulch. What both types or whose new shoots react very sensitively are late frosts.
Specimens in the bucket are particularly sensitive. Therefore, you should choose hardy and slow-growing varieties for keeping in tubs. Young plants should generally overwinter in a frost-free area. In the case of older plants, the root area in particular must be protected, for example by wrapping the bucket with fleece, jute or bubble wrap and filling the cavities inside with leaves.
Cut
plant cutting
Due to its twining and creeping growth, the kiwi is grown on espaliers, which should have a north-south orientation if possible. In order to set up the plant accordingly to train, the strongest shoot is selected in the year of planting and shortened to 2-3 eyes in order to promote lateral branching. All other shoots are removed. The remaining main shoot is tied up again and again in summer. It is important to ensure that it does not wind around the scaffolding. Possible side shoots are shortened to 6 – 8 leaves, but remain as a trunk reinforcement in order to promote the thickening of the main shoot.
Education cut in the 2nd Year
- Remove the side shoots on the trunk in February/March
- Shorten the main stem
- Use the shoots emerging from the two upper buds for scaffolding
- To do this, tie these shoots horizontally to the frame on both sides
- Once they have reached the desired length, pinch off the shoots
- Tie side shoots from the same year to lower lateral trellis bars
- These shoots about after the 8th – 10. shorten the sheet
- Completely remove any shoots coming out of the base or trunk
Tip:
It should not be blended later than mid-March, because then the sap will begin to flow. A significant amount of juice would escape from the cut wounds, which even wound sealants cannot stop so easily.
Education and maintenance section in the 3rd and 4. Year
In February/March of the 3rd Year of standing, after the last severe frost, existing side shoots are cut back to 3 - 5 buds. On the other hand, side shoots that come out of the leading branches are tied to lower-lying side struts of the framework and again up to the 8th branch. or 10 sheet shortened. In summer, exactly these shoots have to be cut back to 6 - 8 leaves after an outer fruit.
In February/March of the 4th Year of standing, the fruit shoots are shortened to 2 eyes after the last fruit set. New fruit shoots develop from these two eyes. All others are shortened to 3 - 5 eyes. All resulting new shoots are tied to the trellis and cut back to 6 - 8 leaves after an outer fruit. Strongly branched fruit branches should be completely removed after 3 - 4 years and replaced with new young shoots.
multiply
sowing
Seeds for sowing can be bought or taken from fully ripe fruits. You also need a suitable seed container and potting soil. In the case of seeds from fresh fruit, the outer, slimy layer must first be removed. With a little kitchen paper or water, this works quite well. If this layer is not removed, it could hinder the germination process.
- First fill the seed pot with potting soil
- Distribute seeds evenly on the substrate
- Do not cover with soil, light germinator
- Moisten the substrate and keep it evenly moist until germination
- Cover with translucent film or glass
- Ventilate the foil regularly
- Place the culture vessel in a warm, bright place out of direct sunlight
- The first seedlings appear after 2 - 3 weeks
- From a size of 3 - 5 cm separate into small pots

If possible, they should also be isolated in potting soil, because this promotes root growth in particular and less the formation of leaf mass. From a size of approx. 100 cm, the kiwi plants can be transplanted into the garden. However, it can take ten or more years for plants grown from seed to flower for the first time.
cuttings
Cuttings for propagation are best cut in early spring before new growth. They should be 10-15 cm long and about the thickness of a pencil. All leaves are removed except for the top ones and the cuttings are placed in small pots with poor potting soil or a sand-peat mixture. Then you moisten the substrate and place the pots in a shady and wind-protected place. If new shoots appear on the cuttings, rooting was successful. As soon as the pots are well rooted, the young seedlings can be planted out in their final location.
lowering
Another and probably the easiest way to multiply the kiwi is via sinkers. To do this, choose a lower, young, easily flexible shoot. Then you carefully scratch the bark in one place, lay this part of the shoot flat on the ground and cover it with soil so that only the tip of the shoot looks out of the ground. Then the soil is moistened. To make sure the sinker stays in the ground, fix it with wires or a small rock. Once the sinker has formed roots, it can be separated from the mother plant and planted separately.
 garden editorial
 I write about everything that interests me in my garden.
Learn more about shrubs

Cherry laurel has yellow / brown leaves: what to do?
Cherry laurel is one of the hardy garden plants in the garden. Nevertheless, it can happen that the leaves of the cherry laurel turn yellow or brown. The causes are manifold. Since some can kill the cherry laurel, you should investigate.

12 native evergreen shrubs & woody plants
Dreary, bare trees and bushes in winter? It doesn't have to be. Even in the European climatic conditions, native, evergreen trees thrive splendidly. The variety of species even enables the gardener to adapt his privacy hedge exactly to his garden design. This guide presents the most beautiful native and evergreen shrubs and woody plants.

Curb Vinegar | Does bucket or root barrier help?
Vinegar trees like to spread in the garden and sometimes even drive other plants away. However, this can be avoided by curbing the growth of the trees. You can find out which methods are best suited for this here!

Rhododendron has dried up: how to save it | Rododendron
Even if the rhododendron is withered and no longer sprout, it does not have to be dead. The plant can look completely dried up above ground, but there is often still life in the roots. It is therefore worth taking appropriate measures to save the flowering shrub.

Winter jasmine, Jasminum nudiflorum | Care, propagation & pruning
The winter jasmine is a relatively frugal and robust plant that can cope with many different site conditions. The plant enchants with bright yellow flowers in winter and tolerates deep sub-zero temperatures very well. It should be pruned regularly and is easy to propagate.

Ball Tree: Care from A – Z | These 9 varieties are suitable for ball trees
Ball trees adorn many a garden, front yard and entrance area. They require little space. Their trunk thickens with age, but its height remains the same. The spherical crown is easy to trim. Nevertheless, they offer everything that makes a tree.


