


Table of contents
- Choosing the right fabric
- Large area application
- Lay tiles on wood
- Stabilize and rehabilitate the subsoil
- Plaster mesh for ceilings and walls
- Use with insulation
- plastering over cracks
- Plastering of wooden beams
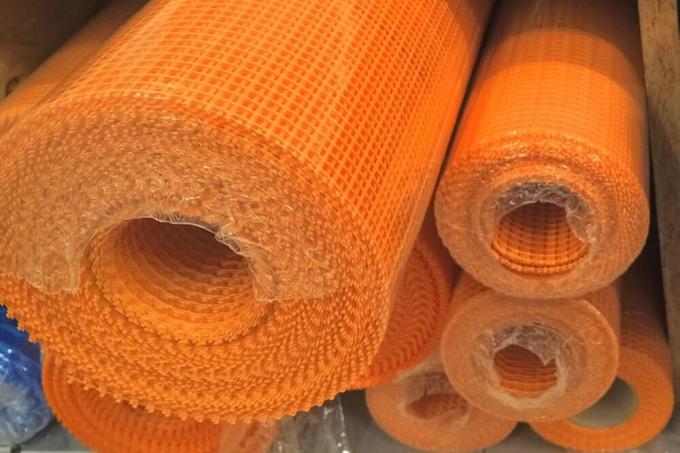
Plaster mesh consists of different materials. These include flax, jute, plastic or fiberglass. It is also divided according to mesh size and basis weight. Fabric is used during renovation to cover cracks and plaster over them. It also prevents further damage to the plaster or connects substrates that exhibit different expansion behavior. Depending on the type of use, reinforcement fabric can be worked into the plaster in different ways.
Choosing the right fabric
In order for plaster fabric to serve its purpose, it must have the right properties for the project and be installed according to the instructions. The fabric used should be resistant to alkalis and acids, and it must not swell in damp plaster. The mesh size depends on the purpose, the sizes 4 x 4 mm and 10 x 10 mm are often used. If materials are to be plastered, which have surfaces on which the plaster does not adhere well, plaster fabric must be used over a large area. This happens, for example, on wooden floors or with styrofoam insulation.
Even small areas can be reinforced, repaired and protected with the glass fiber fabric. These include cracks or holes in the substrate or edges and corners around window openings and doors. Reinforcement fabric is used both indoors and on the house facade.
Tip:
Plaster fabric is easy to cut to size with scissors.
Uses:
- Laying tiles on wood
- stabilization of substrates
- renovations
- Plastering of wooden beams
- Repairing holes and cracks
- prevent damage
- in the thermal insulation composite system of the house facade
Large area application
Reinforcement mesh is used extensively in walls, ceilings and floors in interior design. It stabilizes ceilings and walls, prevents tension in the plaster and prepares floors for tiling.
Lay tiles on wood
Wooden floors are only suitable for tiling after thorough preparation. Wood works and can cause cracks in the tiles. Therefore fiberglass fabric is laid on the wooden floor.
tools:
- deep ground
- Glass fiber fabric in the required quantity
- staple gun
- balancing mass
- squeegee
Price:
- consumables approx. 12 euros/m²
- tool approx. 20-50 euros
expenditure of time:
- Working time (depending on the size of the area) about 2.5 hours
- Drying time 24 hours
Loose wooden floorboards are screwed tight. Sanded the entire floor and thoroughly removed the sanding dust. The floor is then pre-treated with deep primer and the fabric panels can be applied. The strips should overlap by 5 cm. The fabric is attached to the wood with the tacker. The leveling compound is distributed over the fabric with the rubber wiper. When the leveling compound has dried, work can be continued according to the tiling instructions.
Stabilize and rehabilitate the subsoil
Reinforcement fabric can stabilize floors and seal holes and cracks. It can be worked into the filler to even out differences in height.
tools:
- primer
- reinforcement mesh panels
- Scissors
- putty
- squeegee
Price:
- consumables approx. 8 euros/m²
- tool approx. 60 euro
expenditure of time:
- Working time (depending on the size of the area) about 1 - 2 hours
- Drying time at least 24 hours (depending on the absorbency of the substrate, it can also be much longer)
The floor is prepared for the work, it should be clean, dry and stable. The surface is painted with primer, the drying time varies depending on the substrate and is between 30 minutes and 6 hours. Then you can apply the reinforcement fabric webs over a large area if the entire area is to be filled or only in the case of corresponding damaged areas. The fabric is cut to size with scissors. The filler is applied to the fabric. When the floor is dry and pressure-resistant, further work steps can be carried out.
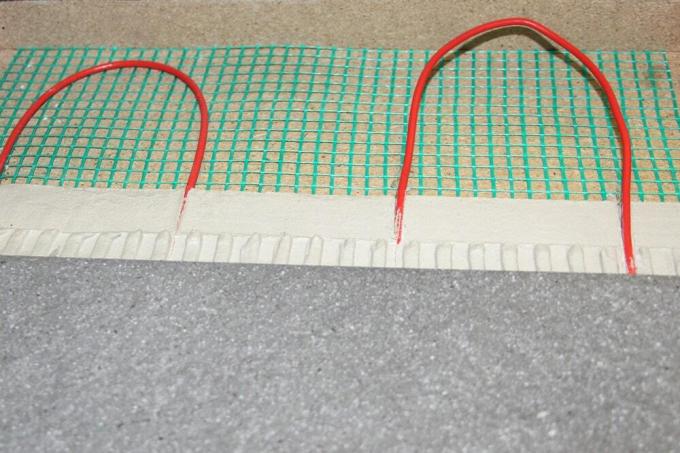
Plaster mesh for ceilings and walls
In order to smooth ceilings and walls, to protect them from damage and to stabilize them, reinforcement fabric strips can be attached directly when plastering. For this, a first, thicker layer of plaster is applied, into which the strips are pressed with a 10 cm overlap. Then there is a second layer of plaster. Further work can be done after drying. Corners on windows are provided with diagonal reinforcement. In addition, a strip of fabric is laid diagonally across the corner.
tools:
- reinforcement mesh panels
- plaster
- trowel
Price:
- consumables approx. 3 euros/m²
- tool approx. 8 euro
expenditure of time:
- Working time (depending on the area size) about 1 day per room
- drying time several days
Use with insulation
If reinforcement fabric is used in the thermal insulation composite system, it is attached over a large area between the insulation and plaster. Reinforcement mortar or a special adhesive spatula is used for this. The mortar is applied to the substrate and combed through with a notched trowel. Then the fabric comes and is pressed directly into the adhesive with the smoother. The individual lanes should be approx. 10 cm overlap. The fabric is embedded directly in the reinforcement layer, then the surface is leveled off with the surface spatula. The entire reinforcement layer should be between 3 - 4 cm thick.
tools:
- reinforcement mesh panels
- Scissors
- Adhesive filler or reinforcement mortar
- Mason's trowel, notched trowel
- smoother
- surface spatula
Price:
- consumables approx. 7 euros/m²
- tool approx. 45 euros
expenditure of time:
- Working time and drying time (depending on the facade surface and the weather) at least several days)
Diagonal reinforcement is installed in the corner area of windows and doors. The fabric strips should be between 20 and 30 cm wide. Care must be taken to ensure that the fabric fits snugly in the corners.
plastering over cracks
Damage in the plaster, such as holes and cracks, can be repaired with little effort. The loose plaster around the damaged area is generously removed. The area is thoroughly swept and moistened. A piece of fabric is cut to the appropriate size. The new plaster is mixed according to the instructions on the package. A first layer of plaster is applied, the fabric is pressed into the damp plaster. The plaster is then applied to full thickness.
tools:
- reinforcement mesh
- Scissors
- plaster
- trowel
Price:
- consumables approx. 3 euros/m²
- tool approx. 18 euros
expenditure of time:
- Working time (depending on the number of damaged areas) about 1 - 2 hours
- Drying time at least 24 hours
Plastering of wooden beams
If the beam has already been plastered over and cracks have appeared in the plaster, it makes sense to remove all plaster from the beam. In addition, the plaster should be removed about 5 cm from the wall on the left and right of the beam. The fabric is cut to the appropriate width and length. It must completely cover the beam. It is attached with appropriate glue or simply stapled to the wood. The fabric is then plastered over.
tools:
- reinforcement mesh
- Scissors
- Glue
- staple gun
- plaster
- trowel
Price:
- consumables approx. 3 euros/m²
- tool approx. 60 euro
expenditure of time:
- Working time (depending on the bar size) about 2 - 4 hours
- drying time a few days
 Home editorial office
Learn more about wall / wall

Fogging: what to do against black dust on walls?
Fogging is still a foreign concept to many, although black dust on walls, ceilings and carpets has been a widespread problem since the 1990s. We give all the important information about the tiresome topic from the emergence to the fight.
Have L-bricks placed: overview of prices / costs
Making slope fortifications or edging from L-stones is one of the more challenging real estate projects. While you can certainly build smaller fortifications yourself, large amounts of earth should be supported by specialist companies. We explain what to look out for and what costs to expect.

Nails for concrete walls: this is to be considered
In addition to screws and adhesives, the do-it-yourself repertoire also includes nails for the solid assembly and attachment of materials. Not every nail is suitable for every purpose. Choosing the right nail depends on various factors, such as the construction material of the support wall.

Interior plaster: how much plaster do you need per square meter?
If interior plaster is to be applied, one question above all arises: how much plaster do you need per square meter? Because too much material causes unnecessary costs. Too little plaster is annoying because it takes time and money to buy again.

Brick Wall: Remove plaster from bricks
Removing plaster from a brick wall takes effort and careful handling. Bricks are delicate and crack/break easily. Here sensitivity and the right instructions are required, which experts have created for hobby craftsmen and those who want to become one.

Drain house & masonry | Cost & Duration
Anyone who needs to have their house and masonry drained has a choice of different methods. We offer here how the costs can be, how long it can take and other important facts.


