Table of contents
- Select scratch plaster
- Prepare surface
- Utensils needed
- prepare plaster
- Instruct
- Structure
- mending
- cleaning
Scratched plaster is open to diffusion and thus enables a natural exchange of moisture. This prevents sticking, reduces the risk of mold and can also have a positive effect on the indoor climate. In addition, it has a high heat storage capacity and is also impact-resistant and self-cleaning. Together with the simple application and the variety of possible colors, this form of finishing plaster offers convincing advantages.
Select scratch plaster
The plaster type is available in different versions. First of all, it is important whether it is to be applied inside or outside - because the appropriate plaster must be selected depending on this. Other differences can be found in color and composition. Real scratch plaster usually has to be mixed with water and can be tinted by adding different colors.
Types that have already been mixed and tinted are more often silicate scratch plasters or synthetic resin plasters, which no longer bring the full range of benefits mentioned. Silicone resin scratch plaster can have a scratch plaster structure as a rough plaster, but their properties also differ from the mineral plaster.
If you want real scratch plaster, you should therefore pay attention to the exact name and only have to look for the Use for inside or outside as well as after the grain and possibly after the color decide.
Tip:
Textured plaster and disc plaster also have a similar structure, but they differ in their properties and in the application or processing.
Prepare surface
Before the plaster can be applied, the surface must be prepared accordingly. Dust, moss, plant remains or other dirt, but also cracks and moisture can affect the durability of the scratch plaster. Accordingly, the wall must be thoroughly cleaned in advance and cracks repaired if necessary. Water pressure cleaners or sandblasters can be used for cleaning. It should be noted that the surface must then dry sufficiently. Depending on the weather, this may take several days. After using the sandblaster, the wall should be swept and vacuumed to thoroughly remove dust and grains.
Only then can the plaster or possibly the plaster base be applied first.
Utensils needed
In addition to the scratch plaster itself, other utensils and one or the other tool are also required for application and painting. Below:
- mason's shovel or mortar bucket
- Electric mixer or mixer attachment for the drill
- facade filler
- brush and hand brush
- smoothing trowel
- grapeshot
- Nail board or fine plaster scraper
- Safety clothing, gloves and goggles
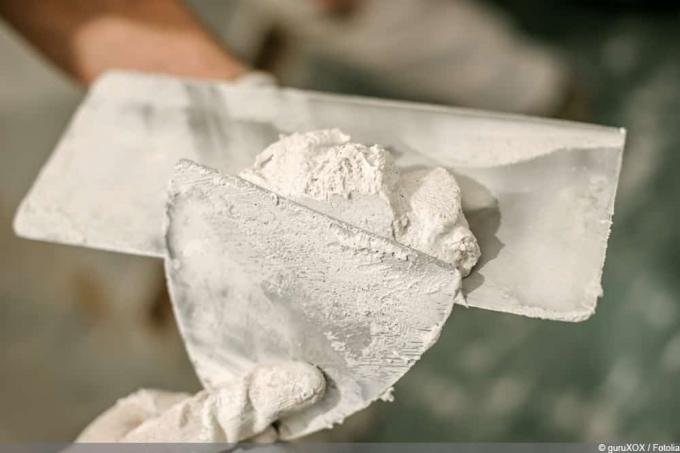
prepare plaster
If the finishing plaster has not yet been mixed, it must be mixed first. The procedure for this is as follows:
- The dry plaster is placed in a mason's trowel or mortar bucket and mixed with water according to the manufacturer's instructions.
- The plaster is now stirred with an electric stirrer until a lump- and lump-free, homogeneous mass is formed.
- The plaster is left to swell for five minutes and then thoroughly stirred again.
Depending on the temperature and humidity, there is still about half an hour to three quarters of an hour to work with the scratch plaster after the preparation. After that, the plaster becomes too stiff to be applied well.
Tip:
Since the mixed plaster dries so quickly, only small amounts should be prepared at a time. Otherwise there won't be enough time to process it accurately.
Instruct
The plaster is applied with a facade spatula, smoothing trowel or steel trowel. It should be 1.2 to 1.5 centimeters thick. However, the thickness of the application depends on the type and grain size of the scratch plaster. As with mixing with water, the manufacturer's information should be taken into account. The plaster is smoothed with the smoothing trowel. In order to get a really even result, you should also use a canister for smoothing. With the help of these and their profiles, the excess can be removed, but any "dents" that may still exist can also be compensated for.
Structure
Immediately after application and smoothing, the plaster has no scratch structure. This has yet to be created by structuring the surface accordingly. This is only possible after initial drying. The surface should be scratched with a board of nails. If the plaster is still smearing and the excess does not fall down dry but instead collects on the projections of the nail board, sufficient drying has not yet been achieved. Again, depending on temperature and humidity, it can take about three to six hours to reach the right consistency. In very hot and dry weather, however, the condition can also occur more quickly. It should therefore be checked at least once an hour whether painting with a nail board is already possible.
Apart from the right time, the procedure for processing the plaster is also crucial. The board of nails is moved over the surface with light pressure in even and circular movements. Larger elements are loosened and torn out. Care should be taken while scraping that the plaster does not become too thin. A thickness of eight to ten millimeters is ideal.
mending
Although scraped plaster is very durable and impact-resistant, weaknesses can appear after a few years. Improper application or insufficient cleaning of the substrate before application can also lead to plaster falling off. In this case, the following steps are recommended:
- Lightly tap off the loose plaster and remove thoroughly. Smaller parts can be swept away with a hand brush or brush.
- Paint the cleaned area with Tiefengrund and let this layer dry.
- Place the plaster in the hole and smooth out, allow to dry and roughen as described above.
It is also important when repairing that the plaster is initially applied very thickly and extends slightly beyond the damaged area at the edges. In this way, it can still be removed when scratched and is seamlessly connected to the old plaster.
cleaning
One of the advantages of scratch plaster is that it "trickles" slightly over and over again. In addition to the components of the plaster, dust and other dirt also fall off. The scratch plaster is therefore self-cleaning to a certain extent.
 Home editorial office
Learn more about plaster from A-Z - types & processing

Plastering cable slots: this is how the filling works
Holes, cracks and bumps in the walls are part of house construction, refurbishments and renovations. Cable slots are usually not plastered after the cables have been laid, which you must do later. They need to be touched up to provide a smooth surface finish.

Repair cracks in the exterior plaster | Repair cracks in the facade
Cracks in the exterior plaster can be harmless or a warning sign. Typical plaster cracks can usually be repaired without any problems. You can also do this yourself. In the case of cracks that extend into the building fabric, however, a professional must do the repairs. More about this is here.
smoothing gypsum plaster | 11 tips to apply, process & remove
Gypsum plaster is a good choice when plastering interiors. It can absorb and release moisture and thus have a positive effect on the room climate. However, when applying, processing, smoothing and removing, some factors should be considered.

Apply rough plaster instructions for inside & outside
Rough plaster can be applied very easily on your own, even without much experience - outside and inside. Interested parties can find out here what advantages it has and how to proceed step by step when applying it.
Paint & apply mineral plaster | Instructions & Cost
Mineral plaster offers numerous advantages and, among other things, has a positive effect on the indoor climate. But how is it applied and painted? The appropriate instructions and an overview of the costs can be found here.
Apply felt plaster - you should pay attention to this
The application or processing of felt plaster is associated with a number of challenges. From the right time to the right technique, a few points must be observed. We reveal what is important when applying the felt plaster inside and outside.