Table of contents
- Wooden terrace pond lined with foil
- Concrete patio pond
- Terrace pond made of EPDM liner pools
- Plant the terrace pond
- Suitable plants for the patio pond
- Conclusion
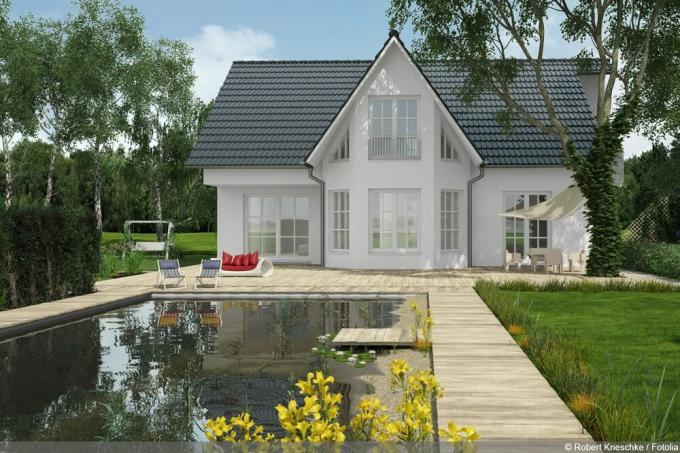
There are different ways to create a patio pond. Formal pools are often used. This can be a large, rectangular mortar trough that is embedded in the ground. The edges are concealed by the terrace covering. The pools are often bricked, so any shape can be created. The design is modern and timeless at the same time. Planting is often avoided and instead decorated with water features, fountains and pebbles or other stones and shells. Waterfalls are also very popular. The design possibilities are manifold.
Plants are often simply used as patio ponds. Whether zinc tub, old wine barrel, ceramic or plastic vessels, the choice is large. Several vessels that are staged together also look very nice. A fountain can be installed in one, one with taller, one with lower plants. In the remaining pools, floating plants can simply be placed on the water surface, or you can just take a few floating candles. A beautiful water landscape can also be arranged in this way. However, most patio ponds are properly constructed in or around the patio. First of all, of course, you have to have a plan of how everything should look like. It is best to draw everything, to scale. Depending on which materials are to be used, everything has to be bought and prepared. For a patio pond on the outside, you usually have to dig first to ensure a sufficient depth.
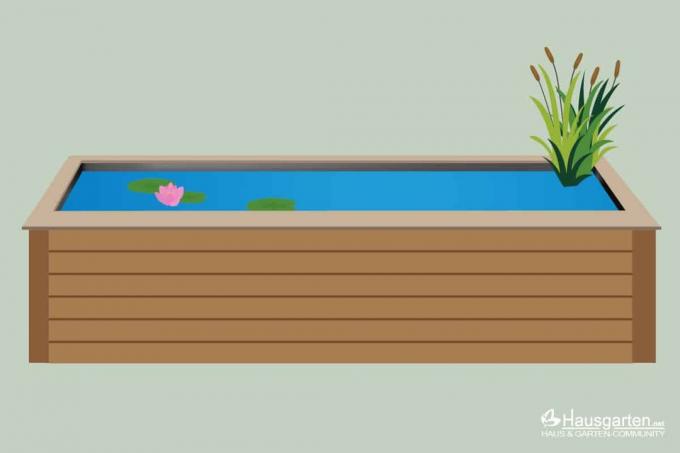
Wooden terrace pond lined with foil
A fairly simple solution is to build a wooden frame and then line it with foil. When it comes to wood, you have to remember that it will start to rot over time if it comes into direct contact with the ground. Depending on the condition of the ground, this can be slower or faster.
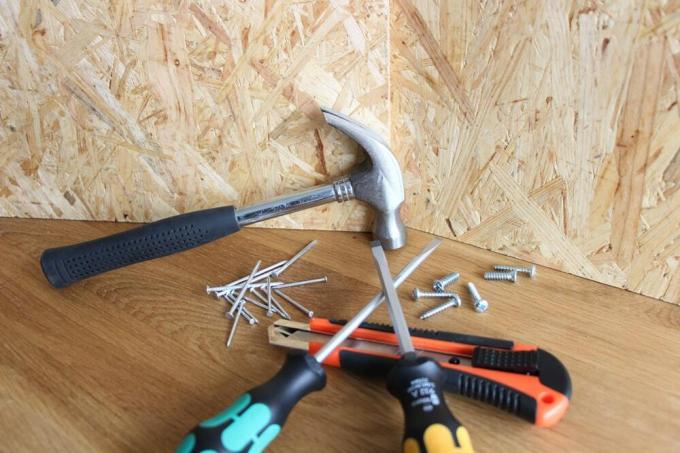
This is required:
- pegs holding the edging boards
- framing boards for the walls
- Frame boards for a clean, wide finish
- Pond liner of the appropriate size
- 1. Mark out the pond dimensions, preferably with the help of pegs and string.
- 2. Dig the soil to the desired depth. It's faster with a small excavator, but of course you can also do it with a spade. The only way to do fine work is with a spade and shovel.
- 3. The next step is to dig holes for the formwork posts. Calculate a distance of 100 cm between them, in any case one in each corner.
- 4. Concrete the posts about 100 cm deep. They support the whole pelvis. It is important that they are straight, so always use a spirit level. The concrete should harden for a few days.
- 5. After that, the edging boards are attached to the posts. You always start on the long sides first, only then come the narrow sides.
- 6. The earth outside must be filled up. Screw clamps are attached so that the pressure does not bend the wood. The wide sides are supported with iron beams or something similar to withstand the pressure. Simply stretch the parts from side to side. Leave an edge free at the top, because the film still has to be attached to the outside.
- 7. The water basin itself is sealed with pond liner. Rubber foil (EPDM), 1mm thick, is best suited. They are laid out in such a way that there are as few wrinkles as possible. the numerous small creases are smoothed out so that a few large creases appear. Leave the foil over the edge at the top.
- 8. Let the water in, about 1/3, because that way the film will still pull into the corners and you can see how it is lying correctly.
- 9. Fold the foil over at the top edges outwards, but do not cut yet. It is stapled to the outside of the edging boards. Excess foil is only cut off when everything is holding up well.
- 10. Now fill up the soil to the brim and solidify nicely.
- 11. Finally, the frame is placed on the wall boards. It is mitred.
- 12. The patio pond can now be planted or completely filled with water.
Concrete patio pond
A patio pond made of concrete has the advantage that it lasts for a long time. However, the construction is a bit more complex. You have to make a casing first. This is then filled with concrete. There is a large selection of formwork elements in hardware stores. Not only can you use it to create rectangular terraced ponds, but also curved, round and many other shapes. A special concrete insert should be installed to prevent cracks, which occur especially in harsh winters when the pond freezes over. The concrete needs to be reinforced.
This is required:
- formwork elements
- concrete
- For large construction projects – concrete mixer
- Insert made of steel or fiberglass
- Here, too, the future terrace pond must first be staked out.2. The excavation works are also no different from those described above.
- The ground has to be dug about 20 cm deeper, because the concrete layer also takes up space.
- Beat the base and sides very firmly.
- build casing. With a concrete pond, it is necessary to slant the walls to create a larger surface at the top. This allows ice to spread unhindered to the sides in winter. If you want straight walls, you should drain the water in winter
- pour concrete
- Either place the insert in the formwork beforehand and place it in the soft concrete after filling half the amount.
- The concrete must now dry. He is constantly wet to keep wet. The best way to do this is with lengths of fabric or jute, which you apply wet to the surface. They have to be moistened again and again, preferably by spraying.
- After complete drying, the formwork is removed.
It is important that it is only removed when the concrete has hardened properly.
Tip:
The concrete exudes lime as it hardens. These amounts are harmful to plants. It is therefore important to first thoroughly clean the patio pond and then to seal it additionally. There are appropriate tools available in specialist shops for this purpose. It is important that it does not contain any toxins.
Terrace pond made of EPDM liner pools
These liner ponds come in a variety of shapes and sizes. You can buy them ready made and just install them. However, completely variable solutions are also possible. With liquid foil, a pond can be designed in any shape. Here, too, the pond must first be staked out and excavated. The finished pond is simply placed in this hole. Small pools can easily be inserted by one person, larger ones need a helper. It is important here that the earth around it is properly filled up again. You have to muddy it up regularly to make it slide down. In addition, the substrate often has to be consolidated. The EPDM basin must be firmly integrated all around. The edges of the pelvis are then "hidden". The easiest way to do this is to pull the terrace a little beyond the edges. A wooden terrace with the appropriate structure is particularly favorable for this.
Plant the terrace pond
Planting depends on the location, size and shape of the pond. A pond that is in the middle of the terrace is planted differently than one that serves as a finish at the edge. With a central pond, the tallest plants go in the middle and it gets flatter towards the outside. However, an exclusively flat planting is often better. 1 to 3 water lilies alone look great, you don't have to. With a pond on the edge or outside, the taller plants are planted towards the back and it becomes progressively shallower towards the front. Here, too, you can only choose plants of one height, it all depends on what you like. It is also good to leave the water surface free so that the light can break, this works particularly well.
When selecting the plants, pay attention to their winter hardiness. If you don't want to remove your plants in autumn and hibernate warm, you should choose hardy plants. However, this is only useful if the pond does not freeze over in winter.
Suitable plants for the patio pond
Swamp and water plants, mostly used for the edge zone
- Marsh marigold - yellow flowers from March to June, height 20 to 30 cm, width 40 to 50 cm
- Marsh Spurge - yellow flowers from April to June, height 60 to 100 cm, width 80 to 100 cm
- Marsh iris - yellow flowers from May to July, height 80 to 100 cm, width 30 to 40 cm
- Marsh Violet – Pale lilac to lilac-pink flowers, 5 to 12 cm high, 15 to 20 cm wide
- Purple loosestrife - purple-red flowers from July to September, height 70 to 120 cm, depth 50 to 60 cm
- Swamp Forget-Me-Not - white flowers July to September, height 10 to 20 cm, width 20 cm
Underwater plants, against algae
- Stingy pondweed – greenish flowers from June to August, from a water depth of 50 cm
- Large mermaid - inconspicuous underwater flowers, from 30 cm water depth
- Canadian waterweed - white flowers from June to August, 50 to 120 cm water depth, forms profuse stolons
- Water plume - white to light pink flowers from May to July, 30 to 60 cm water depth
- Rough tomentosum – inconspicuous flowers in the leaf axils, 50 to 120 cm water depth, free-floating
Floating plants that shade the water surface
- Water hyacinth - purple-blue flowers with lots of white from July to October, height 10 to 20 cm, width 20 cm
- Water chestnut - flowering July to September, height - lying flat on water, width 40 to 50 cm
- Common frog bite - white flowers from June to August, lying flat on the water, flowering up to 10 cm, width up to 80 cm and more by stolons
- Sea jug - small yellow flowers, to 5 cm high from June to August, leaves lying flat on the water, can cover large areas
water lilies
- Yellow water lily
- Numerous water lilies, depending on the depth of the pool
- Asiatic Dwarf Waterlily
It is good to place the plants that are on the ground in plant baskets. This gives them support, prevents them from multiplying uncontrollably and makes them easy to remove again. Pond soil should be avoided, because it contains too many nutrients for such small patio ponds, which in turn promote algae blooms. A pond pump can be used to increase the supply of oxygen. A water fountain is also good, but care must be taken that no water splashes over the edge of the terrace pond. As a special highlight, the pond can also be illuminated. Pond lamps come in different shapes and colors. If you forgot to install the lighting, you can still design a lot afterwards. There are now even floating lights.
Conclusion
Terrace ponds can be built and planted with little to a lot of effort. If you are looking for a simple solution, you can simply take a suitable container as a mini pond and plant it. Properly installed ponds are a bit more complex. If you have an entire water landscape in mind on and around the terrace, you should seek good advice from experts. Today a lot is possible, hardly a wish cannot be implemented. Everything is a matter of price. If you don't want to spend a lot of money, you will certainly find a solution. There are many options for hobbyists. Ready-made pools are certainly the simplest. But formal pools can also look great, it doesn't always have to be a complicated and expensive variant. Less is sometimes more. This is often the case with patio ponds.
 garden editorial
 I write about everything that interests me in my garden.
Learn more about creating a pond
Build a high pond yourself: 15 tips for creating it yourself
A laborious excavation can be avoided with a raised pond. If you want to build and create it yourself, you should pay attention to numerous details. With the right tips, the project runs smoothly and long-term joy is guaranteed.

Build a duck coop yourself 7 tips for a duck house
Building a duck coop yourself is essential if you want to keep ducks yourself. But a protective shelter is also a practical and valuable aid for wild ducks. With our tips for building a duck house yourself, it's easy.
Make a swimming pond out of a garden pond: rebuild in 8 steps
Gardeners with manual skills transform the pond into a natural swimming paradise for the whole family. Thanks to the living sewage treatment plant, the private water world works in an exemplary manner without chemicals. This guide explains how to convert your garden pond into a swimming pond in 8 steps.
Fasten the edge of the pond: this is how the pond liner gets hold on the pond bank
Filled with water, maybe a few fish in it and attractively planted, a pond is a small piece of paradise in your garden. In order for this to remain so for a long time, the correct attachment of the edge and the pond liner is crucial.
Creating a koi pond: requirements for size and filter system + costs
Kois are not only particularly noble, but also very demanding fish. Because the animals have certain requirements for their habitat, which must be taken into account when creating the koi pond.
Build your own indoor pond – instructions in 10 steps
There are big differences in indoor ponds. A lot is possible, starting with plastic shells, such as those used in the garden, through brick and tiled ponds similar to a bathtub, to liner ponds in a wooden frame. Anyone who has never dealt with indoor ponds will be amazed at what some people come up with. Of course, the vessels can also be used for rooms, which are referred to as mini ponds or balcony ponds.