Table of contents
- pricking
- Advantages
- The right moment
- Sort out
- substrate
- Instructions
- Prick out in the garden bed
- Pricking out seedlings in seed trays
- planting depth
- Rest of the procedure
- Which plants do not need pricking out?
As a rule, the seeds of vegetables are sown in a planter and germinated in a warm place. Depending on the type of plant, it takes a few days to a few weeks for the seeds to germinate and for the first leaves, called cotyledons, to appear. From now on it is important for the young vegetable plants that they have enough space.
pricking
To ensure that seedlings do not die and prevent each other from growing, it is important to prick them out. The term "pricking" comes from the French and means "pricking". In the garden, pricking out basically describes nothing more than transplanting seedlings at a greater distance from each other or straight into their own pot. When pricking out, the fragile plant must be handled very carefully and care must be taken to ensure that the entire root is planted in the ground.
Advantages
The easiest solution would be to sow the seeds individually in small pots. This is usually not feasible for reasons of space, so that either several seeds are sown in a pot or in a row in the garden bed. Here the seed matures in humid and warm conditions until the seedling has made its way to the light. From now on the actual growth phase of the plant begins. The vegetables require a lot of energy. The seedlings in the seed tray therefore compete for light, nutrients and water. So that the young lettuce, kohlrabi or pepper plants do not compete with each other for the limited supply, they are given a place in their own pot.
The right moment
Seedlings should be pricked out at the latest as soon as the first true leaves appear after the cotyledons. In principle, vegetables should be pricked out as early as possible so that they can develop optimally. If the plants are already larger, they are easier to handle, but they are Roots then already branched out and possibly already with those of the neighboring plants devoured. This not only leads to major injuries when pricking out, but the seedlings also grow less well in the new pot.
Sort out
At the same time, pricking out serves to sort out small, weak or defective plants. Only allow healthy and strong seedlings to continue growing. Even at this early stage of development, it is easy to see which of the plants have the best chance of growing well.
substrate

After pricking out, always use a substrate that is fine-grained and low in nutrients. Low-nutrient substrates cause the plant to form a densely branched root system. Conventional garden soil is usually too clayey for this purpose and does not contain enough humus to support root formation.
- humorous
- peat free
- finely crumbly
- sterile
- well permeable to water
- low in nutrients
- for example potting soil or pricking soil
Young seedlings are still very sensitive and do not have good defenses. Because of this, they are easily attacked by mold or other fungi. So make sure that the potting soil is largely sterile.
Instructions
Basically pricking is not difficult. However, a little tact is required in order not to injure the sensitive vegetable plants. In order to be able to better remove the seedlings from the soil, it has proven useful to moisten the substrate. Basically, there are two different cultivation options, which of course also differ in pricking out.
Prick out in the garden bed
Some cold-resistant vegetables can be sown directly into the bed in rows. Depending on the type, certain row spacings must be observed. Even in small areas, a larger number of vegetable plants can be sown in this way. If small plants have formed from the seeds in the spring, they must be pricked out and thinned out (warped). The best time for pricking out outdoors is a cloudy but rain-free day without excessive heat. The following are suitable for direct sowing in beds or greenhouses:
- spinach
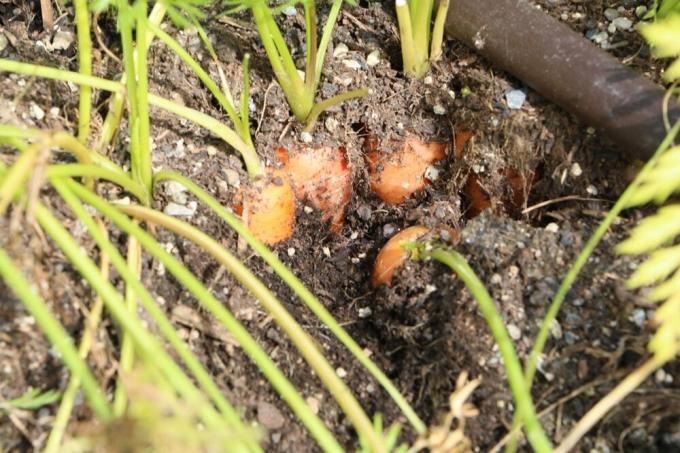
- carrots
- swedes
- Peas
- Lamb's lettuce
- leek
- salsify
- onions
- Corn
- Step 1: First, pluck out any weak, diseased or poorly grown seedlings in the individual rows and dispose of them on the compost.
- Step 2: Transplant individual seedlings to ensure desired spacing in the row between each vegetable plant. The seedlings taken out are then immediately replanted in a free spot.
- Step 3: Place the pricking stick or a garden shovel about a centimeter from the side under the first seedling and carefully lever it up a little. If the seedlings are very close together, the process can be repeated from the other side so that the roots of the individual seedlings separate. Try to take as many of the fine roots with you as possible.
- Step 4: Using a planter or other implement such as a spoon or spatula, poke a hole appropriate for the seedling.
Distances:
Two fingers wide
- leek
- Lamb's lettuce
- salsify
Three fingers wide
- carrots
- spinach
- sorrel
- onions
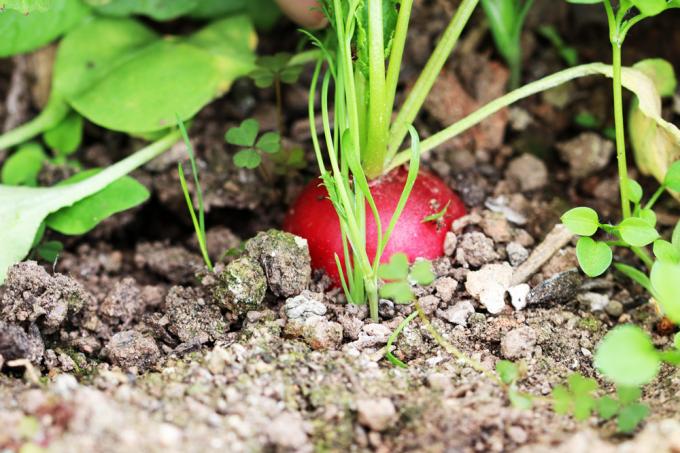
- radish
A hand's breadth
- Corn
- lettuce
Step 5: Put the young plant in the hole according to the optimal planting depth and press the soil lightly.
Step 6: A hole is now drilled at a distance of about five centimeters from each vegetable plant, into which about 50 ml of water is poured. Don't forget to weed regularly to give the vegetables enough light and nutrients.
Pricking out seedlings in seed trays
A whole range of vegetables are somewhat sensitive to cold and are therefore usually preferred in seed trays on the windowsill. They remain in the warm house or greenhouse until finally no more frosts are to be expected. Be sure to prepare a sufficient number of individual growing pots in advance. The plants should only be left lying around open (without soil) for a very short period of time, as they will dry out quickly. That's why you should only remove and transplant one little plant at a time.
Step 1: First fill the containers two-thirds full with potting or pricking soil and press them down lightly.
Step 2: First sift coarse or lumpy substrate through a coarse sieve to refine the structure.
Step 3: Fill the plant pot with the fine soil. Smooth off any soil that is over the edge of the pot and press it down lightly.
Step 4: Drill a deep, narrow hole in the middle of the pot with the pricking stick or a wooden stick.
Step 5: Place the pricking stick from the edge as deep as possible under the first seedling and carefully lever it upwards to separate the roots of the individual seedlings. Try to take as many of the fine roots with you as possible.
Step 6: Use your thumb and forefinger to carefully remove the small plant from the substrate. This works best if you pull it away to the side. You have to be very careful when removing it, otherwise the stems or roots will tear off.
Step 7: Very long main roots may be shortened a little. Slight injuries to the hair roots always occur when pricking out. Unless the roots are severely damaged, minor losses don't matter; on the contrary, they even stimulate root growth.
Step 8: Place the seedling with the roots across the prepared hole in the new plant pot and then pull or push the roots into the indentation. Alternatively, you can also insert the plant vertically into the prepared hole. It is important that the roots remain below the plant and do not bend upwards.
Step 9: Lightly press the transplanting soil around the young vegetable plant and smooth the surface of the substrate.
Step 10: Repeat the above process with another seedling in a new pot.
Step 11: Water the freshly transplanted vegetable plants vigorously with the fine sprinkler on the watering can.
planting depth
How deep the individual vegetable plants are planted depends on the type of vegetable. Many vegetables are capable of rooting from the stem, creating a nice, compact root ball and encouraging tuber or head formation.
1. Deep planting to the first cotyledons
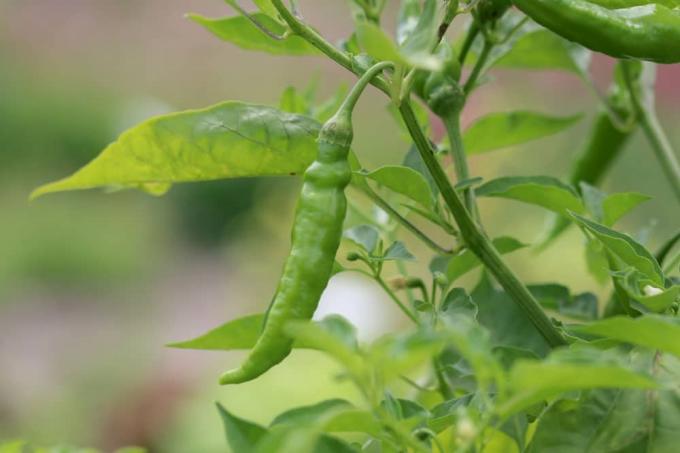
- peppers and chili
- Leek
- tomatoes
2. Plant at the same height (to encourage tuber formation)
- celery root
- fennel
- salad
- cauliflower
- Kohlrabi
Rest of the procedure
In order for the young plants to grow well, it is important to place them in a suitable place if they were planted in a pot. Vegetables such as peppers or tomatoes should be a little cooler after pricking out than when germinating, so that the plants because of the low light conditions in early spring on the windowsill do not grow too fast and thin, not very viable shoots develop.
- bright but without direct sun
- Temperature: 15 to 18 degrees
- keep slightly moist
If the outside temperatures allow it, the pricked out vegetable plants are placed outdoors by the hour from around the end of April. Avoid the blazing sun and heavy rain until the plants have acclimatized.
Which plants do not need pricking out?
Not all vegetable plants require pricking out. If the seeds are sown in individual pots right at the beginning, pricking out is of course superfluous. Larger seeds or vegetables that are sensitive to transplanting are particularly suitable for sowing individually. These include:
- tomatoes
- cucumbers
- Peas
- pumpkin
- zucchini
 garden editorial
 I write about everything that interests me in my garden.
Learn more about maintaining a vegetable garden

Make a climbing aid for cucumbers yourself: building instructions
Cucumbers are healthy, tasty and versatile. In order for the cultivation in your own garden to be successful, you should offer the cucumber tendril, which likes to climb, optimal conditions. The easiest way to do this is with a cucumber trellis, which you can quickly and easily build yourself with our instructions.

Growing vegetables in the garden – which vegetables to plant next to each other?
Today, even a hobby gardener knows: With the right neighbors, vegetable plants develop particularly well in mixed cultures. You can even defend yourself against pests together. In this article we have put together for you which types of vegetables go well together and which go poorly together.
What is a mixed culture? Examples with table from the garden
Ornamental and crop plants of different species and genera form alliances to defend themselves against attacks by diseases and pests. Clever home gardeners take advantage of this strategy and cultivate their vegetables in mixed cultures. You can read here what exactly is behind this technical term. Field-tested examples from the garden clarify the connections.

Sowing calendar for vegetables - when to sow which vegetables?
With so many different types of vegetables, it is not easy to find the right time for sowing. Finally, the appointment differs depending on the species. In addition, of course, it also makes a difference whether the vegetables are pre-cultivated in the house, cold frame or greenhouse or sown straight into the field.
Growing pepperoni plants from seed - instructions to harvest
The cultivation of the crunchy peppers is extremely popular among many hobby gardeners. rightly so! - Because the colorful fruits of the pepperoni plants not only beautify the vegetable patch, but are also extremely tasty. If you also prefer rare or special types of pepper, you can prefer them yourself with a comparatively small amount of work.

Eat vegetables - information for peppers, physalis, cucumbers & Co
Eat vegetables or not - opinions differ here. The care measure should direct the energy of the plants to the development of fruit and thereby increase the yield. There is no scientific evidence for this, but convincing experience. The right approach is important when it comes to exhaustion, the appropriate instructions can be found here.