Table of contents
- Short profile
- Zones of the herbal snail
- Possible materials
- Herb spiral made of stones
- building instructions
- Before planting
- Plant herb snails
- These herbs don't go together
- Conclusion
For hobby gardeners who like to use their own herbs when cooking and a little space in the garden a herb snail, also known as a herb spiral or spice snail, is just the thing. Because it offers optimal conditions for the cultivation of many different herbs and is at the same time a real eye-catcher in the garden. A herbal spiral can be built from a wide variety of materials. Whether made of bricks, natural stone or impregnated wood - the choice of material can be made according to your own taste.
Short profile
- other names: herb spiral, spice snail
- three-dimensional bed for different herbs
- simulates different climate zones
- offers different site conditions
- needs full sun
- Combination of annual, biennial and perennial herbs
Zones of the herbal snail
A herb snail can be divided into four different zones, with the transitions between the individual areas running smoothly. This creates diverse site conditions for the individual plants. If you have a pond in your garden, it is best to place your herb spiral north of the bank of the pond. The water ensures a good microclimate (high humidity).
1. Dry Zone (Mediterranean Zone, Mediterranean Zone)
The plants get the most hours of sunshine at the top of the herb spiral. In addition, the water can drain well in the raised area. Sun-seeking Mediterranean herbs feel at home here.
- full sun
- Soil well drained (sandy)
- rather lean (low nutrients)
- pH value: neutral to slightly calcareous
2. normal zone
This zone is slightly humus rich and provides shade for the herbs for a few hours a day. The plants that grow here have a slightly higher nutrient requirement, so it makes sense to slightly enrich the soil with compost.
- semi-shady to sunny
- slightly humus rich soil
- good water permeability
- ideal for local herbs
3. Damp fresh zone
The further down the zones in the herb snail migrate, the wetter and more humic the soil becomes. Here, too, the plants are offered a semi-shady location.
- sunny to semi-shady
- soil permeable to water
- better water storage capacity than upper zones
- nutritious (humic)

4. water zone (wet zone)
Ideally, the herb spiral ends in a partially shaded area to the west or east (tip in the south). All plants that prefer moist, nutrient-rich soil find ideal site conditions here.
- semi-shady
- good water storage capacity in the soil
- humorous
Possible materials
A herb snail is best planted in a wind-protected open space in the garden. It has proven to be very practical if the herb spiral is as close as possible to the kitchen so that the distances (especially in bad weather) are not too far. A herb snail can be built from a wide variety of materials.
- Stone
- Wood
- plastic
- metal
- gabions
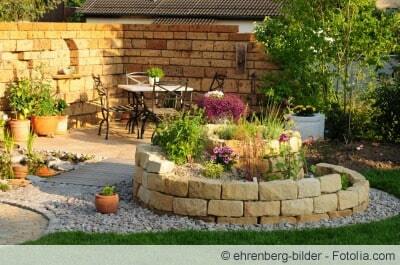
Herb spiral made of stones
A weather-resistant and stable variant is composed of stones. These store heat well and protect the sensitive roots from damage on cold days. A herb snail made of stones can easily be built by yourself. Materials needed:
- enough stones for the dry wall
- Gravel or crushed stone (for drainage)
- garden soil, compost, sand
- spade and shovel
- string and two sticks
building instructions
Once the right place in full sun has been found and all the materials have been obtained, the herb spiral can be set up. Most herbs require a lot of light and warmth. The system must not be too small, so that the plants have enough space to develop. Depending on the size of the garden, you should plan at least two to three square meters for a herb snail. The height then depends on the base area of the herb snail. The larger the base, the higher the herb spiral can be built.
Step 1: Preparing the Floor
Very few people can draw circles freehand. It is therefore advisable to use a pair of compasses for the ground plan of the herb snail.
- String (Length: slightly more than the diameter of the herb snail)
- two sticks
- Tie string to the sticks
- put a stick in the middle of the later herb spiral
- tighten the cord
- draw a circle around the first stake with the other stick
- mark the center point
- Dig the soil about a spade deep
As the name suggests, the shape of the herb snail is based on the shape of a snail shell or spiral. The herb snail should later open to the south and have at least two turns.
2. Step: Create drainage
So that the water can later be easily drained from the herb snail, it is advisable to create a drainage system when setting it up. This consists of a layer of crushed stone or grit about ten centimeters high.
Tip:
It is best to smooth the surface a little after filling with a rake or the back of a broom so that the stones lie on an even surface.
3. Step: build the wall
Now the first row of stones is laid. For reasons of stability, this should begin slightly below normal ground level. The lower row of stones consists of a spiral opening to the south and has two whorls. It is advisable to build a dry wall (without mortar). Such a wall looks much more natural and offers an additional drainage possibility. Stones that have relatively straight side surfaces are suitable for a dry wall. Very round shapes or small stones do not offer enough support. First of all, a part of the wall is built.
- Align oblong stones in the direction of the middle of the screw (ensures more stability)
- Pull stones up like stairs
- there should be enough space between the individual whorls for the plants
- leave out one stone in each row from the wet zone
- the wall remains flat on the outside
- towards the middle it increases
- in the middle is the highest point
- make absolutely sure that the wall does not tilt outwards
- The wall tends to tilt inwards a little
Step 4: Fill and continue building
If the inner part of the dry wall is about 50 centimeters high (knee high), the herb spiral should first be partially filled.
- Fill the inside with roughly 50 centimeters of coarse gravel
- flatten the layer of gravel towards the outside
- Do not fill in any gravel in the last half turn (wet zone).
- Continue building the wall step by step with stones and earth
- use mixtures of sand, soil and compost for the different zones
- Add at least 50% sand in the middle
- the proportion of sand decreases towards the bottom
- the proportion of compost and earth steadily increases towards the bottom
Tip:
Only use soil and compost in damp areas.
Before planting

Before planting the herbs, you should wait a little longer until the ground has settled. It is best to let a few rainy days pass. Alternatively, the herb snail can also be carefully sprayed with a garden hose or moistened with a lawn sprinkler. If necessary, soil must now be refilled.
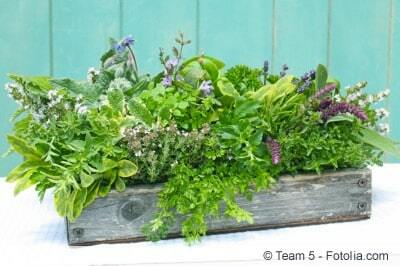
Plant herb snails
The ideal time to plant a herb spiral is spring. Mediterranean herbs in particular are somewhat sensitive to frost if they are placed outdoors very late in the year. The herbs can be bought ready-made in pots or you can grow them yourself from seeds.
1. Mediterranean zone
In the middle (upper) area of the herb snail, Mediterranean herbs with a high light requirement, which prefer to be a little drier, thrive:
- thyme
- sage
- rosemary
- provencal lavender
- marjoram
- hyssop
- curry herb
- savory
2. normal zone
All herbs that also thrive in normal garden soil can be planted here.
- lemon balm
- coriander
- chives
- tarragon
- mugwort
- borage
- chervil
- spice fennel
- arugula
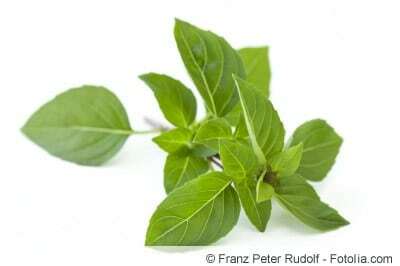
3. Damp fresh zone
- basil
- Parsely
- chives
- wild garlic
- dill
- lovage
4. water zone
All herbs that prefer a little damper and shady have found an ideal location in this zone. These include:
- peppermint
- watercress
- wild garlic
Tip:
Plant tall or rambling herbs (like mint or lemon balm) a little further back and in a larger pot so they don't take up space and light from other herbs.
These herbs don't go together
While some herbs complement each other quite well, such as chives and garlic herb, other combinations fare poorly. Do not match:
- parsley and chives or borage
- basil, marjoram and dill
- dill and sage
- cumin and fennel
- chervil and coriander
Conclusion
A herb spiral can be easily built from a wide variety of materials or bought ready-made from a hardware store. When planting a herb snail, it is always important to have a full sun location and good drainage. The soil contains less and less sand from top to bottom, but more compost and soil. A wide variety of herbs can be planted or sown in a herb snail. However, the location requirements and compatibility with the neighbors must always be taken into account.
 garden editorial
 I write about everything that interests me in my garden.
Learn more about gardening landscaping

Set concrete palisades yourself - instructions and prices
Putting concrete palisades yourself is easy in itself and requires neither a lot of experience nor manual skills. However, this measure involves some effort and becomes easier with a little practice. The right knowledge is the key to success. The following instructions show how it works and what financial effort is required.
Lay lawn edging stones correctly and set them in concrete
With lawn edging stones you keep the lawn growth in check and can thus also bring structure into the garden. The selection of the stones and the right way of laying depend on the circumstances and of course on your own taste. If greater stability is required, it is advisable to set them in concrete.

Build bed borders made of wood yourself - instructions
Wood plays a very central role in garden design that is in touch with nature. What could be more obvious than to use this original material as a bed border. There are no limits to the imagination here. To ensure that the wooden border looks good and lasts a long time, there are a few rules to follow.

Remove tree stump - burn out or mill?
If a tree was felled on a plot in front of a family house, the stump must disappear because he has most of the other planting plans on the already not huge property adversely affected.
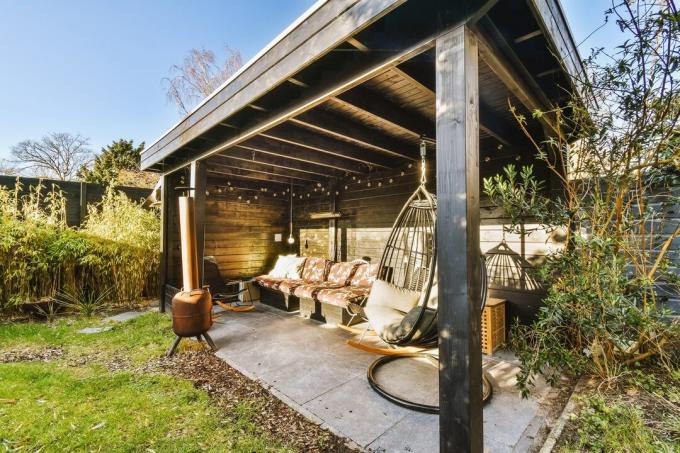
Outdoor seating canopy - ideas, variants and costs
A patio is generally understood to mean an area in the garden that serves as a seating area. This can also be a terrace or even a balcony, but also just a spot in the garden that is simply beautiful and cozy and where you can construct a perfect seating area.

Attach the flower box holder correctly
In order to show off a flower box beautifully planted, the flower box holder must be installed correctly and securely. These are available in different versions, each adapted to the location of the installation.