
Table of contents
- Bitumen membrane: advantages and disadvantages
- Disadvantage
- Difference
- Preparation
- Laying instructions - step by step
- Caution: risk of fire
- Only on fireproof roofs
- protective clothing and devices
- Efficient work and checks
With the right instructions, a bitumen sheet can be laid relatively easily on concrete. The material is very cheap, seals well and has a long service life. When attaching, however, certain basic requirements must be observed. We provide the appropriate knowledge through tips and guidance.
Bitumen membrane: advantages and disadvantages
The decisive advantage of bitumen membranes compared to self-adhesive or cold-adhesive bitumen membranes is the price - the material is significantly cheaper. In addition, the hot gluing or welding on ensures a high degree of tightness. Bituminous membranes can therefore also be suitable for laying on flat roofs, from which rainwater cannot run off too quickly.
Disadvantage
However, a potential disadvantage is that the bitumen sheeting must be applied using a gas torch. They are therefore not suitable for laying on wooden roofs or other combustible materials, as the burner could cause a fire. However, this problem can be avoided with an intermediate length or a cold-glued bitumen layer. In addition, there is no danger with a concrete substrate anyway.
Difference
Another key difference between cold-glued and welded bitumen membranes is the effort required to attach them. Self-adhesive sheets can be unrolled and attached after the roof has been prepared. All you need to do is peel off a film. With the cold-adhesive strips, a bed of adhesive is applied and the strips that have been cut to size are aligned and pressed into it.
Tip:
In the hot process, seams and entire panels have to be processed with the gas burner. As a result, the effort is significantly higher.
Preparation
Before the weld track is laid, some preparatory steps need to be taken. These include:
- The roof needs a thorough cleaning. Dirt can reduce the adhesive strength of the webs. In addition, pointed pebbles or other sharp or pointed objects can drill through the bitumen membrane from the inside and thus cause the roof to leak.
- Before attachment, the roof must be dry and free of grease. In wet weather, you should therefore refrain from laying the sheets. Alternatively, the concrete surface can be carefully dried with the gas burner.
- The bitumen membranes are cut to size. Ten centimeters are planned as an overhang at the roof edges and around eight centimeters as an overlap between the strips. Sharp and strong scissors or a cutter knife with a hooked blade are suitable as cutting tools.
- So that the rolls or webs can be laid out, they will be spread out on the roof for a few hours. If the sun shines very strongly, the bitumen sheets should already be aligned correctly, as the adhesive could already heat up and stick.
A notice:
The bitumen rolls should never be stored lying down. Heat can liquefy the glue and the strips stick to each other or stick to themselves. It is therefore better to position it while standing. However, the individual roles should not be too close together.
Laying instructions - step by step
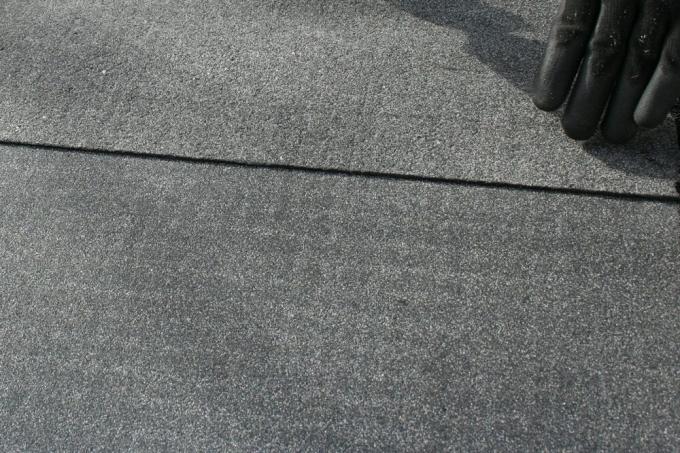
Once the preparations are complete, the lanes can be laid. The following order must be observed:
- The lanes are laid from bottom to top. It is therefore started at the lower edge of the roof. If the roof has no pitch, start on the leeward side.
- The first sheet is placed, aligned and weighed down - so that it cannot slip during welding. It should protrude by ten centimeters on each side of the roof.
- The edges of the web are heated with the gas burner. The heat melts the material and sticks to the substrate, i.e. the concrete.
- The bitumen sheet can be pressed down with a broom and glued on without wrinkles. Since the broom can no longer be used afterwards, either an old broom or a cheap broom should be used.
- The second sheet of bitumen is laid in such a way that the edge overlaps the first sheet by about eight centimetres. Again, the edges are heated with the gas burner and pressed and smoothed with the broom.
- Step 5 is repeated until the entire roof is covered.
- The individual strips can then be evenly and completely heated with the gas burner and smoothed out with light pressure. This step is omitted if a second layer of bitumen is to be applied.
After the first layer of bitumen is finished, the protruding bitumen edges are also glued to the edges of the roof with a gas burner and broom. For a particularly long service life and high tightness, it can make sense to attach a second layer of welding strips. If you want to lay the material in two layers, you don't have to heat the first layer continuously. It is sufficient to weld only the seams. For the second layer, the material is then heated throughout and smoothed to create a tight-fitting layer.
Tip:
When it comes to gas burners, it pays to compare rental and purchase prices. The rental fees are sometimes very high. This is especially true if the device is needed for several days. Therefore, buying a simple gas burner can actually be cheaper than renting it from a hardware store.
Caution: risk of fire

When processing the bitumen membrane, there is a risk of fire and injury due to the use of a gas burner. Therefore, the following three safety precautions should be considered:
Only on fireproof roofs
The above instructions are intended solely for laying weld sheeting on concrete roofs. If it is wood or other combustible materials, either self-adhesive bitumen sheeting or bitumen sheeting for cold bonding should be used - at least for the first layer. Even then, however, great care should be taken when welding the second layer and you should work with rapid movements so that the roof does not become overheated at certain points and burst into flames.
protective clothing and devices
Protective gloves and appropriate work shoes are just as important for handling the gas burner as a fire extinguisher within reach. To be on the safe side, the membranes should not be laid and welded alone, so that a helper can intervene to extinguish the fire if necessary. Anyone who finds this to be excessively cautious should bear in mind that roofs can catch fire even with experts due to unfavorable conditions.
Efficient work and checks
To prevent the bitumen sheeting from heating up too much, the gas burner should be moved over the material quickly and evenly. You can then use a stick or stick to check whether the edges of the bitumen sheet are already soft enough to bond with the subsoil and the following sheet. Usually the check only has to be carried out on the first lanes, after that you get a feeling for how quickly or how slowly the gas burner has to be guided over the seams and panels to achieve the right consistency receive.
 Home editorial office
Learn more about roof / attic
Snow blows under roof tiles: what to do?
Snow drifts often get under the roof tiles when blizzards or strong winds blow them underneath. The moisture often causes damage from meltwater. Air spaces between the roof tiles are to blame. Homeowners should now find out how to counteract this.
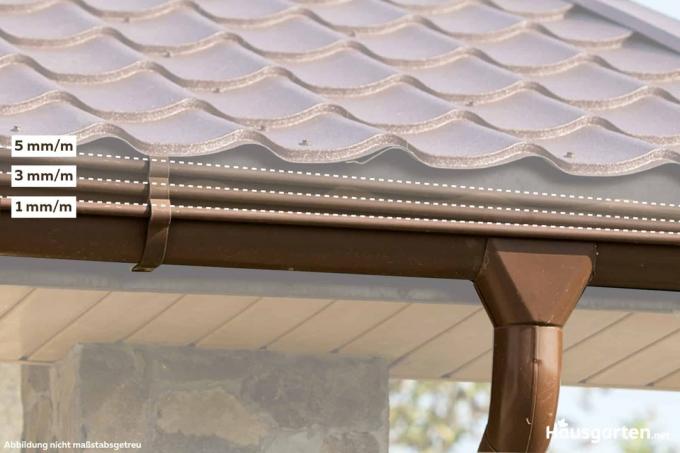
Gutter slope: the ideal gradient
For a gutter to function properly, a slope that has an ideal inclination is required. Various factors have to be taken into account. Before installation, you should find out how the gradient is to be calculated and implemented.
Which attic insulation can be walked on immediately?
Attic insulation effectively reduces heat loss from the building. If the attic is to continue to be used as storage space, the insulation should be accessible as soon as possible. A number of materials can be used for this. They each have advantages and disadvantages as well as different costs.
Bitumen stains: 6 removal tips
If you have to process bitumen, you should be careful. The black, viscous mass is sticky and adheres well to clothing, hands and all possible surfaces with which it comes into contact. With our tips you can successfully remove it.
Attic: OSB or Rauspund as roof boarding?
Both OSB and Rauspund boards are suitable as roof boarding. But what are the differences and what is better suited for the attic? Our guide answers these and other questions about the two materials.

Laying a vapor barrier: how far does the vapor barrier have to go?
Laying a vapor barrier is essential in some cases. But how far does the vapor barrier have to be installed, what is it and what are the differences? These and more questions are answered in the following guide.


