


Table of contents
- Site selection and tillage
- Beautiful decorative gravel varieties
- Design a Mediterranean gravel bed
- Laying out a Japanese gravel bed
- Create alpine character
- Solving the problem of dry shadows
- Plant
- Tips for care
- Conclusion
With a gravel bed, the magic of Tuscany and the grace of Asia move into the garden. At the same time, the design variant solves many a location problem in terms of overall planning. It's good to know that this unique combination of stones and plants creates space for exotic plants that come into their own where classic perennials have long since given up. The reduction to clear forms creates a visual aura in the garden that fascinates without requiring an extra portion of care. These DIY instructions show in a practical way how to skillfully create and design a gravel bed.
Site selection and tillage
You can still take your time with the decision regarding the specific style, because the location conditions and the tilling of the soil is carried out regardless of whether you have a Mediterranean, Japanese, formal or alpine gravel bed invest. The following overview shows what is important:
- Full sun to sunny position
- Dry, sandy-gravelly soil with some loamy topsoil
- Poor in nutrients, with a low humus content
- Well drained with no risk of waterlogging
Where the soil quality does not come close to the ideal conditions, you can influence it with targeted measures. To do this, dig out the intended bed area 25-30 centimeters deep and meticulously remove all roots from the sole. Then mix half of the excavation with gravel to fill in the mixture as a substructure. If a vibrating plate is available, the substrate is consolidated with it. Alternatively, smooth the bed surface with a lawn roller that is as heavy as possible. Spread a stable weed fleece over it, overlapping at least 10 centimeters at the edges.
Tip:
The mounds that are typical of an alpine gravel bed are created in the easiest way with the soil of the substructure so that they can also be covered with the weed fleece. In this way, later planting of the small elevations is possible without any problems.
Beautiful decorative gravel varieties
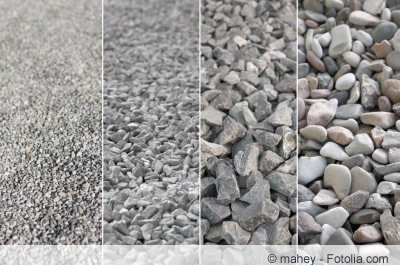
With the prepared bed in mind, the decision regarding the stylistic orientation is usually a little easier. The choice of decorative gravel types is defined by the design imprint. While in the Mediterranean aura reddish-brown to terracotta or bordeaux-colored nuances mixed with white tones are welcome, white, gray and black tones determine this in the Japanese and formally oriented gravel bed appearance. The Alpine style, on the other hand, gives the creative hobby gardener more individual freedom of choice, as long as the vision of apparent naturalness emerges. The following selection of recommended types of ornamental gravel may serve as inspiration:
- Carrara marble, pure white
- Basalt, extra black
- Bordeaux pebbles, beige color
- Natural granite mottled light grey
- Quartz veined black and white
- Rose quartz, soft pink
- Glacial gravel, colorfully mixed
Rounded decorative gravel conveys a harmonious appearance on the one hand, but poses a high risk of slipping when wet. This problem is solved on larger bed areas by curved paths covered with sharp-edged decorative chippings. At the same time, this design variant offers the possibility of creating a color contrast between the paths and the area to be planted. In addition, the different grain size contributes to a varied look. While a grain size of 16/25 to 25/40 is advantageous for decorative gravel, a grain size of 8/16 to 16/32 is ideal for decorative chippings.
Design a Mediterranean gravel bed
The plants of the Mediterranean area thrive extremely luxuriantly in the sandy-gravelly soil of the gravel bed. The following collection of flowering perennials, filigree grasses and decorative shrubs is ideal for the dominant bed in the garden or the sunny front garden bed.
- Lavender (Lavandula angustifolia)
- Butterfly bush (Buddleia davidii)
- Plumeria (Dianthus plumarius)
- Pearl daisy (Anaphalis triplinervis)
- Small iris (Iris Barbata-Nana)
- Blue cushion (Aubrieta x cultorum)
- Blue oat (Helictotrichon sempervirens)
- Yucca (Yucca filamentosa)
- Gypsophila (Gypsophila repens)
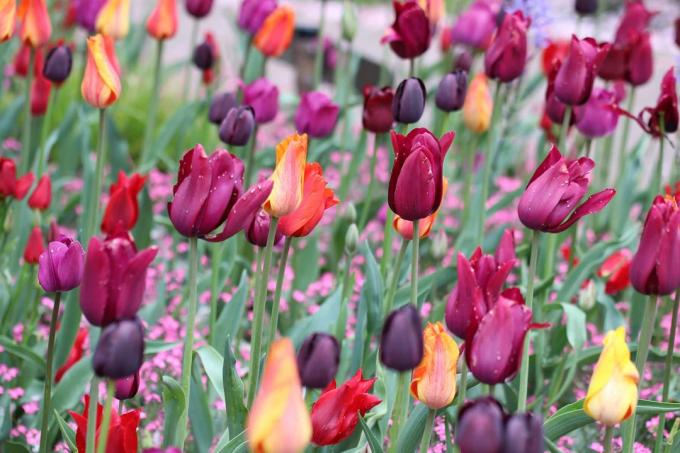
So that the flower spectacle starts early in the year, plant bulb flowers in suitable places, such as daffodils, tulips, crocuses and snowdrops. Although these are not typical Mediterranean plants, this design is valued as the gardener's artistic freedom.
Laying out a Japanese gravel bed
A Far Eastern dream comes true with the following plant community, which is only planted sporadically in the gravel bed. In a stylish design, the emptiness of the room dominates, broken up by solitary trees such as bonsai, perennials and grasses.
- Bamboo (Nandina domestica)
- Japanese maple (Acer palmatum)
- Japanese cherry tree (Prunus serrulata Amanogawa)
- White Japan Anemone (Anemone japonica Honorine Jobert)
- Magnolia as standard (Magnolia liliiflora)
- Bearskin Grass (Festuca gautieri)
- Pendulum sedge (Carex pendula)
- Funkie (Hosta)
- Tibetan summer primrose (Primula florindae)
- Phlox divaricata
Add other design elements like stone pagodas, lanterns and statues. In the large Japanese-style gravel bed, a stone bench invites you to linger. Avoid geometric shapes when creating, because curved lines set the tone in the Japanese garden. Where it is not possible to integrate the element of water in real life, decorative gravel and chippings simulate the course of a stream.
Create alpine character

If a gravel bed has a slight slope or has small hills, an alpine landscape can be imitated here with stones and suitable plants. The following types and varieties make an excellent contribution to this design variant:
- Mountain pine (Pinus mugo)
- Snow Heather (Erica carnea)
- Rock plate (Ramonda)
- Gentian (Gentiana)
- Edelweiss (Leontopodium)
- Alpine bellflower (Campanula alpina)
Anyone who has ever been out and about in the mountains is aware of the fact that stones have a decisive influence on the picture here. Admittedly, the Alpinum is far removed from an orderly structure, as in the formal or Japanese gravel bed. As is usual in the great outdoors, preference should be given to a cheerful mix of shapes and colours, ideally complemented by mighty boulders from the region.
Solving the problem of dry shadows
Are you struggling with a spot in your garden under tall trees or in a shady corner where nothing at all wants to grow? Then the gravel bed is a good solution. In this case, however, only plants that do not attach great importance to permanent sunshine are suitable, such as the following selection:
- Spurge (Euphorbia amygdaloides)
- Waldsteinia (Waldsteinia ternata)
- Comfrey (Symphytum azureum)
- Foxglove (Digitalis ferruginea)
- Sedge (Carex)
- Red veil fern (Dryopteris erythrosora)
- goat's beard (Aruncus dioicus)
As long as there is no Egyptian darkness at the location, you can transform previously barren areas of the garden into a decorative eye-catcher with a gravel bed. Since a more nutrient-rich substrate is required in this case, the addition of bulkheads to the topsoil can be dispensed with.
Plant

Once the preparatory work has been completed and the selected plants are ready, the gardening work begins. The young plants that are still potted are placed in water with their root ball until no more air bubbles rise. Then place the plants in their place on the weed fleece to check the arrangement again. Lay out the gravel bed in these steps:
- Cut a cross into the weed fleece at the location of each plant with a sharp knife
- Using a hand shovel, create a pit with 1.5 times the volume of the root ball
- Put the potted plant in there and water it
- Close the fleece as completely as possible up to the root neck
- Finally, distribute the gravel in the bed. It is recommended to first lay the paths with the grit and then to spread out the gravel at a height of 5 to 8 centimeters.
Tip:
Distributing decorative gravel and grit is made easier if you protect each plant with its inverted plastic pot or bucket.
Tips for care
Once the gravel bed has been laid out and designed, you will spend much more time relaxing in it than caring for it. One of the outstanding advantages of this bed variant is its remarkable undemanding nature. The following care tips will show you how:
- Water the plants regularly during the period of growth
- Subsequently, only water during summer drought
- Do not leave autumn leaves for long, but remove them as soon as possible
- A start fertilization in the spring in the form of compost or organic liquid fertilizer is sufficient
As a rule, you can meet the requirements by pruning shrubs and perennials in early spring. Early-blooming shrubs are pruned to shape and maintenance immediately after flowering. Withered and faded herbaceous plants should be removed in autumn so that the ornamental gravel is not unnecessarily soiled.
Conclusion
A gravel bed brings variety to the horticultural appearance, solves location problems and is extremely easy to care for. Once established, the attention required is limited to dry watering, a little fertilizer now and then, and pruning if necessary. Reason enough to take a look at these DIY instructions to create and design a stylish gravel bed in just a few steps.
 garden editorial
 I write about everything that interests me in my garden.
Learn more about planting beds
Creating a flower bed: 9 tips for planning & designing
The transformation of a "naked" garden area into a lush sea of flowers doesn't just begin with the planting. Site conditions must first be checked and suitable plants selected. If you want to design a particularly beautiful bed, you can also add a pinch of creativity when laying it out.

The bed on the balcony - you have to pay attention to these things
Especially in spring, many people want to be active in their own garden. But not everyone is lucky enough to have the necessary property. Space is scarce and expensive, especially in urban areas. For this reason, the balcony is becoming a popular alternative for all hobby gardeners.

Building a raised bed: which stones are suitable?
A raised bed made of stones not only brings practical advantages because plants grow earlier and produce longer yields - it can also be an eye-catcher in the garden. Depending on the type of stone, however, there are significant differences.

11 Bed borders: what are the options?
There are many ways to border a garden bed. There are beautiful design borders, natural borders or those that are almost invisible. The following article briefly introduces the various bezel ideas.

Bed edging made of plants: Which ones are suitable as a bed border?
A bed border made of plants is above all temporary fads. With green vibrancy, numerous species and varieties give your ornamental and vegetable beds a picturesque setting. Let yourself be inspired by a colorful array of suitable plants with the potential for the perfect bed border.
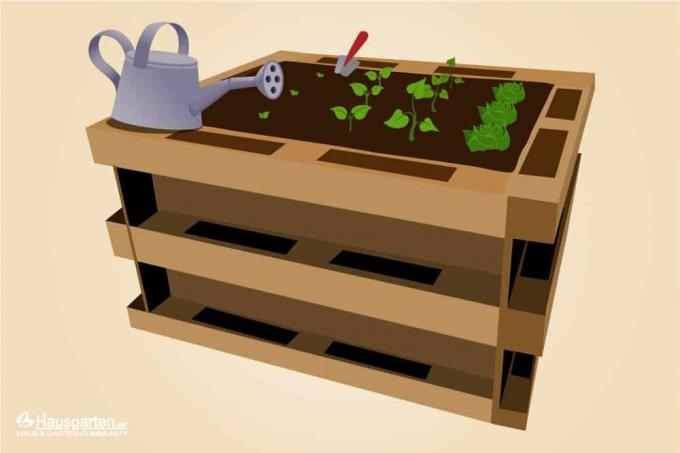
Build a raised bed from wooden pallets - the 3 best building instructions
Growing vegetables, flowers and herbs at table height makes gardening a relaxing, active pleasure. A raised bed made of wood is easy on the back, keeps voracious snails at bay and serves as a rustic eye-catcher. With a little manual skill, you can easily build a raised bed from wooden pallets yourself. The 3 best building instructions show how it works.