

table of contents
- The structure
- The material
- The tool
- The instructions - step by step
- Step 1 - Determine the top edge
- Step 2 - Determine the slope
- Step 3 - the base course
- Step 4 - the intermediate level
- Step 5 - The support profiles
- frequently asked Questions
A wooden terrace exudes warmth and invites you to enjoy a pleasant stay. For a permanent solution, however, it depends on the correct substructure of the wooden terrace. Our instructions will help you step by step to the perfect structure.
In a nutshell
- A frost-proof day layer of gravel keeps the terrace level and straight even after years
- Instead of complex foundations, the substructure can simply be created on concrete slabs
- a slight incline of 1 to 2% in the substructure guides rainwater safely away from the terrace
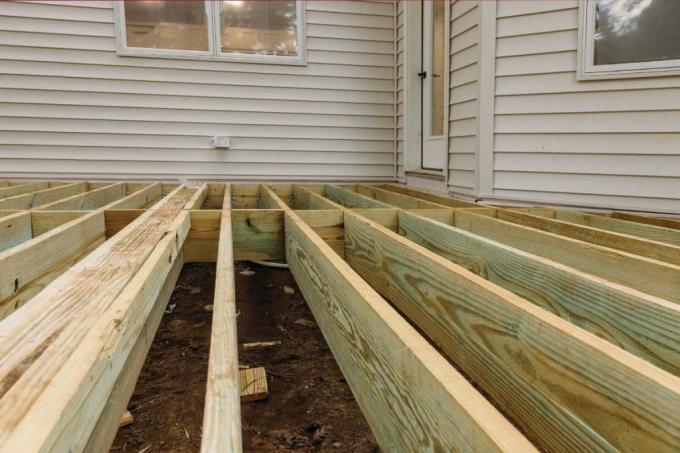
The structure
A wooden terrace differs fundamentally from other terraces with stone or tile coverings. In contrast to other types of construction, the visible surface is not the only “level” that also carries away rainwater. Instead, another level is added under the substructure, which drains water, absorbs loads and not least for the necessary rear ventilation to remove moisture and moisture from the sensitive timber construction cares. A typical structure, viewed from top to bottom, looks like this:
- Wooden floorboards (placed at a distance, due to shrinkage and swelling of the wood) - the actual floor covering
- Substructure made of wood and aluminum - ensures a distance to water and moisture and brings cohesion into the construction
- Securing the position of pavement slabs or similar (alternatively: concrete foundations)
- Base and infiltration layer made from a water-bound mineral mixture
The material
If you start building your wooden terrace "on the green field", the substructure will require a lot of building materials and aids:
- Split, crushed stone or mineral concrete
- Weed fleece (permeable to water), ideally black
- Concrete slabs, e.g. B. Pavement slabs 30x30cm, min. 3 to 4 inches thick
- Square timbers, min. 6x6cm, better 6 × 8 to 1x10cm, ideally the same material as decking
- alternatively: special aluminum profiles for terrace substructure
- Screws, e.g. B. 6 × 140 with matching dowels
The tool
With the right tool, the work can be done easily by hand:
- Shovel, spade, pickaxe
- Plate compactor
- Bucket, wheelbarrow
- Straight or Setting bar
- Guide line with pegs
- Folding rule, tape measure, laser level
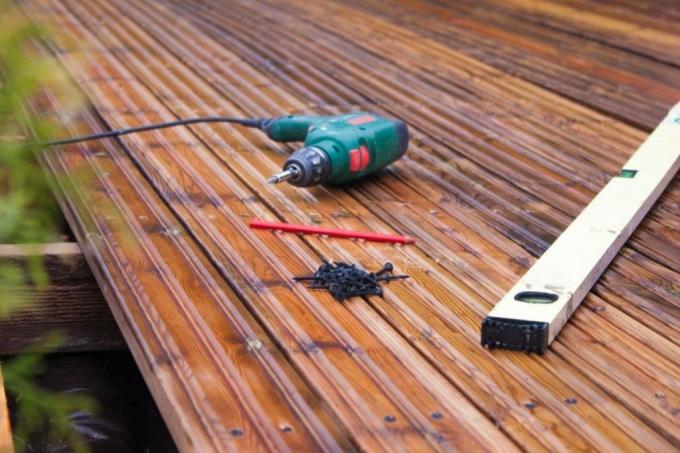
- Drill with masonry bit and wood resp. Metal drill
- Circular or miter saw with wood or aluminum saw blade
The instructions - step by step
Now it's time to put your project into practice using easy-to-follow steps:
Step 1 - Determine the top edge
So that your terrace is created at the right height later, you have to create the right heights with the substructure. To do this, proceed in such a way that you reach the planned height of the walking surface, e.g. B. from the patio door etc. determine off and mark on the house wall. Now do the math down:
- Thickness of the decking
- plus the thickness of the substructure
- plus thickness of the concrete slabs
- = Upper edge of the base course
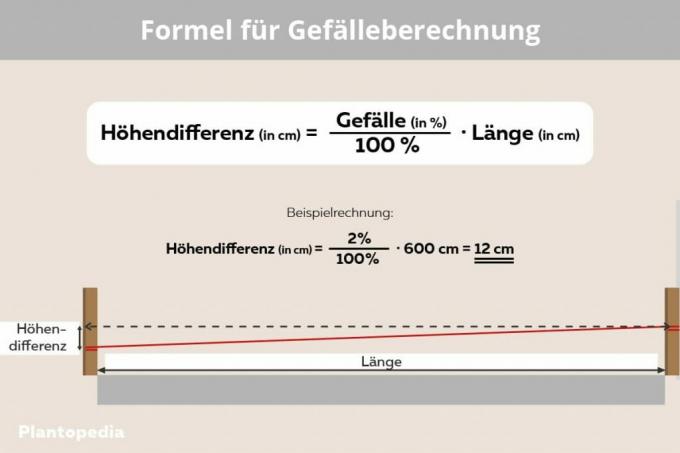
Step 2 - Determine the slope
Every terrace has a certain slopeso that rainwater does not stand still, but drains off quickly. Usually you choose a value of around 1 to 2 percent, i.e. one or two centimeters per meter of length. The slope away from the house is typical, so that water never has the opportunity to penetrate the house wall or patio door and possibly cause damage. On the other hand, the inclination over the shorter side leads to a smaller height offset between the high and low points.
When creating the base course, first orientate yourself to the lowest point and measure it. To do this, add the height difference between the high and low point (distance x selected slope in centimeters) to the previous calculation of the construction height. If a flat surface has been created at this level, work out the incline in the direction of the high point by applying material and using the setting rod to move it towards the marked high point.
Step 3 - the base course
Once the heights have been determined, create the load-bearing and water-draining layer for the substructure of your wooden terrace:
- Mark out the terrace + 60 centimeters on all sides
- Cut and remove lawn
- Excavate the subsoil to at least 60, better 80 centimeters below the surface, store the excavated material on the side or dispose
- Fill the pit in layers of 20 centimeters with crushed stone, KFT or mineral concrete and compact
- Make the top edge of the base layer on the side about 10 centimeters above the planned terrace, level off the surface with a straight edge and a laser spirit level
- then sloping downwards 45 degrees outwards
- Fill the remaining excavation above the embankment with excavated earth, later cover it with sod, press it on and water it

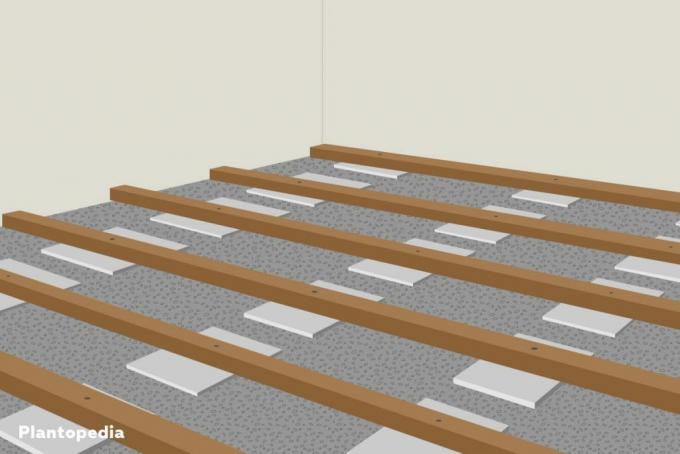
Step 4 - the intermediate level
Regardless of whether you are using squared timber or aluminum profiles for the substructure of your wooden terrace Use the mounting of the boards, it is very difficult to secure them in place on the gravel base layer build up. The use of foundations or other ground anchors would be possible. The use of concrete pavement slabs, on the other hand, is far simpler:
- Define the axes of the squared timber or aluminum profiles (supporting axes)
- at right angles to the later flooring
- laterally indented about 20 centimeters from the ends of the boards
- in between distances of 70 to a maximum of 75 centimeters
- Lay out the pavement slabs on the base layer in the supporting axes
- Distances in the axial direction of 1.00 meter each
- Check the top edges of the concrete slabs for evenness with a laser level and straight edge
- If necessary, align individual panels with a rubber mallet and gravel
- Cover the base course with concrete slabs over a large area with weed fleece, overlap the joints by 30 centimeters
Note: The weed control is not absolutely necessary. However, it creates a uniformly dark look between the later joints of your decking.
Step 5 - The support profiles
The core element of the substructure of your wooden terrace is now the level that will accommodate the later floorboards - the squared timber or aluminum profiles.
- Cut wood to the length of the terrace
- Align the squared timbers on the supporting axles and check the distances between each other
- Orientation: narrow side down / up, long side sideways (upright)
- Drill wood through concrete slabs twice per slab from top to bottom
- Transferring holes to concrete slabs
- Also drill through with a masonry drill and hammer in dowels
- Bolt timbers to concrete slabs to secure the position

Note: Proceed in the same way with aluminum profiles as the substructure. Make sure, however, that you use suitable saw blades and drills.
Done, you did it. Now you can align and screw the wooden terrace of your choice directly onto the construction you have created.
frequently asked Questions
There is no real “better” in your terrace construction. Aluminum gets by with lower installation heights, but is somewhat more difficult to handle. Wood needs more space for the same load-bearing capacity, but also forgives any inaccuracies in preparation.
If your subsurface has the necessary slope and the squared timbers over concrete slabs do not lie flat on the damp subsurface, water is not a real problem. Your wood may become damp and swell a little, but it dries quickly and shrinks again. Sufficiently large joints are important in the subsequent covering so that the swelling boards do not build up tension.
If you want to set up your wooden terrace on foundations, point foundations are created instead of the flat base layer. These then act like the concrete slabs and serve to accommodate the squared timbers. Depending on the distance between the foundations, the timbers must then be dimensioned significantly larger. However, the effort involved in this method is considerably greater than in the case of land foundation.


