Table of contents
- Properties of the EPDM pond liner
- pond planning
- preparations
- Calculation of the amount of foil
- Lay rubber pond liner
- Assemble foil strips
- Conclusion
There are foils made of natural rubber and the ones just mentioned made of synthetic rubber. EPDM should be used to protect natural resources. The film made from synthetic rubber is similar in chemical structure and physical properties to those made from natural materials. In terms of technical properties, it even surpasses the natural product.
EPDM pond liner is available in different thicknesses and widths. The individual lanes can be connected to one another, creating a large area. If you use the widest foil, a seamless installation of up to 930 m² is possible, which is already a large pond. Specialist dealers usually offer pre-cut or assembled pond liners that only have to be spread out.
Properties of the EPDM pond liner
- Long lifetime
- Extremely resistant to UV radiation
- High ozone resistance
- Pollutant neutral
- Environmentally neutral
- Biologically harmless
- Very flexible, stretchy, elastic and supple
- Lighter than many other pond liners
- Compatible with fish and plants
- Without plasticizer
- Contains no toxic substances
- Easy to process
- Suitable for all pond types
- Resistant to naturally occurring chemicals
- Not rhizome resistant
- Roll width up to 15 m
- With professional laying, there can be material guarantees of up to 20 years (depending on the seller). Shelf life is given as 30 years.
- There is one disadvantage, the higher price compared to other films.
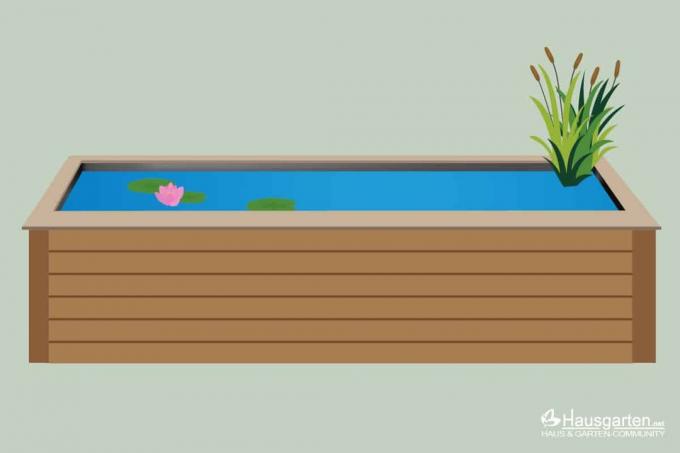
pond planning
Before laying the pond liner, the pond must of course be properly planned. The right place in the garden where the pond is to be installed must also be found. Of course, the shape and size of the planned pond and, above all, the depth are decisive. A pond does not have to be very large, although of course it is important to remember that the smaller it is, the more difficult it is to establish and maintain a biological balance. If you want fish in the pond and you want them to overwinter there, you have to plan for a sufficient depth. It must be at least 80 centimeters, but 100 centimeters and more are better so that the pond does not freeze to the bottom in winter and trap the fish.
preparations
Of course, one of the preparations is digging the pond. Its ground plan is “drawn” on the garden floor with sand, sawdust or string. Smaller ponds can be dug with a shovel and/or spade, for larger ones it is better to borrow a small excavator. It is important to excavate the various levels precisely. A natural looking pond should have a swamp zone, a shallow water zone and a deep water zone. The terraces should be as flat as possible, but the walls can be steep. Once the pond has been dug, the soil must be pounded really tight. All stones and roots can be removed at the same time. Anything that could damage the foil has to go. After fastening, the earth should no longer slip and trickle from top to bottom. Rain is unfavorable, it can undo all efforts. A pond fleece is then placed on the prefabricated pond. This serves as protection if roots or stones threaten the foil. It is important to lay the fleece in the opposite direction to the film strips so that nothing slips. The fleeces are available as rolls. They are rolled out in strips. The individual strips should overlap by about 5 cm. So that the fleece does not slip when the foil is laid out, it should be weighed down with stones at the edges.
Calculation of the amount of foil
To calculate the amount of liner, the length, width and twice the depth of the pond plus one meter for the edge are added up. If you don't know how to calculate, you can measure it. It is best to take a string and place it at the top of the pond. It is then led over all levels and up again on the other side of the pond. It is important that it is constantly in contact with the ground and lies flat. The cord is then measured. One meter for the edge is added to the value. The process must be repeated once for the length and once for the width. This is how you get the exact dimensions of the pond liner.
Lay rubber pond liner
The layout of the rubber film hardly differs from that of other films. It should be remembered that the pond liner is quite heavy, especially if you have chosen strong liner. For large ponds you should have enough helpers at hand. One more person is required for each 70 kilograms of foil.
- When delivering the foil, make sure that the pallet is placed as close as possible to the pond. In the case of medium-sized and large ponds, it is hardly possible to transport the pallet with physical strength. The film can weigh several hundred kilograms.
- Lay the film out as flat as possible without tension. It must not be stretched or kinked. It is carefully unrolled or unfolded depending on how it was delivered.
- Always start rolling out on the fleece at the top of the pond. Unfold the foil and pull it into the pond. The fleece must not slip. In the case of rolled goods, start at the edge of the pond, roll lengthwise into the pond and then pull up again on both sides of the pond embankment.
- Let the foil rest for at least an hour.
- Position the foil, i.e. lay it as planned. It is important that it survives abundantly at the edges of the pond.
- Establish the necessary connections for floor drains, pipe penetrations, pump connections and the like.
- Creases cannot be avoided when laying. It is then beneficial to pull together smaller folds towards the pelvis in such a way that a large fold is formed there. Fold them back.
- Water can now be let in. It is important not to fill the whole pond at once. In the beginning, a third is enough.
- The film now pulls itself into the correct position and can also slip a little again. If that happens, it needs to be tightened a bit.
- Now the pond can be left full. Many pond owners plant the plants beforehand because it is easier if there is only little water in the pond. Everyone can decide for themselves.
- It is better to leave the pond alone for a few days for settling.
- It is important to install a capillary barrier to prevent the loss of water that occurs automatically when the pond water comes into contact with the surrounding soil.
- Building a small ridge around the pond has proven effective. Immediately behind is a ditch. The fleece and pond liner must be laid over the mound and through the ditch. The ditch is usually filled with gravel or river pebbles.
- Alternatively, the pond liner can be attached to the edge with sand or stones. The border should be quite wide.
Tip:
In the case of particularly large ponds, it is sometimes better to have an excavator come and pull the liner over the dug pond sink.
Assemble foil strips
Rubber foil is also available on rolls, delivered by the metre. Anyone who cannot have the heavy lanes delivered to the edge of the pond, e.g. B. if there is no access to the garden for a vehicle, it can also work with the individual tracks and join them together. Unlike the other types of film, the webs are not glued or welded, they are vulcanized. You need a two-component adhesive and should follow the instructions exactly. It's actually not as complicated as it sounds.
- The area where the connection is planned must be cleaned and marked. The lanes must be approx. overlap by 7 to 8 cm, this must be planned for.
- Lay both foils dry on top of each other. Tensions must be avoided at all costs.
- Fold the top foil over.
- Clean both interior surfaces.
- If the surface is not clean, it is better to lay a separating fleece right away. Pond fleece increases the life expectancy of the liner. The fleece prevents dirt from getting onto the work surface.
- Apply primer to both surfaces.
- Put the tape on it. Use the palm of your hand to press the so-called connection tape lightly onto the lower surface of the foil.
- Fold over the second primed area.
- Pull off the tape's protective film on the side. Do this very carefully. There must be no residue left on the tape.
- Press both surfaces firmly. Then roll over it with a roller.
Conclusion
Rubber liner is the most durable of all pond liners. A big plus is the lack of plasticizers, which unfortunately are still often found in other films. Small ponds can easily be laid out with this EPDM foil. With large ponds there are sometimes difficulties due to the heavy weight. Helpers are important here. The higher price of the film is a disadvantage, but the extra cost is worth it when you consider the long shelf life.
 garden editorial
 I write about everything that interests me in my garden.
Learn more about creating a pond
Build a high pond yourself: 15 tips for creating it yourself
A laborious excavation can be avoided with a raised pond. If you want to build and create it yourself, you should pay attention to numerous details. With the right tips, the project runs smoothly and long-term joy is guaranteed.

Build a duck coop yourself 7 tips for a duck house
Building a duck coop yourself is essential if you want to keep ducks yourself. But a protective shelter is also a practical and valuable aid for wild ducks. With our tips for building a duck house yourself, it's easy.
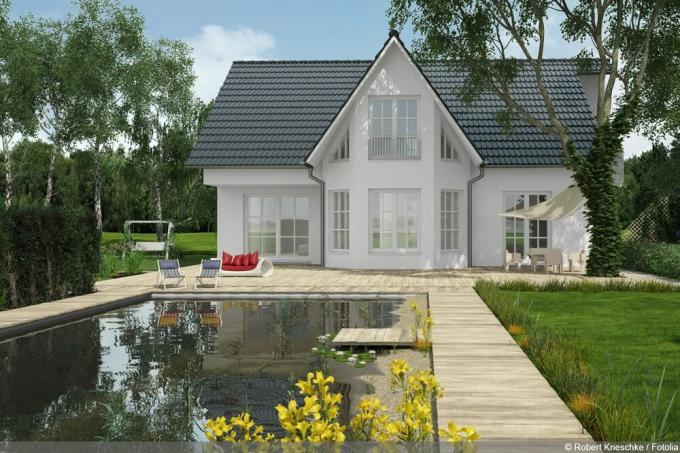
Make a swimming pond out of a garden pond: rebuild in 8 steps
Gardeners with manual skills transform the pond into a natural swimming paradise for the whole family. Thanks to the living sewage treatment plant, the private water world works in an exemplary manner without chemicals. This guide explains how to convert your garden pond into a swimming pond in 8 steps.
Fasten the edge of the pond: this is how the pond liner gets hold on the pond bank
Filled with water, maybe a few fish in it and attractively planted, a pond is a small piece of paradise in your garden. In order for this to remain so for a long time, the correct attachment of the edge and the pond liner is crucial.
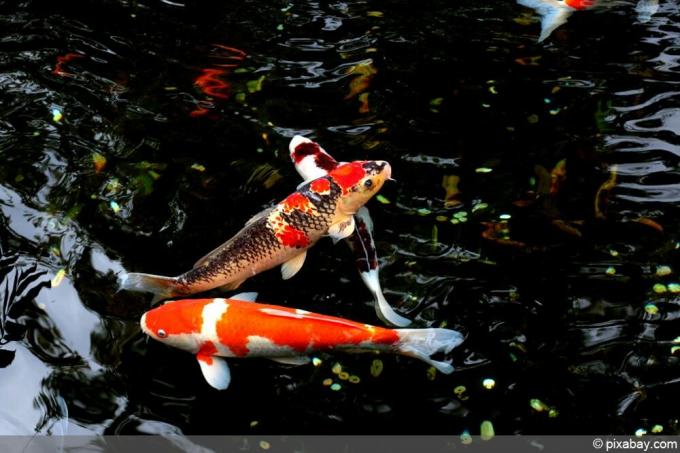
Creating a koi pond: requirements for size and filter system + costs
Kois are not only particularly noble, but also very demanding fish. Because the animals have certain requirements for their habitat, which must be taken into account when creating the koi pond.
Build your own indoor pond – instructions in 10 steps
There are big differences in indoor ponds. A lot is possible, starting with plastic shells, such as those used in the garden, through brick and tiled ponds similar to a bathtub, to liner ponds in a wooden frame. Anyone who has never dealt with indoor ponds will be amazed at what some people come up with. Of course, the vessels can also be used for rooms, which are referred to as mini ponds or balcony ponds.