table of contents
- Microgreens
- Requirements
- Grow microgreens yourself
- 1. Choose location
- 2. sowing
- 3. care
- 4. harvest
It used to be the self-bred Cress from your own windowsill a welcome addition to bread, salads and soups. Today, on the other hand, we speak of the microgreen trend, but ultimately mean nothing else. Numerous vegetable and herb plants offer a high productivity and - much more importantly - an extremely high vitamin and nutrient content due to the harvest shortly after germination. We'll tell you how you can grow your superfood yourself and then even without soil.
Microgreens
Small vegetables, young plants or even superfoods - microgreens are given a variety of descriptions. All in all, these are "normal" herbs or vegetables that are harvested shortly after they have sprouted. What one should not confuse this trend food with are sprouts. Contrary to the sprouts, microgreens are allowed to develop their first leaves and shoots. As a result, the nutrients from the seed are attacked by the onset of growth. However, the offer of the young plants is supplemented by other valuable content through the onset of photosynthesis and metabolism. Frequently encountered examples of gladly taken plant species are:
- Amaranth
- basil
- cauliflower
- Beans
- broccoli
- Watercress
- Buckwheat
- dill
- peas
- fennel
- coriander
- cress
- mint
- Pak choi
- radish
- Rocket
- Beetroot
- Red cabbage
- Cut salads
- mustard
- Wheatgrass

Requirements
This knowledge about the what and why is essential when it comes to the correct cultivation of the trendy microgreens. Although these are "full-fledged" plants, the following properties make them very suitable for cultivation without soil:
- There are nutrient reserves in the seed, no supply from the growth substrate necessary
- An external supply of moisture is required, so the growth medium is primarily used as a water reservoir
- Due to the onset of growth in size, there is a need for holding options for the roots
- High heat requirement for germination and first sprouting
If you take a closer look at these requirements, you come to the result that it will not work entirely without a growth substrate, but that cultivation can certainly succeed without soil. The most important thing is the search for a suitable replacement medium on or on. in which the individual seeds and young plants find optimal conditions. Primarily, the media in question should meet the following requirements:
- Water storage capacity
- Water permeability to avoid waterlogging
- Fibrous or porous structure to hold the roots
From this manageable but indispensable list of requirements emerges a whole Abundance of possible plant substrates that can be used for growing microgreens as self-grown superfood suitable:
- Coconut fiber
- Clay granules, e.g. B. Perlite
- Mineral nutrient substrate, e.g. B. Vermiculite
- Sawdust
- Cotton wool
- Kitchen paper (only for fast-growing varieties, e.g. B. Cress)
Grow microgreens yourself
If we are clear about the basic principles of microgreens, as well as possible substrates for cultivation, we can start with the concrete implementation. Only a few tools are required to ensure that the cultivation is problem-free and safe:
- Planter bowl, e.g. B. flat saucer, wide flower pot or something similar
- Plant substrate as described
- Seeds of the selected plant species
- Spray bottle or small watering can with a very fine pouring sieve
- Scissors (for harvesting)
If all things are ready, only a few steps are necessary until the journey from the seed to the edible microgreen can begin:
1. Choose location
In order to germinate, the seeds need warmth and moisture above all else. Once the sprouts are growing, there is also light as the basis for photosynthesis. Suitable locations are, for example:
- Windowsill over radiator
- Floor areas behind French doors (especially with underfloor heating)
- In summer: south-facing locations near the window, then also without heating
Placing it at the window has the additional advantage that the planter bowls catch the eye again and again and so the control of the optimal humidity is not forgotten.
Note: It would actually be possible to initially concentrate on a warm location and only take the brightness into account after germination. For the sake of simplicity, however, we will look for a location right from the start that takes both into account. This eliminates the need to move the planter and the focus of care is left with the right moisture.
2. sowing
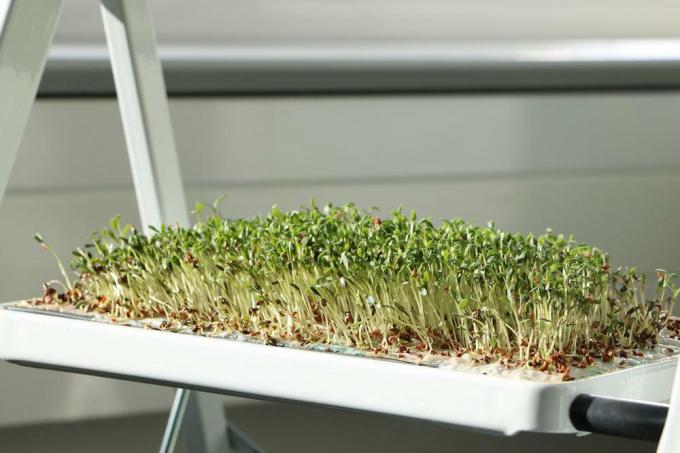
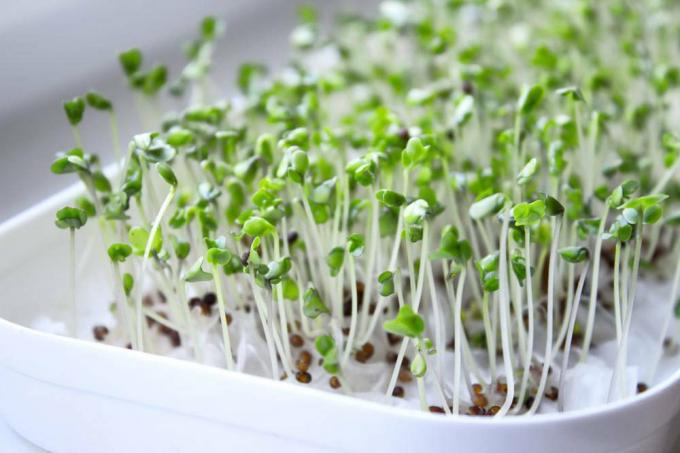
Once the location has been determined, the planter can be placed. Wide, flat containers that offer the largest possible cultivation area are ideal. A high substrate thickness is not required due to the very early harvest, as the roots only penetrate a little from the surface into the depth of the substrate during the short growth period. There is also no need for water drainage holes and a coaster, as watering or watering is unnecessary. Keeping them moist should be done at short intervals with little watering.
- Spread the substrate evenly in the planter and press it down lightly
- Pressed substrates, such as B. Coconut fibers, loosen and crumble beforehand
- Provide very thin substrates such as kitchen paper in two or three layers
- Moisten the substrate
- Spread the seeds evenly on the substrate and press lightly
- Lightly pour over or spray

Note: It is quite sufficient to lay the seeds on the substrates. An impression or It is not necessary to sprinkle with substrate. In this way, the seeds receive sufficient air and warmth right from the start, while the roots find their way into the substrate anyway after germination.
3. care
Once the seeds have been sown, the maintenance of the microgreens is essentially limited to keeping the seeds and plants moist:
- Pour the substrate regularly from above
- Avoid waterlogging (due to Mold and seeds floating away)
- Optimal: spray with fine water mist
- Avoid drying out the seeds
Other care measures are usually unnecessary due to the very short growth time until harvest. Especially the search for or You can usually safely remove protection against diseases from your maintenance repertoire for microgreens. Here, too, there is simply not the time that pathogens or parasites need to spread to the plants.
Note: The actual growth time of the seedlings can vary significantly due to the dryness and age of the seeds, temperature and humidity, as well as the selected variety. The waiting time from sowing to harvest can be from two to three days (cress) to one and a half to two weeks (beetroot). In general, it can be said that all plants that take a particularly long time in "normal" cultivation are also among the slower candidates as microgreens.
4. harvest
Finally, the harvest of the now “fully grown” microgreens is due. Since these are not fully ripe crops by definition, it is of course difficult to find the right time to harvest. It should be said that the main problem is that the harvest is too late. Because too early would simply mean “harvesting” the seeds yourself. With the formation of the cotyledons, the plants are fully usable for a healthy and nutritious diet and can therefore also be harvested.
If, on the other hand, the harvest comes too late, the nutrients from the seed have already been used up and the plant begins to suffer from the deficiency. A good harvest time is therefore reached when the plants have developed the first pair of leaves after the cotyledons. Then the plant still has a complete supply, but also sufficient green matter for good usability as food. The actual harvest is then very simple with the scissors. Cut just above the substrate, the young plants are best eaten fresh.


