
table of contents
- Materials and utensils
- preparation
- Setting fence posts: instructions
- Alternative: 2K synthetic resin mortar
- frequently asked Questions
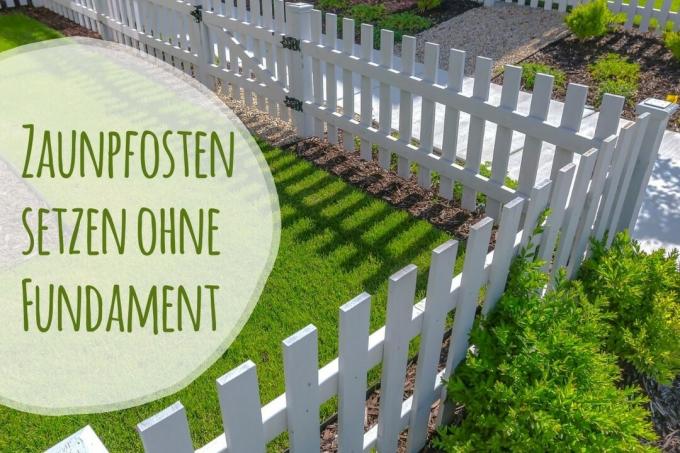
Putting fence posts without concrete and foundation is easy with a suitable alternative. With the right guidance, you can have your fence Realize it much faster and with little effort.
In a nutshell
- Fence posts can be set inexpensively with impact ground sleeves
- the sleeves do not require a foundation or frost protection
- they are aligned with a spirit level for the correct stand
- alternatively, a 2K synthetic resin mortar can be used for setting
Materials and utensils
If you want to do without the concrete foundation for the individual posts, the use of so-called impact ground sleeves is a good idea. Impact ground sockets are usually made of metal brackets that are hammered into the ground and do not require any foundations. For this purpose, they are provided with ground anchors that hold the posts in the desired position even when exposed to weather or external influences. They are particularly suitable for fences with a maximum height of 150 centimeters. All projects over 150 centimeters should be equipped with a foundation for safety reasons. In order to implement the procedure, you will need the following aids and utensils:

- 1 x impact ground sleeve per fence post
- Impact tool or impact aid
- Wooden or rubber mallet
- Spirit level
- Guideline
- Pegs
- Tape measure or roll measure
Since you will have to pound the pods into the ground on your own, you should seek help from someone if you are not strong enough yourself. When choosing the sleeves, it is important to pay attention to the diameter and shape of your posts. The sleeves are available in numerous sizes and in a rectangular or round shape, which is suitable for different posts. The drive-in tool is a bolt that, depending on the manufacturer, is either enclosed with the sleeves or has to be ordered separately. You can also make this yourself if you have wood available. You only need a block with a thickness of at least five centimeters, which sits in the pot of the sleeve. The aid protects the metal from the hammer blows.
preparation
If you want to set fence posts with hammer-in ground sockets, you need to prepare the project well. This ensures that the individual posts are seated correctly and not at an angle. One of the most important steps is the position of the sleeves. They must be in a straight line and should not deviate, otherwise inaccuracies can quickly arise, which have a negative effect on the structure. To prepare, do the following:
- Make a mark for the first fence post
- use pegs for this
- Use a tape measure to set the distance to the next marking
- Stretch the cord in between
- repeat until the desired fence shape is achieved
With the help of the cord you can see exactly whether the fence has the desired shape. If not, you can adjust the individual nails, which also changes the guide line. Changes can be visualized immediately, which significantly simplifies planning. In addition, before setting the fence posts, check whether they are damaged. Less often this can happen through transport or storage. Replace damaged sleeves.
Tip: In order to increase the stability of the finished fence, there should be a maximum distance of 250 centimeters between the individual posts.

Setting fence posts: instructions
After the preparation, you can start setting the fence posts. To do this, choose a day with no precipitation so that you don't have to work in the wet. However, the soil should not be too dry, otherwise it will be more difficult to drive them into the soil. Once you have chosen a day, follow these instructions:
- Position the drive sleeve at the marking
- insert the knock-in aid into the pot
- drive the case into the ground with strong blows
- Align with the spirit level in between
- later this is no longer possible
- insert the fence post into the sleeve to align it
- Use the fence post as a starting point for a spirit level
- Knock the sleeve into the bottom up to the pot
- repeat for all sleeves
After this procedure you can immediately insert the posts into the sleeves and fix them in place.
Note: If you want to create a corner with the drive-in sleeves, you will need two struts and two more sleeves. The struts are attached to the corner post at a 45 ° angle from both sides and to the floor via the sleeves to improve stability.
Alternative: 2K synthetic resin mortar
The more modern alternatives of a concrete foundation and the drive-in sleeves, however, also include the use of 2K synthetic resin mortar. This is a mixture based on 2-component adhesives that are specially used as a substitute for concrete in natural substrates. The biggest advantage of the material is the small amount that is required. An average of 300 grams of the 2K synthetic resin mortar is required for 25 kilograms of concrete. The mortar is available from manufacturers such as Quikset for 15 to 20 euros for one kilogram. The application is specially designed for posts, signs and similar devices. How to use the mortar can be found in the following instructions:

- Dig holes for posts
- The depth of the hole is specified by the 2K synthetic resin mortar
- Place the post in the hole
- Align with a spirit level
- Hold or fix post
- Mix 2K synthetic resin mortar according to the manufacturer's instructions
- fill the required amount into the holes (calculate beforehand)
- Do not move the stake for 3 to 5 minutes
- the 2K synthetic resin mortar spreads out as foam
- Above-ground residues are cut back after 10 minutes
- use a knife for this
- Cut to 3 centimeters below the surface
- then let it harden
- Duration in warm temperatures: 90 to 120 minutes
- Duration in cool temperatures: 24 hours
- then fill up to the edge of the lawn with soil
This approach is particularly suitable for smaller projects, as the required amount of 2K synthetic resin mortar can be expensive. Still, the material has some advantages. No frost protection is needed and it is environmentally friendly and can remain in the ground even after the post is removed. In addition, it no longer spreads after use and can be easily dug up.
frequently asked Questions
If you do not want to use sleeves, you can use so-called impact posts. Impregnation posts are made of durable and mostly impregnated wood and are sharpened so that they can be driven into the soft ground with a large hammer. If the ground is hard, a hole should be dug beforehand. For a fence 1 meter high, you must drive the posts at least 40 centimeters deep. Protect the top of the post with a board.
Yes, all you have to do is prepare the floor accordingly. The metal could bend due to the solid base and render the sleeve unusable. You can loosen the soil beforehand with a spade or auger to protect the pods. This step also makes it easier to remove stones that are too large and leave no room for the sleeve. You can even swap the soil if the soil is extremely firm or rocky.
Soils must be firm enough for the ground sockets and resin to sit securely. If the ground has been freshly filled or dug up deeply, it must first sit down before you can put the project into practice. Because of this, be sure to check exactly how firm the floor is. If it moves too easily, you will have to wait a little longer, otherwise the fence posts will tip over and you will have to repeat all of the work.