

table of contents
- preparation
- On grit
- On pedestals
- With stone glue
- On paddock plates
- frequently asked Questions
Terrace slabs concrete laying is seldom recommended because the panels are easier to lay on unbound subfloor. In addition, the water drainage is ensured. However, it can also be applied to concrete.
In a nutshell
- There are four different options for laying the panels
- the water drainage must be ensured in any case
- which method is optimal depends on the local conditions
- Expansion joints should be taken into account
- there are also systems for tenants that can be easily dismantled and reused
preparation
If you rent a house or apartment and already have a concrete surface available as a terrace, you usually cannot simply have it demolished. However, this is usually not necessary, because the terrace slabs can also be laid on the concrete with the right preparation. The following preparatory steps are necessary for this:
1st slope: First of all, it must be checked whether the concrete surface can ensure efficient water drainage. Depending on the type of tile selected, the surface should have a slope of two to three percent. If this is not the case, a slope with drainage concrete must first be created. When the layer has dried, the slope should be checked again.

2. Expansion joints: Expansion joints should be marked in order to apply the selected type of board. If these are already present in the concrete surface, they can be used as a guide when laying. The joints also support the drainage of the water.
3. Cleaning: In order to achieve optimal results, the concrete surface should be thoroughly cleaned before the terrace slabs or the underlying layer are applied. Sweeping is sufficient for light and dry soiling. In the case of heavier soiling, a sandblaster or a Kärcher should be used to create a clean surface.
4. Isolation and insulation: If there is a living room, cellar or garage under the concrete layer, additional insulation can be useful. In advance, however, it must be checked whether the underlying roof can safely support the weight of concrete, slabs and additional materials.
5th method: Depending on the method chosen, various tools are required that should be available before starting work.
On grit
A simple and inexpensive way of laying is to spread gravel. With this guide, just these simple steps are all it takes to do it:
If necessary, first provide the edges of the concrete surface with metal rails, which should protrude at least four centimeters at the upper end. These form a frame and prevent the gravel from spreading outside the concrete surface.
The grit must be applied at least three centimeters thick and can also be used to level the slope. Due to the planned joints, the water can still flow off the bonded surface. For this purpose, water drains should be planned on the sloping side.
The panels can now be attached to the split bed. It is imperative to ensure the correct distances to ensure that the water drains off. The introduction of joint rails makes this work easier and offers protection for the concrete and the terrace slabs.
On pedestals
Laying slabs on so-called pedestals is extremely easy and has the advantage that Both the brackets and the plates can be easily removed and reused permit. If you rent, you can save not only work and effort, but also money.
Pedestals are - mostly height-adjustable - brackets that are screwed onto the concrete floor. A drill with appropriate attachments is therefore required for fixation. Then proceed with this practical guide as follows:
- Depending on the size of the slab, the brackets are fixed to the concrete surface at regular intervals.
- In order to achieve a level surface or the required slope of two to three percent, the heights of the individual pedestals must be precisely coordinated with height-adjustable variants. A folding rule is usually the best choice for this. In addition, however, a spirit level can also be used in order to be able to better coordinate parallel pedestals
- When setting and fixing the pedestals, care must be taken that the middle pieces between the panels, edge and corner pieces are at the correct distances from one another.
- If all pedestals are in the correct position, the terrace slabs are simply placed on top and pressed into place.

Tip: Another advantage of pedestals is that they automatically create a gap between the concrete surface and the floor slabs. This allows the water to flow away unhindered. In addition, there are height-adjustable models on the market with which optimal adjustments can be made. Furthermore, the application of additional drainage concrete to create a slope can be saved, which is a clear plus point in terms of costs, time and effort.
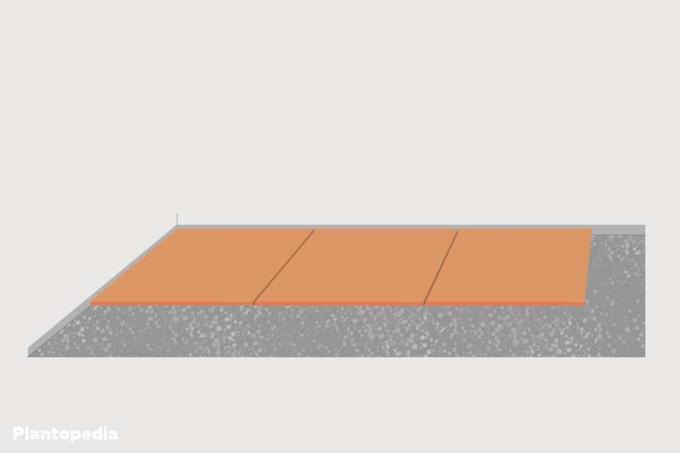
With stone glue
Drainage concrete can be used as a stone adhesive for a particularly permanent and firm attachment of the floor slabs to the terrace. Standard concrete is not recommended as damage from water and frost can occur here. The following instructions show what to look out for.
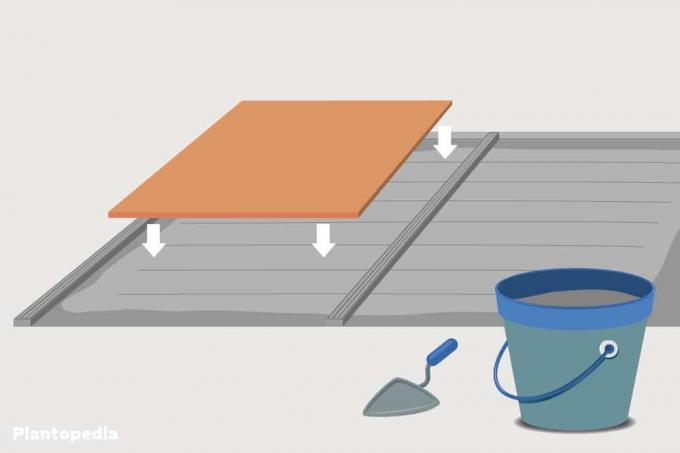
- Lay drainage rails for orientation in order to secure the water drainage and to be able to align the floor slabs faster and more safely.
- Mix the drainage concrete and let it thicken. Pay attention to the manufacturer's instructions.
- Apply the drainage concrete between the rails with a trowel. Only use and apply so much of the moist mass that two to four panels can be laid on top. Because only a thin layer is applied, it dries relatively quickly and hardens in the process. This can reduce the durability of the stone adhesive.
- After laying the stones, a spirit level should be used to check whether they are level. Otherwise, individual slabs on the terrace can develop into a trip hazard. The check should take place when the drainage concrete or stone adhesive is still moist and malleable, so that any necessary corrections can be carried out more easily.
On paddock plates
The main purpose of paddock plates is when keeping horses to secure lawns or meadows. However, they can also serve as a substrate for floor slabs, as they create a gap between the concrete substrate and the slabs themselves.
Since they are mostly made of flexible materials, they withstand pressure well and act as insulation against bumps and kicks. However, the attachment of the paddock panels and the floor panels on them is more difficult. A combination of pedestals and paddock plates can therefore be ideal. The paddock plates act as insulation, while the pedestals provide the necessary support on the concrete floor. The following instructions show how this combination works:
- The terrace is cleaned thoroughly.
- The pedestals are installed on the terrace at regular intervals so that the corners of the floor slabs can be attached to them.
- After the paddock slabs have been fixed, the terrace slabs can be laid as described in the other examples.

frequently asked Questions
If the floor slabs are on a concrete substrate and attention is paid to the water drainage and sufficient expansion joints, cleaning is correspondingly easy. Stone slabs on the terrace can be cleaned very easily with a Kärcher. Even from rough surfaces, more difficult soiling, such as moss or trampled dirt, can be removed comparatively easily with this device.
That depends on the material in question. Wood stretches more than plastic or stone. Therefore, you should pay attention to the manufacturer's instructions for the respective distance or the joint width.
There is no general answer to this question. In any case, you should ask the owner, landlord or apartment or property management company whether such a redesign is possible. In some cases it can be determined that the installation must not be carried out by yourself, but must be carried out by specialists. In other cases, a cost sharing can even be offered if the floor slabs remain on the terrace after moving out.


