table of contents
- care
- Location
- Substrate
- Watering and fertilizing
- Multiply
- Seeds
- Pollinate
- Growing the seeds
- Cuttings
- To harvest
- Ferment
The vanilla, bot. Vanilla, is a genus of the orchid family (Orchidaceae). All species of the genus are evergreen, perennial climbing plants. The best-known type is the spice or real vanilla (Vanilla planifolia), from whose seed capsule, which is popularly known as pods, the spice vanilla is obtained. You can get vanilla orchids from growers or in good specialist shops. With a little skill, you can also grow vanilla yourself.
care
In order to grow young plants from a vanilla orchid, the mother plant needs good care. Since vanilla is native to tropical and subtropical regions, it needs a lot of light and one high humidity. It also has to be watered and fertilized regularly. The plant does not need a cut.

Location
A vanilla plant does best in one Glasshouse, because this is where the optimal climate for the plants can be created. Because Vanilla planifolia needs a location with:
- 25 ° C to 28 ° C
- high humidity (80 percent)
- lots of light, but without direct sunlight
In addition, you need a climbing aid, which should not be too tight, because the tendrils of the plants are between ten and fifteen meters long.
An alternative to the greenhouse is the east or west window of living rooms or the bright bathroom. In these, however, the temperatures should not fall below 18 ° C and should be constant. You should also be prepared for the indoor culture that the plants can only rarely be made to bloom.
Substrate
Vanilla thrives best in orchid soil. If you want to put together the substrate yourself, a mixture of pine and conventional potting soil is recommended. It is important that the substrate has the following properties:
- slightly damp
- crumbly and
- air permeable
tip: When planting, the substrate is only draped lightly around the roots so that the roots can still breathe. Under no circumstances should you press the substrate.
Watering and fertilizing
Only use lime-free, lukewarm water for watering. Rainwater is ideal. When watering, make sure that the substrate is always slightly damp. The soil may dry slightly on the surface of the pot, but it should always be slightly damp on the bottom of the pot. Also, do not give the orchid too much water, because the plants cannot tolerate waterlogging.
In order to be able to meet the plant's desire for high humidity in living rooms, you should regularly spray the vanilla with lukewarm, lime-free water. You should also place the plant and the planter in a wide container filled with water.
It is fertilized every two weeks from March to September with a special, low-salt orchid fertilizer. In winter, when the vanilla takes a break, there is no fertilization. You should also reduce the amount of water you use, but the orchid must not dry out.

Multiply
The vanilla orchid can be propagated with seeds or cuttings, although propagation with seeds is not so easy for the hobby gardener.
Seeds
In order to grow vanilla plants from seeds, you need to obtain seeds from the mother plant. These are in the pods, i.e. the fruits of the vanilla orchid. This means that the plant must first be made to flower. If this is successful, then it has to be pollinated by hand.
Pollinate
In order for manual stunning to work, you must always be on your guard, because the time window for this is very tight. You only have a few hours. The vanilla bud opens in the morning hours and dies by the evening of the same day. Therefore, you should pollinate them between 6 a.m. and 12 p.m. To pollinate the hermaphrodite flower, proceed as follows:
- Flower with a pointed stick, e.g. E.g. a toothpick, carefully slit open on one side
- Pick up yellowish pollen from the male genitals with a toothpick and transfer it to the stamp underneath
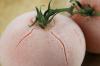
If pollination worked, the flower will turn into a long, green pod after six to nine months.

Growing the seeds
One vanilla pod contains around a million seeds. Therefore, one might think that reproduction is not a problem. However, this is not the case. Vanilla seeds need a partner for germination, the Mycorizza mushroomwith which they enter into a symbiosis. Only when this is in the growing medium do the tiny seeds start to germinate. But there is another hurdle. In order for the sowing to be successful, it must be carried out in a completely aseptic Environment.
Since this environment is difficult to create for the hobby gardener, there is an alternative that is promising: sowing in the pot next to the mother plant.
To do this, proceed as follows:
- Sprinkle seeds on the substrate of the mother plant
- Sieve very thinly with peat sand or vermiculite
- Spray finely with lime-free water
tip: Spread the seeds generously, as a high failure rate can still be expected.
Then place the pot in a bright, but not full sun, location. The optimal temperature is 28 ° C. It is watered regularly, but you must not fertilize during the germination phase. If the mycorizza fungus is present in the substrate, you should see the first seedlings after 6 to 30 days.
Cuttings
In comparison to cultivation with seeds, propagation with head cuttings is easy. Proceed as follows:
- cut off a head cutting about 40 centimeters long
- Remove leaves on the lower side
- Put the cutting in a pot with potting soil
- Tie the cuttings to a climbing aid
- Slightly moisten the potting soil with a spray bottle
- Put a glass cover or transparent plastic over the pot and cutting (humidity)
- Keep the substrate slightly moist (spray the leaves)
- Place the cutting in a light spot without direct sunlight (temperature: 25 ° C)
If you discover a new shoot on the cutting, the cutting has taken root and propagation has been successful.
tip: You can also put the cutting in a glass with water to root.
To harvest
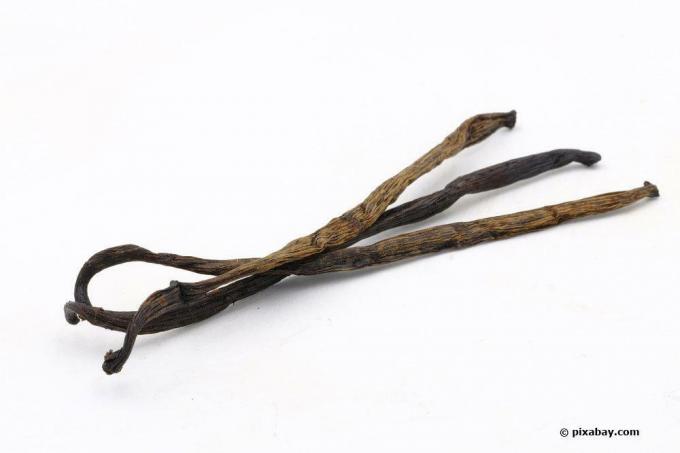
Vanilla plants that you have grown yourself will only bloom after several years at the earliest. So it takes a little patience before you can use your own vanilla in the kitchen. In addition, as with seed propagation, you have to pollinate the flowers by hand. The vanilla pods are harvested while they are still green. If you have already turned yellow, it is too late and the pods will burst.
Ferment
In order for the pods to get their vanilla-scented aroma, they have to be fermented. To do this, they are briefly immersed in hot water and then stored in a moist environment for several weeks. To do this, you can wrap the pods in damp cloths and place them near a heater.
During this process, the pods slowly turn brown. The pods then have to dry for several weeks. Alternatively, you can also dry it in the oven at low temperatures. Now the brown pods are stored dry and get the popular aroma.