table of contents
- Strawberries propagate through runners
- 1. Need for propagation
- 2. Suitable runners
- 3. Optimal time
- 4. Temporarily plant cuttings in pots
- 5. Plant out young strawberries
- Strawberries multiply by sowing
- 1. Wait for the seeds to ripen
- 2. Win strawberry seeds
- 3. Store strawberry seeds until sowing
- 4. Break the germ inhibition
- 5. Pre-soak strawberry seeds
- 6. Sow strawberries
- 7. Prick out the seedlings
- 8. Plant out young plants
Young strawberry plants produce plenty of fruit, but they wear out quickly. After just a few years, they have to be replaced with fresh specimens to ensure a consistently good harvest. But young plants, whether for new planting or expansion of an existing strawberry area, do not always have to be bought at high prices in stores. The offspring can come from the home garden free of charge. You have two options for propagating strawberries: using the numerous runners and sowing seeds.
Strawberries propagate through runners
Most strawberry plants help us to use this simple method of propagation ourselves, as they form abundant runners every year. These are often referred to as Kindel because they develop into mini strawberry plants after a short time.
In connection with the propagation of strawberries, there is often talk of offshoots, albeit these Designation in the narrow sense is not applicable, as no offshoots are cut from the original plant will. However, since this term has become firmly established in the hobby area, it can also be found in the following instructions.
1. Need for propagation
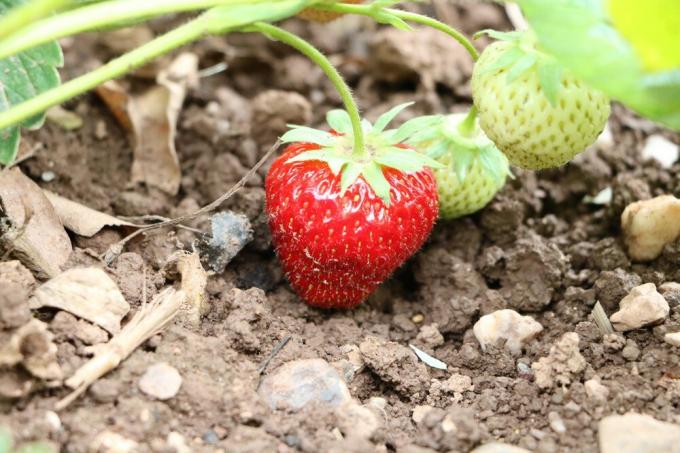
If you create a strawberry patch in your garden, you will be able to harvest plenty of red fruits in the first year - provided the location and care are right. How long the good fruiting will last in the following years cannot be precisely predicted. Depending on the variety, the harvest can be satisfactory for two, three or four years before the plants tire. As soon as you notice that the yield is declining, you should propagate the strawberries from cuttings and create a new bed.
Of course, you can also multiply strawberries from foothills at any time, for example with your own To enlarge the strawberry bed, to give away young strawberry plants to friends or to close window boxes and tubs with them plant.
tip: Many cultivated strawberry plants from the trade only produce a good harvest in the first year and are only a disappointment afterwards. Old varieties are more persistent and always worth considering. For example the tasty kitty Schindler.
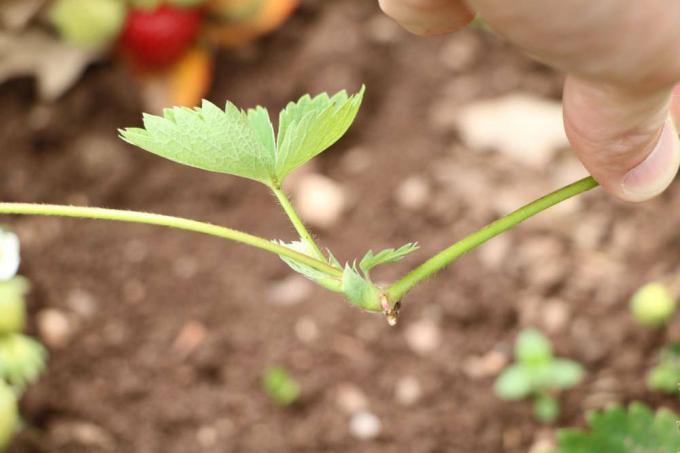
2. Suitable runners
From around mid-May, most strawberry plants form the first tendrils in addition to their flowers and fruits, on which runners soon develop. These steal a lot of energy from the mother plant and you should only leave them on when you need them to propagate the strawberries.
Each runners are genetically identical to the mother plant, so you should only use runners from well-bearing specimens multiply. Plants that bear only a few fruits invest their energy in the formation of strong runners. Don't let that fool you.
- Mark high-yield mother plants with a stick
- let their strongest runners grow
- the runners that grow close to it are ideal
- remove all other runners
tip: If you marked a well-bearing shrub the previous year and now want to get many offshoots from it, you should remove all of its flower stems. In this way, the plant can concentrate all of its energy on the runners, making it easier for you to successfully propagate the strawberries.
3. Optimal time
The optimal time for replanting Fragaria, as the strawberry is botanically called, is late summer. August as the planting month promises the best harvest in the following year, but September can still be used for transplanting the Kindel.
You can leave the cuttings on the mother plant until then, where they will continue to grow, connect to the ground and take root. At the time of transplanting, these young plants are simply dug up together with their roots. This procedure is very time-saving. Alternatively, you can also carry out step 4 of the instructions.
4. Temporarily plant cuttings in pots
Instead of simply letting the runners of a Fragaria grow freely until they are transplanted, you can do it In the meantime, also plant in a separate pot, whereby the connection to the mother plant remains. The runners quickly take root in their own “pot rich” and develop into a strong plant. For each runners you need an unglazed clay pot, which should have a diameter of about 10 cm. Plastic pots don't do well because their walls are impermeable. Potting is done as follows:
- Choose from several runners of a mother plant the one that is closest to it. It shouldn't be rooted yet, but it should already have some strongly developed leaves.
- Carefully push the stalk to one side.
- Dig a hole deep enough to accommodate the clay pot at the spot where the runners used to stand.
- Fill the clay pot with the excavated material, leaving about 2 cm free. If the garden soil is poor in humus, you can upgrade it with normal potting soil or leaf compost.
- Plant the runners in the middle and flat in the prepared pot. Cut off the ground shoot so that no more children form and consume valuable energy. Attention: Do not disconnect from the mother plant.
- Place the pot in the hole and fill in the spaces with soil. The pot should have good contact with the ground so that moisture exchange is possible.
- Water the soil well and continue to make sure that the soil does not dry out completely.
tip: If you do not allow runners to take root directly, but in pots with new, purchased soil plant, you can also prevent any fungal spores in the soil from moving to the new location to take with you.
5. Plant out young strawberries
The propagation is complete when the young plants formed from cuttings in late summer on their planted in their final location, where they develop into vigorous strawberry plants can.
- choose a sunny location
- There should not have been any strawberries on it for several years
- Separate the young plant from the mother plant
- Plant or Carefully dig out the pot
- take out of the pot
- and use it immediately at the new location
tip: Strawberry plants of one variety show quite different yields. If there is a perennial with plenty of fruit in your new bed, it is best to mark it immediately with a small bamboo stick.
Strawberries multiply by sowing
Propagating strawberries using runners is the easier of the two ways, but sowing seeds is also a promising method in practice. In the case of some strawberry varieties that do not form runners, it is even the only way to get new plants without visiting specialist shops. Here, too, it is important to follow the instructions described in detail below step by step.
1. Wait for the seeds to ripen
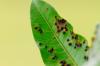
The Fragaria places its seeds clearly visible on the outside of its red one Fruits. These are the small, yellow-green dots that are numerous and evenly distributed on every strawberry. They are so fine that they are simply eaten without being noticed. These little seeds are actually nuts. Strawberries are not berries as their name suggests, they are Common nuts. It is these little nuts that hold the potential for new strawberries. A ripe strawberry fruit is synonymous with ripe and germinable nuts.
2. Win strawberry seeds
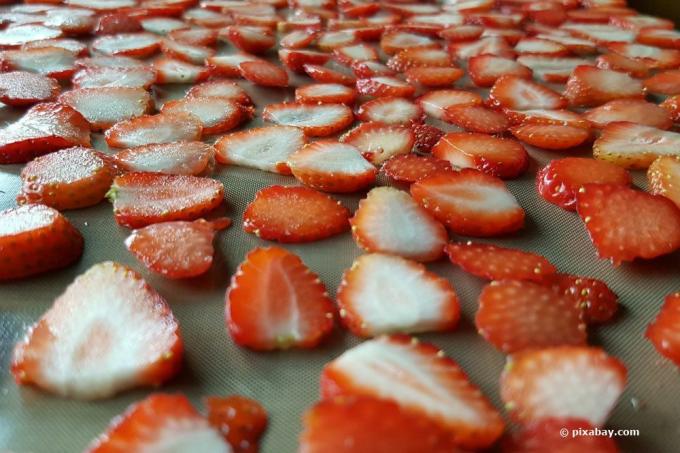
Choose fully ripe and perfectly healthy fruits for propagation. Every single strawberry fruit contains around 100 seeds, so you only have to sacrifice a few delicious fruits for seed production. Do not try to pull the nuts out of the fruit, as this can easily damage them and make them unusable.
- Halve the fruit
- Spread the strawberry halves on newspaper or paper towels
- with the interface downwards and with a little distance to each other
- First let the seeds dry with the pulp
3. Store strawberry seeds until sowing
After the halved strawberry fruits have completely dried, the strawberry seeds should be freed from the pulp. All you need to do is move the newspaper back and forth with a little swing. The dry nuts fall out and can be collected. You can carefully loosen stuck strawberry seeds with the blunt side of a knife.
- Put the strawberry seeds in a sealable container
- it should be dark and dry
- A clean screw-top jar made of brown glass is ideal
Keep the jar cool, dry and protected from light until it is time to sow in spring. You should use strawberry seeds as fresh as possible, i.e. they should not be kept for years but should be sown as soon as possible.
tip: You can also sow the strawberry seeds immediately after they have been harvested and plant the young plants out in late summer. However, sowing should be done in mid-July at the latest so that the plants can develop enough strength before winter.
4. Break the germ inhibition
The strawberry seeds should be sown from mid-February at the earliest and by the beginning of March at the latest. Sowing too early causes the plants to rot due to lack of light, while sowing late postpones the start of harvest.
Before you can start sowing, however, the dormancy must first be ended. In nature this happens through the winter cold, at home you have to expose the small seeds to the cold for a long enough time. This process of germ breaking through cold is called Stratify known.
- Put the strawberry seeds in the refrigerator
- alternatively in an unheated garage or similar Ä.
- outside on window sill, etc.
- Start in mid-January
- four weeks should be enough
- if you want to be on the safe side, you start earlier and stratify 3 months
5. Pre-soak strawberry seeds
Just before sowing, put the seeds in a glass with lukewarm water and let them soak in it for about 3-4 hours. If you want to sow early in the morning, you can leave the seeds in the water overnight.
6. Sow strawberries
To sow the strawberries, fill one or more large sowing pots with sandy, lean soil. Spread the strawberry seeds evenly on top and press them down lightly. as Light germs strawberry seeds may be covered with a maximum of 3 mm of soil. Moisten the soil with a spray bottle so that the seeds are not washed away from their position by the force of a jet of water. For optimal germination, you should also note the following information:
- set up bright but not sunny
- keep moist continuously
- Cover the pot with transparent foil
- Ventilate the foil every other day
- at least 16 ° C, ideally 20 ° C
The germination time depends on the variety and can be between two and six weeks. As soon as you see the first seedlings, you should remove the cover again.

7. Prick out the seedlings
When the seedlings have reached a height of 2 cm, they must be pricked out in their own small pots. But you can also leave them in the nursery pot if you can give them enough space in it. To do this, you can pluck out some of the seedlings and thus thin out the plants. Of course, there should still be enough seedlings left to cover your propagation needs.
8. Plant out young plants
From a height of 5 cm, the new plants are strong enough to inhabit the free bed. They can and should even be planted in a timely manner.