table of contents
- Vegetative propagation
- Suitable plants
- time
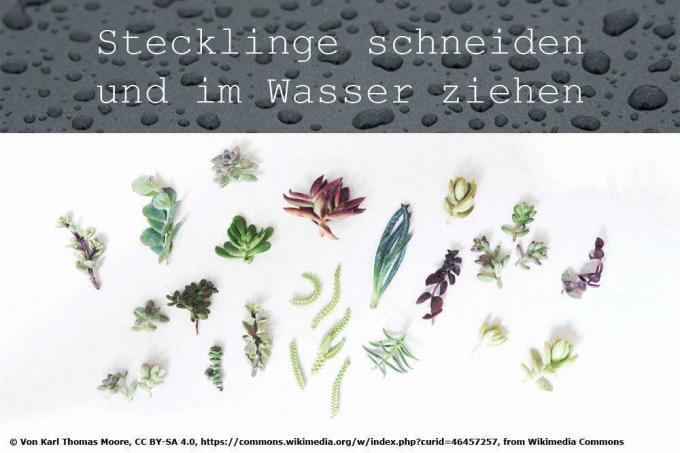
- Types of cuttings
- Pulling cuttings: instructions
- Step 1: harvesting cuttings
- Step 2: preparation
- Step 3: rooting phase
- Alternative for very small cuttings
- Step 4: duration of root formation
- Step 5: potting
- Care of the young plants
The easiest way to get new plants in a short amount of time is by pulling cuttings. This works with most perennial plants without any problems and can also be carried out by new gardeners. One of the many methods of propagation from cuttings is cultivation in water. You can find out how to do this successfully here.
Vegetative propagation
Growing many ornamental plants from seeds can be a rather complicated or tedious undertaking. In addition, when propagated by seeds, plants with different properties often arise. Therefore, cutting cuttings is a good idea. In contrast to the cultivation from seeds, this is a purely vegetative type of propagation. The young plants are identical to the mother plant and therefore have the same properties in terms of growth, flower color and leaves.
Suitable plants
This type of plant propagation is often used for indoor, container or balcony plants. It is particularly suitable for hardy ones Woods and half shrubs. A good rule for the suitability for cuttings is: If the plant sprouts well after it has been cut back into the older wood, then this wood can also be grown from cuttings.
- only use real roots (no grafted plants)
- the plant (shoot) should not have any flowers if possible
- only suitable for perennial plants
- not suitable for witch hazel, magnolias and pines

time
In principle, it is possible for almost all plants to propagate them from cuttings between May and August. The timing for the cut depends, however, on the type of plant and the individual possibilities of the gardener. In most cases, this method is useful if the plant is cut anyway and the cuttings are a by-product. In the case of plants that do not form new roots from a shoot very quickly, the success depends on the optimal time of the cut. The decisive factor is primarily the degree of maturity of the shoots. If pruned too early, the cuttings are prone to rot. But too late a cut makes rooting more difficult due to stronger lignification.
Perennial cuttings
Experienced gardeners cut their perennial cuttings in April or May. In this way, the young plants can already form roots, new shoots and leaves in the current growing season.
Deciduous trees and shrubs
For most trees, it is advisable to cut the cuttings in early summer. Because at this time the young shoots are already well matured and only slightly lignified in the lower area. In the case of shrubs or plants that grow only very slowly, cuttings can also be propagated shortly before be carried out in winter quarters if the wood is cut back a little anyway will.
Evergreen trees
The cuttings of evergreen trees are cut a little later than the plants that shed the leaves. In most cases, the late summer between July and August is recommended.
Types of cuttings
Depending on which parts of the mother plant are used for cultivation, a distinction is made between different types of cuttings:
- Head cuttings
- Partial cuttings
- Cracks
Pulling cuttings: instructions
It is best to disinfect the scissors or knife with alcohol to avoid the transmission of pathogens. Several cuttings can be placed in a jar, but one is recommended for everyone single vessel so that the roots do not grow together into a single network and are easier to separate are.
Step 1: harvesting cuttings
For the production of cuttings only young shootsthat are not yet lignified. These shoots should be as strong as possible and just as healthy. In addition, there must be several leaves on them.
- well matured, not yet lignified shoots
- strong, flowerless shoots
- annual shoots of deciduous plants
- in evergreen trees also two to three year old shoots
- Length: 10-20 cm

Step 2: preparation
Cut the cuttings into about three pairs of leaves. The lower leaves are removed so that only the stem is in the lower third to half of the cutting. To reduce evaporation, very large leaves are cut in half. In the case of plants that only form large leaves, it is possible to roll them up and fix them with a rubber band.
- just leave the leaves at the tip of the shoots
- Rule of thumb: 3 pairs of leaves
- alternate leaves: three to five leaves
- Remove buds and flower bases
- Cut the lower attachment of the shoot at an angle
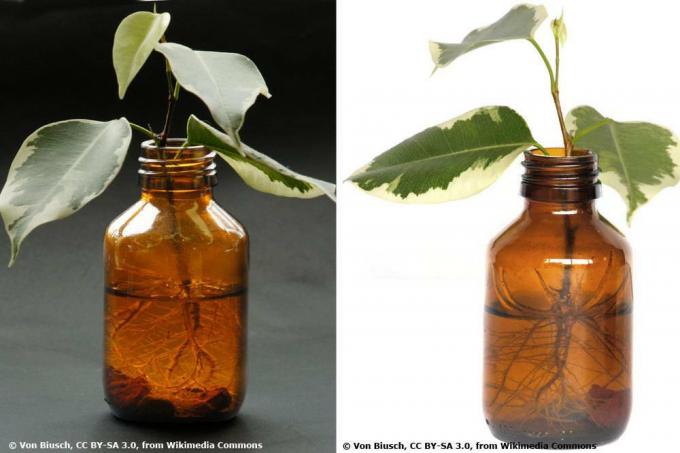
Step 3: rooting phase
For rooting, the cutting is now placed in a water glass immediately after cutting so that the cut does not dry out. The leaves should not be immersed in the water, but should lie loosely on the container. The filling level in the glass depends on the length of the cutting. Only pour in enough liquid so that it is about three centimeters deep. However, if the shoot is deeper in the water, there is a risk of rot. To shorten the process of root formation, it is advisable to darken the glass with aluminum foil, for example, or to use a cup or mug straight away.
- Immerse about 3 cm in the water
- Distance to the bottom of the vessel: at least 2 cm
- otherwise the roots will grow sideways
- Temperature: room temperature
- Location: warm and bright, but without direct sunlight
- east or west facing windows
- Winter garden
- Glasshouse
- Change the water every two to three days
- Pay attention to the filling level in the glass
Some woody ones Potted plants how Hydrangeas or citrus plants have a hard time rooting. Rooting preparations (root activator) can help here.
Alternative for very small cuttings
When it comes to the sections of robust, small-leaved plants such as the fuchsia, one is offered space-saving Alternative to the water glass. The preparation of the individual cuttings remains the same.
- flat styrofoam sheet (about 0.5 cm thick)
- other packaging that floats on the water
- Punch holes in the plate about 3 cm apart
- Tools: screwdriver or meat skewer
- Cut the shoots to a length of about 8-10 cm
- through the holes in the plate
- up to the beginning of the first pair of leaves
- the cuttings must protrude about 3 cm from the bottom
- Place in a bowl filled with water
You can also place the plate with the small plants on it garden pond swim as long as temperatures allow. So you don't have to worry about topping up and changing the water.
Step 4: duration of root formation
More or less time can pass before the roots develop. Because the duration depends to a large extent on the type of plant. For most types of plants, however, the cutting will take root within the next two to three weeks in the water. Some plants, including conifers or the Boxwood, take up to a year in the worst case. The roots should be at least two to three centimeters long and show the first branches before the cuttings are repotted in soil. If the cuttings stay in the water for too long, the roots will form a ball and the plant will then no longer be able to grow well.
Step 5: potting
If the cuttings are individually in a water glass, they can simply be removed and put in soil. In order to get the rooted plants out of the plate, it is broken through along a row of holes. This way, the sensitive roots are not injured. The soil for the young plants must be low in nutrients, because this is the only way for the roots to search for the nutrients and root the soil well.
- only use vessels with a drainage hole
- about 8 to 10 cm in diameter
- pots that are too large promote waterlogging
- Fill the planter loosely with substrate
- press a hole in the middle with your finger
- Planting depth: about 1 cm above the roots
- Insert roots as vertically as possible
- carefully cover the roots with substrate
- Press the earth lightly
- water lightly

Care of the young plants
After potting, however, the young plants are still very sensitive and have to stand in a protected, warm place until the soil is well rooted. If large sheets of paper have been rolled up, the rubber ring can now be removed.
- Location: bright, without midday sun
- just pour carefully
- Always let the soil dry first
- do not fertilize in the first few weeks
At least four to six weeks should then pass before planting out. Cuttings from outdoor plants that did not form roots until autumn are better left in one place through winter in a cool room in the house before they are planted out in the spring after the last frosts at the beginning of May to be allowed to. From this point on, houseplants and potted plants can also be repotted in a substrate suitable for the type of plant.