
table of contents
- The best time to layer the raised bed
- Layer components
- Substrate as a layer basis
- Drainage layer
- Order of layers one to three
- Order of layers one to five
- Further care of the raised bed
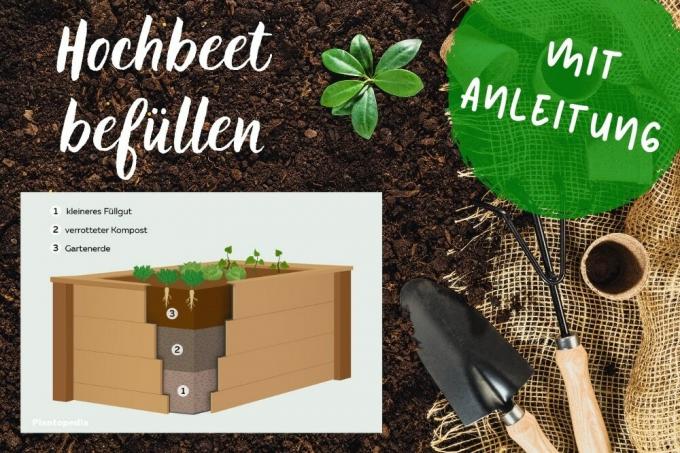
In order to create an optimal basis for the best growth in the raised bed, it is important to create layers. The expert instructions explain how this works and what the layers should consist of.
The best time to layer the raised bed
In theory, one can Raised bed at any time of the year. However, autumn offers the best moment. This is based on two factors: there is usually a lot of garden waste in autumn and the individual layers can settle sufficiently before planting in spring.

Shift reason
A raised bed works much like a compost heap. It consists of organic substances that create humus and warmth inside. Especially the latter is of great importance due to the rotting because it is compared with a conventional one A garden bed with a higher temperature of around five degrees Celsius favors growth and also matures the harvest accelerated.
Layer components
Before layering begins, the necessary components should be available and ready. A distinction is made between raised beds with three and five layers.
- Gravel or the like as drainage
- Coarse compost
- Rotten compost
- Garden soil with a fine structure
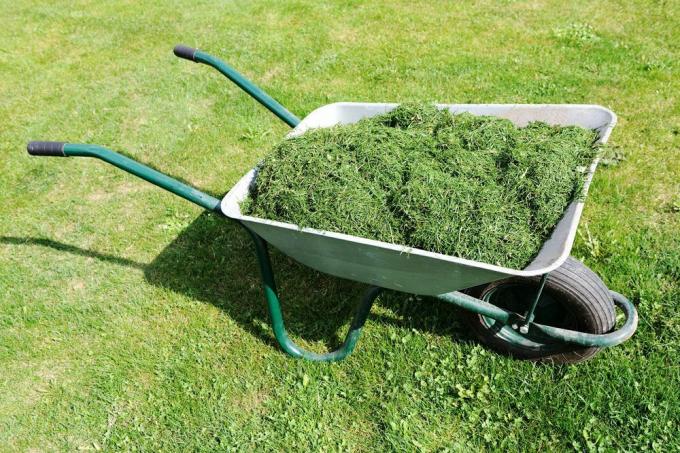
- Five additional layers of finer garden waste such as chopped, leaves or lawn clippings
- Five layers of additional air and water permeable material such as straw or upturned turf
Other materials required:
- If necessary, spade to cut out a lawn under the planned raised bed
- Digging fork
- Wire mesh, fine-meshed (rabbit wire works well)
TIPP: If the stratification for the raised bed is planned for the fall, it makes sense to collect garden waste from the spring already and to compost and to put the necessary tree and shrub cuttings in autumn, so that sufficient material is available stands.
Substrate as a layer basis

- The substrate should consist of normal soil
- is race present at the site, cut it out (use turf later as a layer)
- The first layer should be on the ground
- Loosen the earth roughly with a digging fork
TIP: Do not set it up on solid, water-impermeable surfaces, such as concrete, stone slabs, plastic boards or wooden panels. This leads to waterlogging and the plants can quickly die off due to rot or become very susceptible to diseases and pests.
Floor grille
Before the raised bed is set up and the first layer is poured in, a fine-meshed wire mesh grid must be viewed as layer 0. It is used to block access to voles. This is how it works:
- Spread out the wire mesh on the surface
- Should be wider than the perimeter of the raised bed
- Place a raised bed on top
- Cut into corners, press up on the box and fasten (staple or nail)
- Ideal: cover the entire interior with rabbit wire (make sure that the wire size is appropriate)
Drainage layer
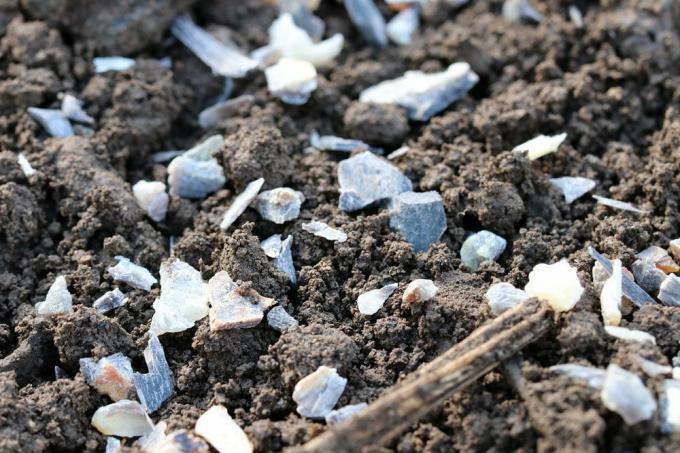
Especially if the soil is heavily compacted or stores a lot of water, the creation of a drainage system is very useful. This is placed directly on the grid at a height of about five to ten centimeters. In addition to gravel (pumice), the following materials are also suitable:
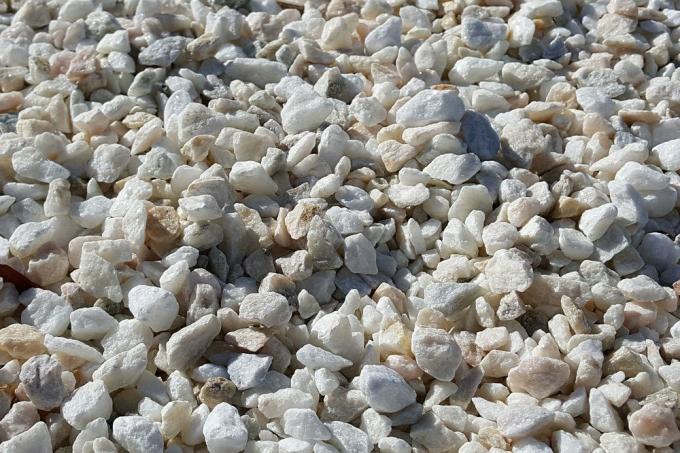
- Quartz sand
- Pottery shards
- Expanded clay
TIP: Via the drainage mat Lay a special "drainage fleece", which you can buy in any well-stocked gardening specialist. It prevents the soil or parts of the individual layered components from being washed out during watering.
Alternative:
Instead of the drainage materials mentioned, a layer of branches can also be used to prevent waterlogging. It should be noted that the branches will rot over time and the subsidence of all raised bed layers can become significantly more extensive. If you use branches, the shape of these should be selected so that they form a relatively narrow "framework" so that the subsequent layer fillings do not simply trickle through. Branches are not a good alternative, but if no suitable material is available, they should be used.
Order of layers one to three
The fastest and easiest variant is the 3-layer system. Ideally, the raised bed is filled with all three filling layers at the same height. Accordingly, a little calculation is required, in which the planned total height from the drainage to the surface of the earth is decisive. However, it should not be overlooked that a minimum height is required, but also one The maximum height should not be exceeded in order to benefit from the desired advantages of a raised bed can. The following are instructions on how the layering is optimally carried out:
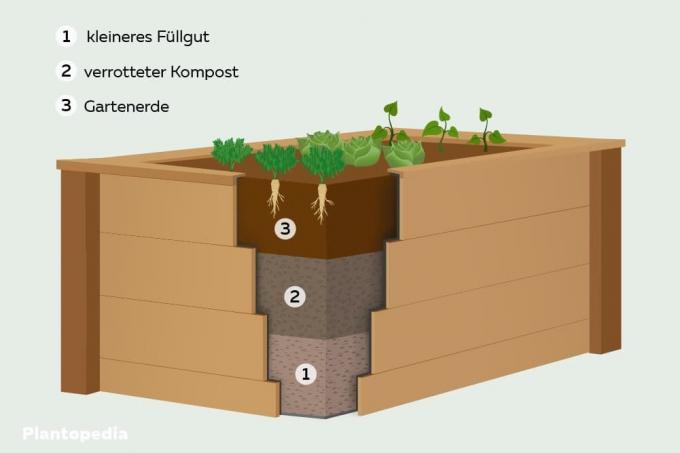
1. Layer: smaller contents
Similar to the 5-layer system, the first layer here consists of smaller components that still allow air to pass through and ensure stability.
- Suitable material: leaves, clippings, coarsely chopped, coarse compost
- Minimum and maximum height: between 20 and 30 centimeters
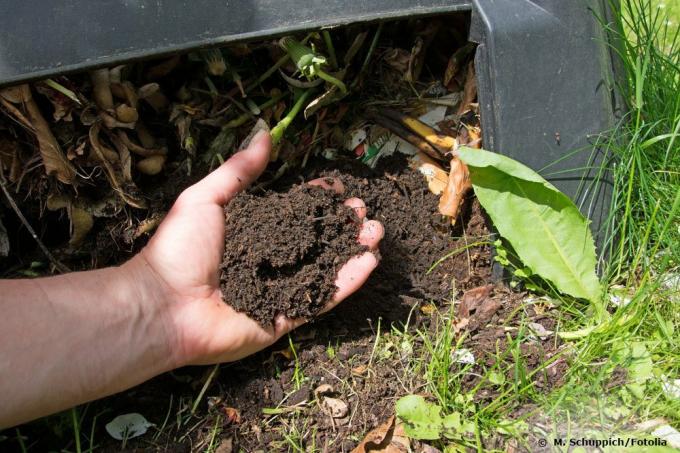
2. Layer: rotten compost
Rotted compost is then placed on the smaller filling material, which makes up the first “real” layer in the raised bed. It is important to ensure that it is well rotted so that the actual rotting process does not develop excessively high temperatures that can damage the plants. Please note the following:
- Minimum and maximum height: 20 to 25 centimeters
- Turn the compost several times before layering (allows heat to escape and loosens up)
3. Layer: Garden soil
Finally, garden soil is spread over the compost. It should have various properties, as described under the heading "Order one to five - 5. Layer: garden soil ”are described in detail. If a planting with strongly consuming plants is planned, the garden soil can also be enriched with a little compost in order to ultimately achieve a higher nutrient content.
Order of layers one to five
Once all the preparations have been made and the drainage in the raised bed has been properly placed, you can start filling the various components in the following order.
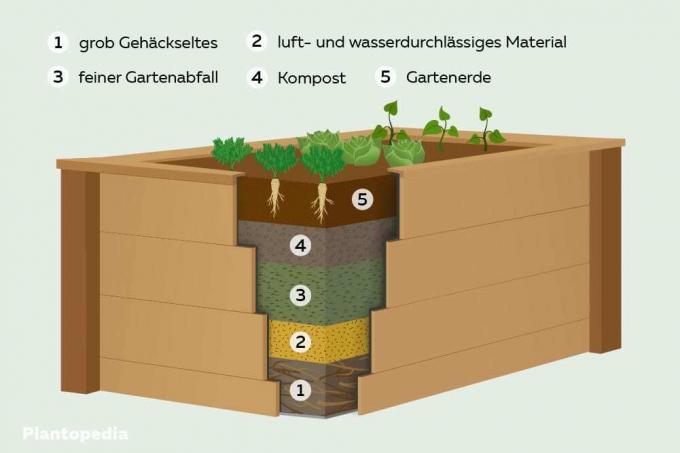
1. layer: roughly chopped
The first "real" layer consists of a layer of roughly chopped garden waste at least 20 centimeters high. This can be crumbled tree bark or shredded branches. As part of the rotting process, it ensures that microorganisms are attracted and it is easier for them to “get into” the raised beds. No earth or other compacting material may be added here, as otherwise the air permeability will decrease however, it should also be too extensive for a closed compost mass to mix with the substrate can. In addition, coarsely chopped material is ideal for stabilization because it only sags slightly.
2. Layer: air and water permeable material
The second layer is made of air and water permeable material such as straw or sod. The latter, however, are placed on the first layer with the turf facing up. The layer should always have the height of a sod, regardless of the material that is filled.
TIP: Very few have access to straw, although the next farmer would certainly give a little. If you didn't have to cut out a lawn, you don't own any sods. As an alternative, normal lawn cuttings or litter products for small animals can also be used.
3. Layer: "Fine" garden waste
Finer garden waste is used again. Lawn cuttings and especially leaves are ideal components for the third layer of a raised bed. The following must be observed when filling the raised bed:
- Lay loosely on top of the second layer
- Reach a height of at least 30 centimeters
- Leaves shouldn't be completely composted, but already dried off
- Distribute exactly into the corners
4. Layer: compost
The penultimate layer is filled with compost. A coarse, slightly to moderately rotted compost, which can consist of garden and kitchen waste, is optimal. At this level, the compost layer provides warmth that reaches right up to the roots of the plants, where it has a positive effect on them and provides many nutrients. The compost layer should be between four and six inches high. Layered too high, temperatures could develop too high, which could damage the roots and at the same time cause a Cause oversupply of nutrients, which also result in intolerance in the later plants can.
Alternative:
If there is no compost, it can be replaced by conventional garden soil if it is enriched to achieve a high nutrient content. One of the following components is suitable for this:
- 50 grams of horn shavings per square meter
- 100 grams of calcium cyanamide per square meter
- Manure (moderately rotted)
5. Layer: Garden soil
The garden soil completes the filling of a raised bed. The following details should be taken into account:
- 6 to 8 inches tall
- Use high quality garden soil - poor quality tends to compact and mold quickly
- Should be nutrient-rich garden soil
- Flower-, Green plants- and vegetable soil are equally good
Further care of the raised bed
Subsidence of the layers
It is a normal process for the raised bed layers to sink in the next few weeks / months after the new plant has been laid. This is a sign that the rotting is in full swing and, in this way, the volume inside is decreasing. This can be done simply by filling it again with garden soil, as described above, in order to achieve a "normal" height again.
Refill the raised bed
If the raised bed has been layered according to the instructions here, the complete rotting of the individual components and with it the loss of nutrients takes about five years. This means that raised beds should be refilled every five years, at the latest every six years. To do this, the content is simply removed and the layering is re-created as described here. This is the only way to continuously benefit from the advantages of a raised bed.
Wait until planting
A waiting time does not theoretically have to be observed for the replanting of a raised bed. However, the best time to fill the raised bed is autumn, which means that winter is just around the corner with frosty temperatures. Plant hardy plants and / or winter vegetables immediately after the layer has been filled. Incidentally, tulip bulbs are also a good idea for autumn / winter planting in the freshly created raised bed. Otherwise you can simply wait until spring before planting.
Problem of fresh stratification
The layers specified here for the raised bed have the "problem" that they release a lot of nutrients. In the first year, you should only use heavily consuming plants that can cope with the high nutrient content. From the second year onwards, medium-consuming plants are ideal, and from the third year onwards, low-consumption plants will find a suitable planting location in the raised bed.