table of contents
- preparation
- Protective clothing is the be-all and end-all
- Cut
- Remove the blackberry bush
- Shorten parts of the plant
- Dig out
- Remove roots
- Transplant blackberries
- New location
- Best time to transplant
- Transplanting the blackberry bush: instructions
- Planting hole preparation
- excavation
- Planting
Some plants grow extremely rampant, so that this can hardly be stopped. This is also the case with the wild blackberry bush, which is considered a real survivor. The sometimes immense roots and its spines make removal just as difficult as repositioning. Care should be taken here. The plant expert explains what is important and provides professional instructions that allow removal and repositioning to be carried out optimally.
preparation
Protective clothing is the be-all and end-all
The spines of a blackberry bush can cause deep wounds in the skin and very painful injuries. The thin, pointed spines can also break off and Infections trigger if they are not properly removed from the skin. If the eye is injured, in the worst case, serious and permanent impairment of the eyesight can result. For the reasons mentioned, it is essential to put on protective clothing before starting work. This should consist of at least the following:
- safety goggles
- Thick, tightly woven and long-sleeved sweater or jacket
- Gloves made of solid material - classic work gloves made of leather or special rose gloves are ideal
- Long trousers
- Closed shoes
Cut
Regardless of whether a blackberry bush is to be removed or replanted, the same preparation is required in each case: a previous one Cut.
First cut off the blackberry vines. In older plants in particular, they have usually formed an extensive thicket that does not allow them to get through. The procedure is as follows:
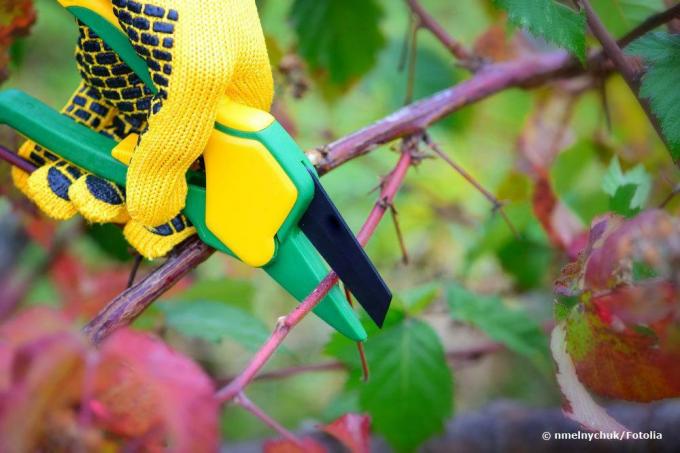
- Cut off the entire growth about 20 centimeters above the ground with sharp secateurs
- Squeeze the tendrils into bundles with your hands and pull them out
- Using loppers with a telescopic rod protects against injuries from the spines
- Has the disadvantage that each shoot has to be cut through individually
- Using a motorized brush cutter with a bush knife does the job more conveniently
- Requires additional protective clothing such as safety shoes with steel caps, hearing protection and a safety helmet with a visor
tip: Do not just leave cut blackberry tendrils lying on the ground or dispose of them on the compost, because they can quickly sprout again and allow a new shrub to grow. Burn the tendrils or shred them in the shredder.
Remove the blackberry bush
Shorten parts of the plant
Blackberry bushes should always be used for the planned removal so that you can get to the roots better and without sting injuries cut far back will. Shorten all branches and shoots so that only a stump about 30 to 40 centimeters long remains. It has to be the length so that you can pull the shrub out of the ground in the following step. If you cut the plant too short, you may not be able to apply enough pressure to pull it out.
Dig out
When all the tendrils have been cut off, the digging takes place. The professional approach is as follows:
- Remove the carpet of roots with a spade (blackberry bushes are shallow roots)
- Do this bit by bit
- The erosion is finished when the blackberry bush can be detached from the earth
- If you press the remaining “stump” in all directions, the remaining root connections will loosen better
- The wider you dig the root carpet, the more roots you can pull out with the plant
Remove roots
So that no new blackberries develop from remaining root remains, they must be removed from the earth after the plant has been excavated. Depending on the size of the shrub excavated and the range of the roots, the soil in the area should be dug up to a depth of at least 20 centimeters. You can then Remains of roots Pick up by hand and dispose of.
tip: Check the area regularly for any remaining roots in the following months. In this way, you can prevent new growth in good time if root remains are still present in the soil.
Transplant blackberries
If the shrub is to be preserved and continue to supply wild blackberries, but removed from its location, it can be planted elsewhere. To do this, a few details must be observed and a certain procedure for planting and planting must be observed.
New location
Often sit down wild blackberries without human intervention in the garden. As a rule, this only happens in a place where they feel comfortable and where their needs are optimally satisfied. If you are now repotting the shrub, it is important to choose an optimal location. This should meet some conditions:
- Light conditions: moderately sunny to partially shaded
- Sheltered from the wind: place sheltered from easterly winds
- Ideal location: in front of a wall

Best time to transplant
Theoretically, the bushes of the blackberries can be implemented over the entire growing season. However, the best time has always proven to be spring until the end of April. Then existing annual rods still have the chance to grow wild blackberries that year. If the transplanting takes place later, it is very likely that you will have to forego a harvest that year.
Transplanting the blackberry bush: instructions
Planting hole preparation
Before you plant out the blackberry bush, the planting hole should be prepared. The roots tend to dry out quickly, so you should plant them again quickly after planting them out. Proceed as follows:
- Dig a planting hole in a suitable location with the dimensions at least 50x50x50 centimeters
- Pre-soak well
- Cover the ground with a layer of horse or chicken manure, pellets made from cow manure or mulched lawn clippings
- Mix the excavated earth with the fertilizer as well
If you want to combat and control the spread of the blackberry bush, we recommend one Root lock around the planting hole.
Root lock
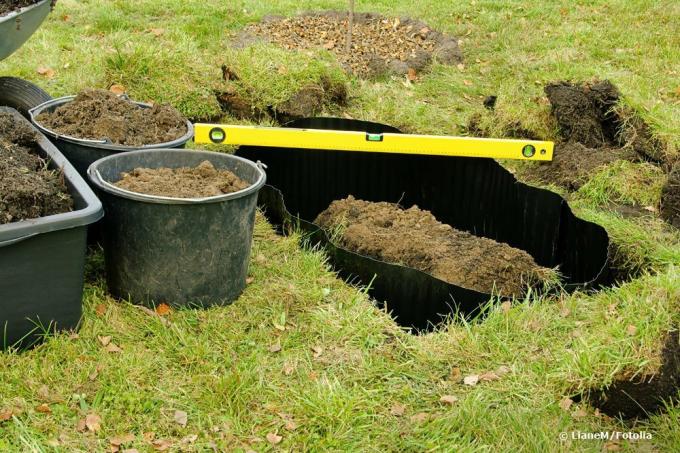
To combat the uncontrolled growth of blackberries and / or prevent roots from spreading in the neighbour's garden, place a root barrier. The ideal time is when moving a shrub. You can also put the root barrier in the soil afterwards, but you shouldn't wait too long to do so. Once the roots have spread, it is difficult to get into the soil near the shrub without damaging the roots.
A root lock is created as follows:
- Dig a five to ten centimeter wide trench around the planting hole / blackberry bush
- Wider digging means more work to fill in
- Select the distance to the shrub in such a way that root growth is to be restricted
- Digging should be around 30 centimeters deep
- Place plastic foil with a width of 30 centimeters vertically in the trench
- The end of the film should touch the bottom of the trench
- Hold the upper part of the film and pour the trench again
- Medium-thick pond liner is best - the blackberry roots cannot get through this
excavation
The excavation during the transplanting is basically carried out in a similar way to the removal of the bushes, as described above. However, the affected shrub is not cut or only slightly cut beforehand. Exceptions are the tendrils, which make excavation difficult or even prevent it. These are then to be cut off in the same way as for removal.
The excavation works best if you adhere to the following points:
- Carefully raise the root carpet with a spade
- Work piece by piece from the outside inwards up to the trunk
- Dig about ten to 20 centimeters deep to remove all of the roots from the ground
- Damage the roots as little as possible
- Once the roots are exposed, carefully pull the bush up
- Leave earth residues at the roots
Planting
Once the planting hole has been prepared, you can start planting immediately after digging it out, as described below:
- Place the shrub in the planting hole
- Place protruding flat roots in the planting hole - if necessary, place in a circle if they are too long
- Fill in the excavated soil up to about half of the planting hole
- Soak another five to six shovels of soil well and distribute it evenly in the planting hole
- Close the planting hole with the rest of the excavated earth
- Press the earth down well
- Pay attention to continuous soil moisture for the next few days
- Do not water when it is frosty


