
Rhododendrons are a must in any garden. For the optimal start, however, there are a few small things to consider when planting the rhododendron.
the Rhododendrons (rhododendron) are a huge genus within the heather family (Ericaceae), which includes over 1,000 species. The geographic spread of the rhododendron extends over many continents. Despite the great diversity of origins, there are many parallels in terms of growing conditions. We'll tell you what you have to look out for so that your favorite rhododendron flourishes and adorns your garden in full bloom.
contents
- Planting rhododendrons: when is the best time?
- Planting rhododendrons: location
- Planting rhododendrons: the right rhododendron soil
- Plant rhododendrons in a pot
- Planting rhododendrons: instructions
Planting rhododendrons: when is the best time?
In principle, you can plant your rhododendron all year round, as long as it is in containerized form. Roots are planted in spring or autumn. Planting in late spring (April or May) has the advantage that the soil is already slightly warmer at this point in the year and the risk of night frosts is virtually eliminated. In addition, the soil is consistently moist enough for the shallow-rooted rhododendrons to establish themselves well. In addition, when you buy the plants you can see the first flowers and be sure of the flower color. Planting in autumn (beginning of September to mid-November) has the advantage that the roots develop more quickly. At this point your rhododendron will go into hibernation. No more energy is put into the formation of drives. This can flow into the root formation.

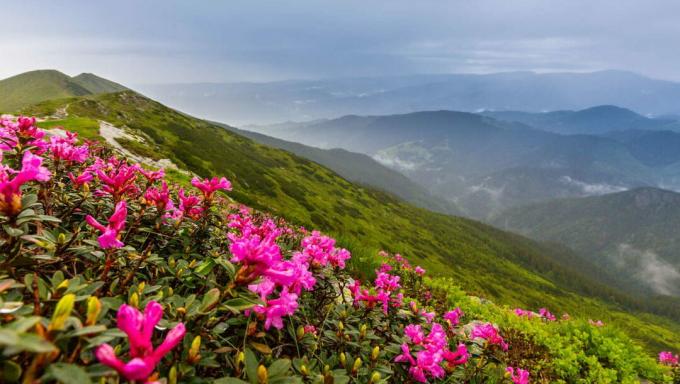
Planting rhododendrons: location
The rhododendron originally comes from high altitudes where, due to the shallow soils, it can only develop shallow roots. These soils are characterized by high permeability and above all by a slightly acidic pH value. In the following section you will find out how to create the optimal conditions for your rhododendron in your own garden.
Planting rhododendrons: the right rhododendron soil
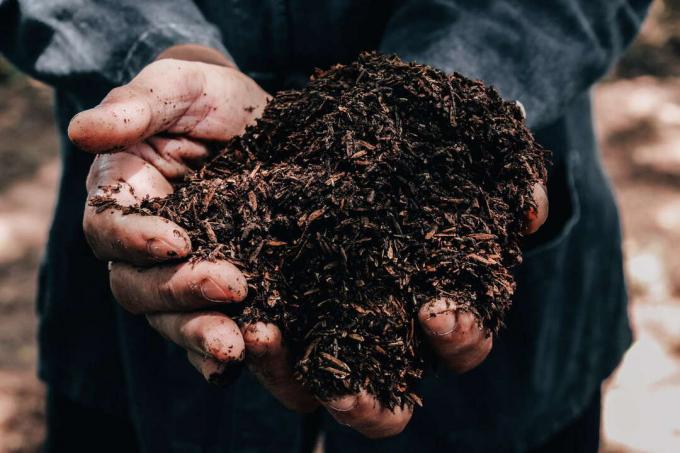
The rhododendron needs acidic conditions and must under no circumstances "suffocate" in waterlogging. Most soils in our latitudes, however, are more neutral to slightly basic (for example with lime subsoil), which is why you should enrich the excavation of your planting hole with plenty of compost.
In addition to the acidic conditions, the rhododendron loves loose, airy soil with a high degree of permeability. While in some locations the permeability may be given (for example on sandy soils or Black earth), some gardens still have to be helped a little (for example on loamy, clayey ones Locations). It is advisable to increase the grain size structure by adding sand. Simply mix the potting soil with the sand in a ratio of 1: 1.

If you want to be on the safe side, you can also put a drainage layer made of gravel on the bottom of the planting hole, or add larger amounts of bark mulch to the planting hole. This prevents waterlogging and regulates the water drainage. Despite the permeability, the soil should have good water storage capacity.
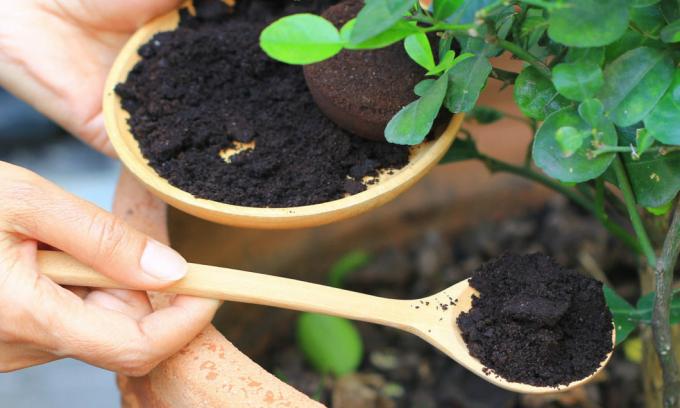
tip: Coffee grounds have proven themselves as a home remedy for fertilizing acid-loving plants. This slightly acidifies the soil and also brings small amounts of essential nutrients into the soil.
Here we have additional information on the Rhododendron soil collected for you.
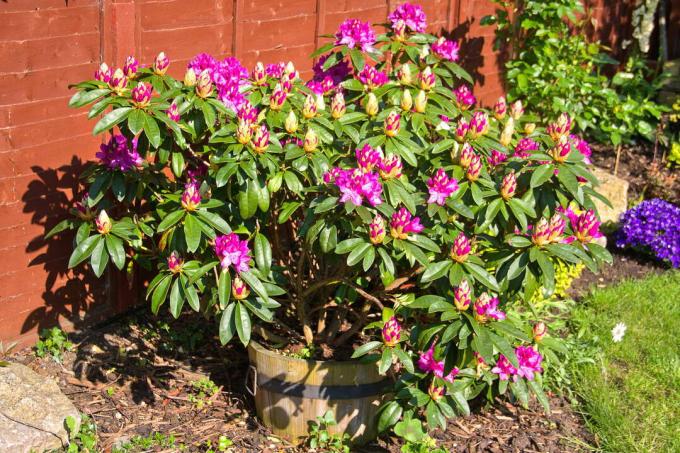
Plant rhododendrons in a pot
The conditions that the rhododendron likes to find in the garden should also be observed when planting in pots. Make sure to use the widest possible tub so that the shallow-rooted rhododendron can develop accordingly. Attention: Due to the size differences, not all species are suitable for growing in pots or tubs. The type of Japanese azaleas, for example, includes many varieties that are relatively small and therefore ideally suited for growing in pots. When planting in pots, there are two further features that must be taken into account: On the one hand, you have to make sure that no waterlogging builds up in the pot. So use a bucket with a drain hole and lay a drainage layer at the bottom of the pot.
On the other hand, wintering is a bit of a challenge, as the pot freezes through very quickly due to the large surface area of the root ball. If you have no way of moving the rhododendron to a warmer place, try to protect it as much as possible from changing sunlight and cold drafts. It is best to place the container plant against a house wall, a closed fence or between other higher plants so that the plant can find protection from as many sides as possible. In addition, an insulating layer can be used to minimize heat loss from the pot, so you can guarantee your darling good conditions even in winter. To do this, wrap the pot with several layers of bubble wrap or newspaper.
More information about Species and varieties of rhododendrons You will find here.
Planting rhododendrons: instructions
In order for your rhododendron to grow and thrive quickly and safely after planting, there are a few things to consider. We explain in step-by-step instructions what is important:
1. Choosing a location for the rhododendron
The rhododendron prefers partially shaded locations, with good water flow and particularly likes to stand on gentle slopes. You can also choose a location in full sun for your rhododendron, but proper water management must be taken into account here. The distance to other plants should be chosen generously at each location, because the rhododendron develops extensive and shallow roots.
2. Observe the correct planting spacing for the rhododendrons
The rhododendron can - depending on the variety - grow very sprawling. It is therefore important to keep a sufficient distance from neighboring plants. Especially if there are many rhododendrons next to each other, a suitable planting distance should be maintained, because otherwise the flat roots will hinder each other. The planting distance is selected depending on the size at the time of planting and the expected final size. Depending on the size, there should be 30 (slow-growing varieties) to 100 (fast-growing varieties) cm between the crown margins. Should the rhododendron line up in a hedge planting (for example the variety 'Bloombux'), you can do without large planting distances. If the plants do grow too dense, they just can transplanted to increase the distance.
3. Dig the planting hole large enough for the rhododendron
As already described above, the rhododendron needs particularly permeable and acidic soil conditions. The larger the planting hole, the more loosened soil surrounds the roots of the freshly planted rhododendron. Therefore, the dug planting hole should have at least twice or even better three times the circumference of the root ball.
4. Prepare the plants
The root ball is watered intensively before planting by dipping it into a vessel with water until no more air bubbles appear.
5. Prepare the soil for planting
Depending on the soil conditions in your garden, you may need to make a few adjustments to get your rhododendron off to the perfect start. In any case, the excavated earth is mixed at least 1: 1 with humus. This takes care of the nutrients and lowers the pH value. The pH can be adjusted to around five with the amount of humus, but also with coffee grounds.
Loamy and clayey soils are unsuitable for the cultivation of rhododendrons, as they have too dense a range of grain sizes and tend to be in the basic pH range. The excavation of the planting hole should therefore be enriched with plenty of sand beforehand so that a permeable environment is created. If you want to be on the safe side with the supply of your rhododendron, you can also exchange the entire excavation for special rhododendron soil. This has all the properties your rhododendron needs to be happy.
6. Place the rhododendron in the planting hole
Don't put the rhododendron too deep in the hole. Otherwise the roots cannot be properly supplied with oxygen and the plant will perish. Fill in the planting hole so that two centimeters of the root ball are still visible from the earth. Just step on the soil lightly so that it remains well drained.
7. Water the rhododendron well and fertilize
After the rhododendron has been planted, it is poured vigorously. You can also add a pouring rim to make the watering more effective. To give your rhododendron an optimal start, fertilizers such as horn shavings, corn flour or compost are worked into the surface after planting. This nitrogen-heavy fertilization counteracts a nitrogen deficiency through a decomposing layer of mulch. Also ours Plantura organic hydrangea fertilizer is ideal for the rhododendron.
8. Mulch after planting
Once the rhododendron has been planted, a layer of mulch is applied in the root area. This protects against dehydration, temperature fluctuations, prevents weeds in the root area and keeps the pH value down when they decompose.
9. Care for rhododendrons after planting
In general, the rhododendron is relatively easy to care for, but this only applies as the plant ages. A young rhododendron wants to be watered regularly without drowning in waterlogging. Regular water intake will speed up youthful growth and help your rhododendron establish itself. Above all, the rhododendron needs time to develop extensive roots so that it can survive the possibly dry summer months in the next few years without watering. It is fertilized for the first time two weeks after planting, if it was planted in spring. In the case of autumn planting, fertilization is carried out for the first time in the next spring.

More information about the Care of the rhododendron You will find here.
