The term pricking may not be familiar to every hobby gardener. This is a work step that is carried out less or more often, depending on the plant.

Pricking comes from the French “piquer” and means “to stab”, which describes the activity carried out quite well. When a lot has been sown, the plants are getting bigger and are slowly getting too close together, then it is time to prick out. Learn more about the process below.
contents
- What is pricking out?
- When should plants be pricked out?
-
Prick plants: instructions
- The right tool for pricking out
- What soil is used after pricking?
- Which pots are suitable?
What is pricking out?
This is what the term pricking out means in the field of horticulture Isolation of seedlings or young plants that are too close to one another. In the course of the process, weaker plants are usually also sorted out. This term is also used for food, but has a different meaning.
The purpose of isolating the small plants is to provide them with sufficient space to grow, as the seedlings compete for water, light and nutrients above a certain size. When pricking them, they are carefully removed from the substrate with a suitable tool and reinserted into individual pots at a greater distance or straight away. For larger nurseries, this step is usually too time-consuming, which is why they avoid pricking with appropriate seeds and sowing techniques. However, pricking is quite common among hobby gardeners and in smaller, less automated nurseries.
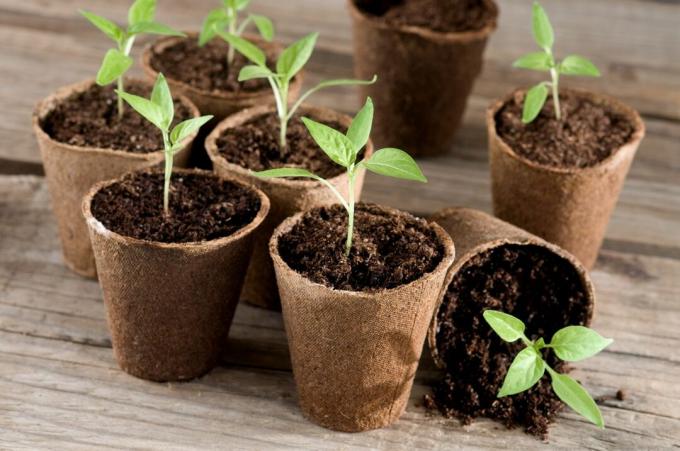
When should plants be pricked out?
The optimal time to prick out has come when the cotyledon stage of the plants is over and the first correct pair of leaves has already appeared. Then the seedlings are big enough to take the singling out.
Prick plants: instructions
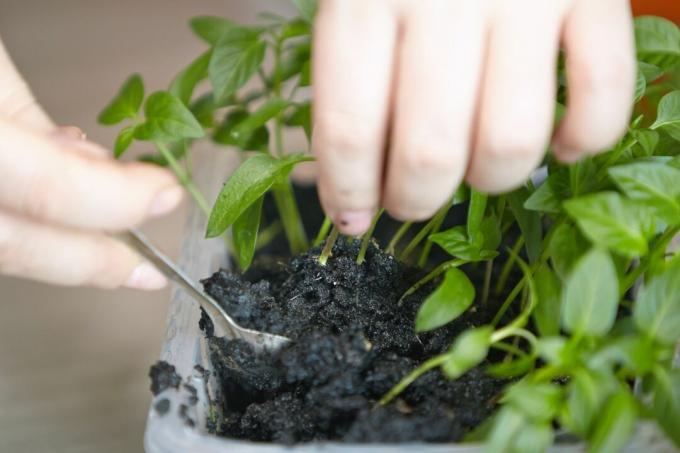
Pricking out requires some practice and sensitivity, as the seedlings are still very sensitive and can break quickly. You also need a pricking stick, which can also be easily replaced with household items such as a small spoon. Here we explain what you should pay attention to and how you can best proceed step by step:
- In advance, the substrate can be filled into the pots that will be needed later and lightly pressed so that the seedlings can then come back into contact with the soil as quickly as possible. The substrate with the plants and that in the new pot should be well soaked before pricking out so that the seedling can loosen better and make contact again.
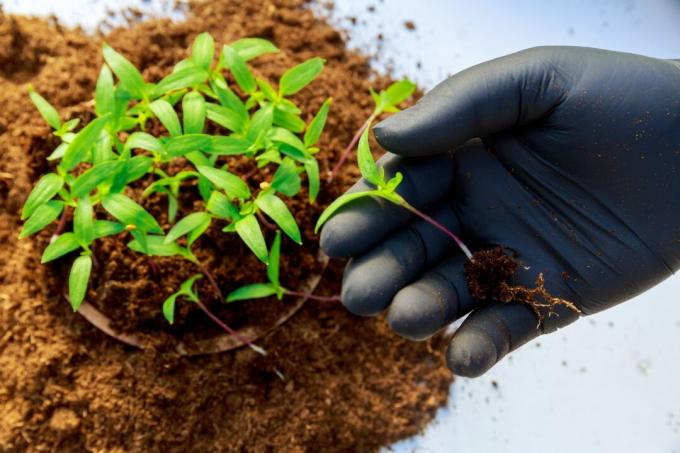
- For the first step in pricking, take your professional or improvised prick stick and prick the substrate next to a seedling. Now the plant is carefully lifted out of the substrate below the roots. At the same time, you can grasp it as deeply as possible, close to the root neck, but you should not exert any pressure or pull it too hard. If the hypocotyl, the germinal stem, accidentally tears off, regrowth is no longer possible.
- When the young plant is loosened from the substrate, a hole can be made in the soil of the new pot with the pricking stick. The bare-root seedling is now inserted into this hole. If the root system or the whole plant is quite long, you can carefully push in with the pricking stick. It is beneficial for the growth of the young plant if the radicle is straight in the hole. In addition, the root neck should be in the ground.
- Then the soil around the seedling is carefully pressed down with your fingers to close the hole.
- Watering is an important step for the freshly pricked plants to take root properly, as this restores contact between the substrate and the roots. The pots are watered either from below or from above. If the substrate was watered thoroughly beforehand, this is no longer necessary afterwards.
- At best, the pots are also labeled or provided with labels, from which the type and variety can be recognized. Because in the seedling or young plant stage, some plants are often not so easy to distinguish. To reduce the water stress of the seedling, a cover can temporarily be placed over the plants which increases the humidity and the freshly injured fine roots is spared.
Tip: Plants such as tomatoes can be used when pricking up to the cotyledons, as they have the ability to form new roots, so-called adventitious roots, on their stalk. This phenomenon is only to be expected in some plants, so you should research this beforehand.

The right tool for pricking out
Usually the tool of the same name, namely the prick stick, is used for pricking out. This rod is made of plastic, wood or metal, is about 18 centimeters long and tapers to a point. The pricking stick can also be safely replaced with a thicker pen, a popsicle stick or spatula made of wood or a small spoon.
What soil is used after pricking?
Since the fine roots of the plants are still very sensitive, a nutrient-poor sowing or potting soil is usually still used after pricking out. This also ensures that the plants become strong and robust, as they develop powerful roots when searching for nutrients. This enables the plant to take care of itself better later, for example in dry periods, because the roots reach deeper into the earth to the water supplies. An example of such a substrate for pricking out is ours Plantura organic herb & seed compost. It has a loose and airy structure due to perlite and is poor in nutrients, which stimulates the root growth of the young plants.
Heavy eaters, such as tomatoes (Solanum lycopersicum) and paprika (Capsicum), are plants that have higher nutritional needs than others. With them, it makes sense to mix the potting soil with a more nutrient-rich soil in order not to risk an undersupply of the young plants. Of course there are also plants with more specific demands on their soil. Succulents, for example, need a very mineral substrate.
Which pots are suitable?
Which pot size should ultimately be used for pricking depends on various factors. These include, among other things, the speed of growth, the space required by the plant, as well as the length of time that your young plant still has to spend in the pot. It also depends on the number of young plants. If a lot of seedlings are pricked out, it is worth using pricking plates. However, if the number of plants is manageable, any pot size can actually be selected. Usually pots of 9 are used. If necessary, several seedlings can be pricked out in a pot, as long as there is enough space for each one.

Pricking is an often used method, especially when growing tomatoes. Everything important about the Pricking and planting tomatoes you can find out in our article.