table of contents
- Sowing: time
- Location
- Cultivation: procedure
- Prick out and plant out
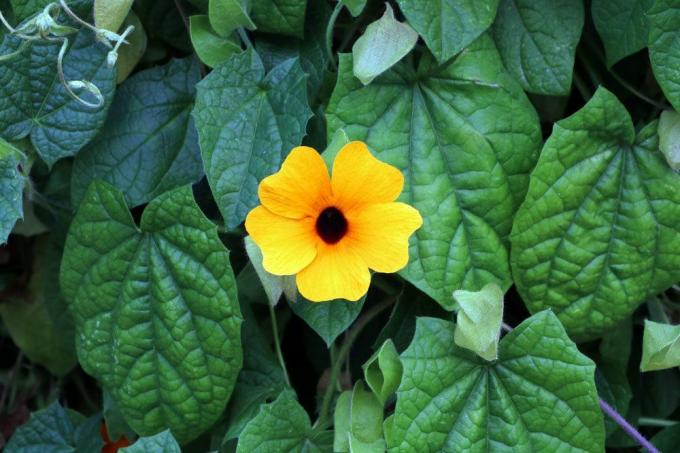
the Black-eyed Susan is one of the most famous climbing plants from southeast Africa. The pretty flowering plant is quite undemanding and can be cultivated by beginners without any problems. Due to the simple cultivation and long flowering time, it is popular in private gardens and as a container plant on balconies and terraces. Since it is an annual plant, the process is repeated annually. With the right approach, sowing Thunbergia alata will be a breeze.
Sowing: time
Before you can start sowing the Black-Eyed Susan, you need to choose the right time. That Acanthus family (bot. Acanthaceae) does not come from Central Europe, but from warm Southeast Africa, which makes it impossible to sow in the field. You have to prefer the attractive climbing plant indoors. There are two dates for exactly this purpose, which are dependent on the availability of a mini greenhouse:
- Mid to late January with a mini greenhouse
- Beginning of March without a mini greenhouse
The species belongs to those plants that have to be grown indoors over a long period of time in the local latitudes. The reasons for this are the low temperatures in spring and the risk of late frosts, which would severely affect the young plants. That is why a black-eyed Susan is kept annual in most cases, but inspires with her blossoms until autumn. It takes an impressive four months for flowers to form, which explains the early sowing.
Note: Alternatively, you can sow the seeds directly in the field after the ice saints, if you can wait much longer for flowering. In this case it will not show its flowers until late summer, but will keep them until the beginning of winter.
Location
The black-eyed Susan needs an optimal location so that the seeds can germinate effectively after sowing. Since the plant is a dark germ, the seed does not depend on light in any form, which makes it easier to grow in many forms. After preparation, you can place the growing containers in a dark location, which should ideally be 20 ° C. As soon as the first seedlings can be seen, the location must be adjusted a little. From this point on, the place at a bright window without direct midday sun is necessary until you plant the young black-eyed Susanne. Make sure that the seedlings are not drafty, as the species cannot tolerate these circumstances.
Cultivation: procedure
Once you have decided on an appointment, you can start planting the seeds in planters. The procedure is not time-consuming and can even be implemented by beginners without any problems, as the black-eyed Susanne is undemanding in terms of the substrate. You need:
- Planters
- high quality potting soil
- sand
- Cling film or mini greenhouse
- spray bottle
When choosing planters, you should consider the following points:
- Material: clay, plastic
- Diameter: 10 to 12 cm
- not too high
Since the individual seeds need some space, you should not use pots that are too small. The black-eyed Susan forms an extensive root system, through which she can build up enough strength to grow upwards. If you have all the necessary materials and utensils at hand, it's time to start growing. The procedure works in the following way:
- Fill pots with potting soil
- Cultivation soil up to 2 cm below the edge
- Max. 5 seeds per pot
- Place seeds on the substrate
- Keep the distance between the seeds
- 1 cm layer of sand or substrate on top of the seeds
- this corresponds to the sowing depth
- press gently with your fingers
- This compresses cavities
- moisten with spray bottle
The sowing of the black-eyed Susanne does not end there. Depending on whether or not you have a mini greenhouse, you need to go about it in different ways. If you own a mini greenhouse, place the growing containers in it. If you don't have one, cover the pots with cling film. The foil prevents the seeds from drying out and not germinating due to insufficient humidity. For the next two to three weeks it is now important to keep the soil sufficiently moist. To do this, check the substrate daily for dryness and moisten it as necessary.
Tip: You can either buy seeds for the black-eyed Susanne in stores or collect them from your own specimens that you or your friends own. To do this, let the withered flowers stand and mature into seed pods, which you can then harvest.
Prick out and plant out

The first seedlings should appear after a maximum of three weeks. Don't be surprised if the number of seedlings is low, the black-eyed Susan is notorious for germinating very irregularly. As soon as the seedlings show up, separate them. A maximum of three seedlings should be used per pot, otherwise there will be a lack of space. Use high-quality standard soil for this, as the plants do not yet need as many nutrients. When pricking, you only select the strongest specimens. During the period leading up to the Ice Saints, you need to keep the following points in mind:
- Use climbing support
- keep soil moistured
- protect from the midday sun
- pinch at regular intervals
- Apply liquid fertilizer after about 8 weeks
The plants are hardened from mid-April. This means that you put them on the balcony or terrace in good weather so that the plants can get used to the outside world and become more robust. Planting out or repotting in the final vessels is possible after the Ice Saints. One of the following earths is used in the pot for the black-eyed Susanne
used:
- Potting soil
- Geranium soil
- Potted plant soil
Make sure that the quality is high, as the Thunbergia alata grows much better. In the field there should only be enough humus-rich soil. It is also important that the location is sheltered from the wind, as the climbing plant is quickly caught by the wind.
Tip: There are different climbing aids for Thunbergia alata that you can use as a support for the plant. Robust cords, rose sticks, bamboo sticks or even branches, which have to be firmly attached to the ground to provide the plant with sufficient support, are particularly suitable.