Table of contents
- Bokashi Bucket: Variant 1
- drill holes
- sealing
- drain
- Bokashi Bucket: Variant 2
- Fill correctly
- Activate
- What are "EM"?
- What else has to go in?
- sealing
- Bokashi Harvest
- The actual bokashi
In addition to the worm compost, there is an even faster way to get good and cheap fertilizer. We show how easy it is to build your own Bokashi bucket. With this technique from Japan you can quickly get fertilizer on the balcony or even in the apartment. The principle of a Bokashi bucket comes from Japan and makes use of lactic acid fermentation in the absence of oxygen. In this way you can quickly obtain inexpensive fertilizer in the smallest of spaces with minimal odor development.
Bokashi Bucket: Variant 1
This variant is the most practical and easiest way to make your own Bokashi bucket. Implemented quickly and without much effort.
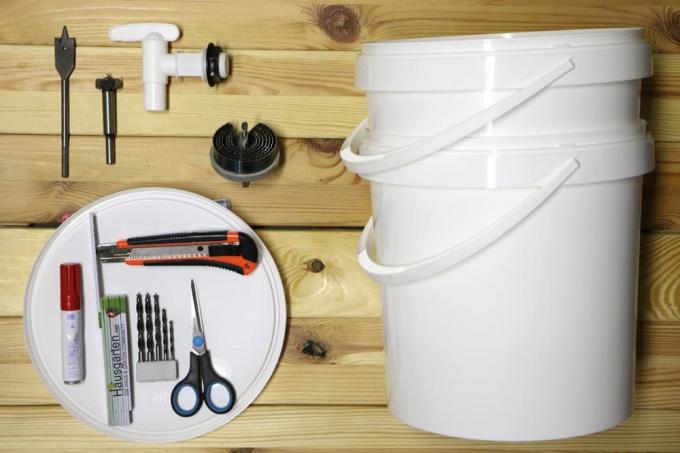
material
- 2 identical conical buckets (plastic)
- 1 matching lid
- 1 water tap (water butt)
- possibly. some sealing tape
- 1 thin garbage bag
- 1 freezer bag filled with sand (quartz sand).
Tool
- Cordless screwdriver or drill
- Drill (universal or wood)
- Hole saw or Forstner bit
- pen (waterproof)
- ruler, folding rule or similar
- Scissors or cutter knife
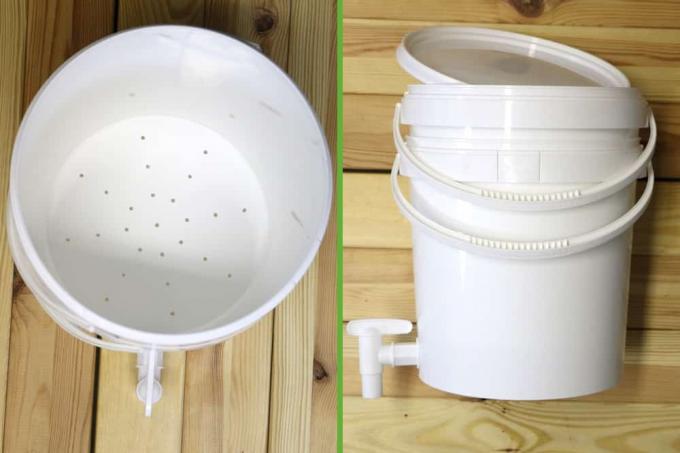
drill holes
Drill holes in the bottom (only!) of the inner bucket (B). The holes should be large enough that liquid that forms can drain off easily, but still small enough so that no organic waste falls through. Distribute the number of holes evenly.
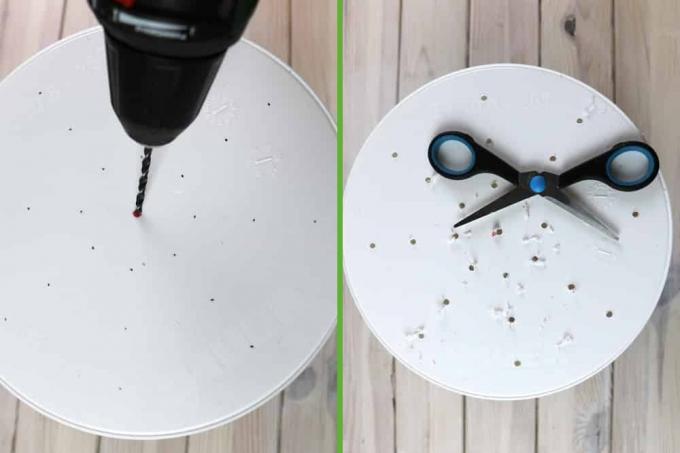
Tip:
Start with smaller and fewer holes. The number and size of the holes can also be increased the next time you clean, if liquid builds up and does not drain properly.
sealing
The two buckets are now inserted into each other (the one with the holes goes inwards). Once the lid is on the bucket, you actually have a finished Bokashi bucket. If the buckets don't fit together very well or you have the feeling that air is being drawn in, you can also seal the gap between the buckets with modeling clay. Silicone is not recommended because it has to be removed every time you clean it and then reapplied later.
Tip:
However, it is advisable to add a drain to regularly drain the bokashi liquid without having to always remove the inner bucket.
drain
Insert both buckets into each other and hold them in front of a light source (lamp or sun). Now you can see how much space there is between the two buckets on the floor. Mark this with a pen and measure the distance. Now you can buy a suitable faucet. It is important that the screw cap for the inside (the widest part on the faucet) fits into this distance.
If you already have a faucet that is a bit larger, it is not a problem either. If the second bucket later no longer fits completely in the outside, you can also cut out a piece from the inside. Place the screw cap on the outer bucket (A) and mark the center. A hole is then drilled into the bucket with a Forstner bit, hole drill or similar tool. It also works with scissors or a cutter knife, but is more dangerous for the fingers - so be careful!
Tip:
Hold a piece of wood against it from the inside to prevent the bucket from breaking or cracking.
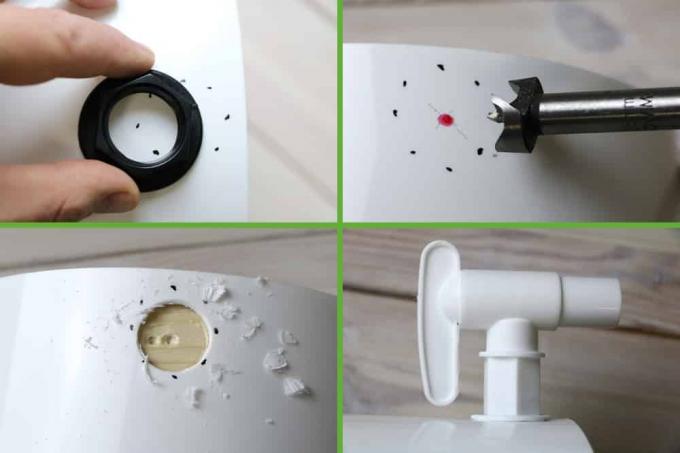
Once the hole has been drilled, the edge is carefully deburred with a cutter or scissors. Now you can screw the tap into the hole. If the hole is a bit too big, you can also seal it with sealing tape.
Bokashi Bucket: Variant 2
You don't always have two identical buckets available or don't want to buy extra material. For this variant, a closable bucket and a second one, which can also be a little smaller, are sufficient. The bottom of the inner bucket should be perforated as in variant 1. In order to create a cavity between the two buckets in which the Bokashi liquid fertilizer can collect, you should place an elevation in the large bucket. Flat baskets made of plastic or coasters made of clay or ceramic are suitable for this. Since the entire Bokashi principle is based on the exclusion of oxygen, the main thing is that the bucket closes tightly.
Fill correctly
Kitchen waste goes into a Bokashi bucket just as it would go into the compost. Vegetable or fruit waste and plant parts are perfect for this and should be chopped up beforehand.
Danger:
Meat (including fish), ashes or paper have no place in a Bokashi bucket.
Activate
To activate or to support, must effective microorganisms "EM" can be added to the waste.
What are "EM"?
Effective microorganisms can be bought ready-made. As a spray, it can be dosed particularly well. EM consists of lactic acid bacteria, yeast fungi and many other very active little helpers. Those who are particularly keen to experiment can try their luck with unpasteurized sauerkraut juice, Bread drink, sourdough, unpasteurized whey or the liquid from drained yoghurt attempt. There are reports that these things should have a very similar effect - without guarantee.
What else has to go in?
stone flour prevents the formation of odors, but please use sparingly. ceramic powder (2-3 teaspoons) and activated charcoal support fermentation and also help with decomposition.
sealing
When the organic waste and all other ingredients are in the bucket, the whole thing is covered with a garbage bag and compressed with a little pressure. There must not be any cavities between the waste, because mold could develop here (which must be avoided at all costs). A weight is placed on the film so that nothing slips. A larger freezer bag filled with quartz sand is ideal here. This now presses everything together and helps with sealing.
Bokashi Harvest
Every few days (1-3 days or depending on the filling level) you can drain the compost water and use it later as liquid fertilizer. The collected compost water is very acidic (pH below 4) and should only be used as fertilizer diluted with water. Depending on the plant, application and bokashi mixture between 1:20 and 1:100. The guideline is 1:50, but you should be willing to experiment.
Tip:
Make sure to always drain the liquid. The liquid must not rise up into the other bucket - otherwise there is a risk of mold.
The actual bokashi
The upper content (Bokashi) can be disposed of after 2 weeks on the compost. Leave it on the compost for a few days and let it air out well. You can then mix it with other materials (green waste, etc.).
Alternatively, you can also soil the fermented Bokashi (mix well 1:3 with soil) and then add it to the bed as fertilizer. Since the Bokashi solids also have a very low pH value (are acidic), it should only be used in places and plants that can tolerate it. The very high nitrogen content ensures a very good promotion of plant growth, but is too high for many soil dwellers.
A notice:
Never put finished bokashi directly into the worm composter.
 Home editorial office
Learn more about fertilizer

Lawn lime: Lime against moss in the lawn
As soon as moss appears in the lawn, many a hobby gardener becomes restless - because soon the moss carpet can take over entire areas. With lawn lime, however, the unwelcome visitor can be skilfully put in his place.
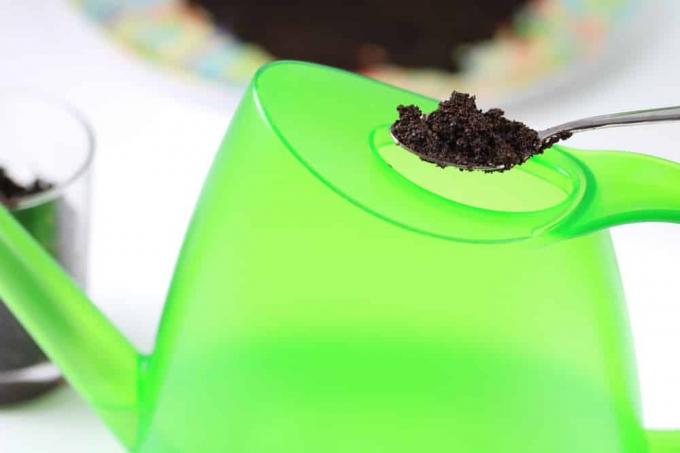
These 8 plants don't like coffee grounds as fertilizer
Hobby gardeners swear by the effect of the coffee grounds. It is fertilizer, snail protection, soil conditioner and cat deterrent all at the same time. In addition, it is free of charge and occurs daily in the household. Most plants are strengthened, but some are sensitive to the addition of coffee. We clarify.

Fertilize Christmas roses properly: 11 effective home remedies
Christmas roses are special flowers because, unlike almost all other perennials, they bloom in winter. They are insensitive and frost-hardy, and they can also multiply independently. Here you can find out what needs to be considered when fertilizing.
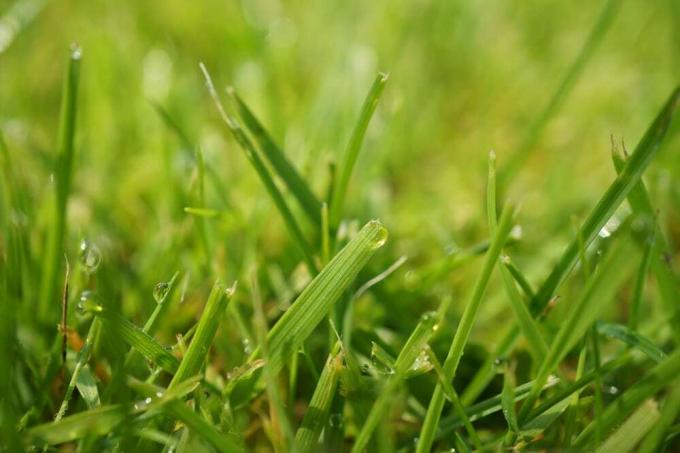
Lawn Bokashi: 6 steps to a cheap & natural fertilizer
The name Bokashi is still largely unknown. This method of using grass clippings comes from Japan. With a little preparation and a special form of processing, the clippings become valuable, nutrient-rich fertilizer that can be easily distributed in the garden.

Wood ash as fertilizer | These 70 plants love barbecue and charcoal
Home gardeners with a fireplace or tiled stove receive a natural fertilizer for free. Charcoal and charcoal leave behind a dusty residue that is packed with valuable nutrients. Read here under what conditions wood ash is suitable as a fertilizer. These 70 plants benefit from the unorthodox nutrient supply.

Foliar fertilization: make your own foliar fertiliser
Foliar fertilization transports nutrients directly into the plant via the leaves in order to compensate for short-term deficiency symptoms. This guide will make you familiar with the right approach, because this form of nutrient intake is associated with risks. Our tried and tested instructions explain how to make foliar fertilizer yourself.