

Table of contents
- Foundation or no foundation?
- The frost-free strip foundation
- Instructions: build a sandstone wall
- Mortar for the sandstone wall
- A very special wall
- Foundation for the sandstone drywall
- Sandstone dry stone wall
- Conclusion
Sandstone is a common building material in Germany that has been used since primeval times. There are good reasons to stick with this tradition, because sandstone is also a very beautiful building material, and the sandstone wall is one of the most durable garden structures that you build and grout very well yourself can. Even in two different variants, for which there are instructions below:
Foundation or no foundation?
This is the first question that must be decided before the wall is built, followed by decision-making aids and instructions for creating a strip foundation:
- A sandstone wall, in which the stones are properly laid with mortar, should be placed on a frost-free foundation
- A wall with a support function, at the bottom of a slope, e.g. B., where there is ground, needs a foundation for safety reasons alone
- If a sandstone wall is not to undergo any heaving or settlement even in severe frost, it is better to have a foundation
- If the sandstone wall is to be built on an already existing smooth concrete surface, that is fine further possible if this is on a bed of vibrated gravel and grit that complies with the regulations stands
- If not, it depends on the height of the sandstone wall, really thick walls should not be placed on an unpaved concrete surface, which will eventually crumble
- Especially not if water could collect, then it quickly becomes noticeable if a gravel foundation as a capillary-breaking frost protection layer is missing
- As soon as the lower bricks are "in a trough of water" when there is frost, they will simply burst
- Then you can create a capillary-breaking layer with a border and drain on top of the concrete, or place the sandstone wall somewhere else
- If you just want a simple little sandstone wall as a garden ornament, you don't need one frost-free foundation, but can simply put the wall on a 30 to 40 cm thick gravel or build gravel layer
The frost-free strip foundation
A frost-free strip foundation is created as follows:
- Use a batter board to mark out the base of the wall + an allowance of at least 10 cm on all sides (depends on the height of the wall) + the thickness of the formwork
- A batter board is a simple construct made from masonry cord and wooden pegs
- This strip for the foundation is now excavated to a depth of 75 cm
- For a long time, a depth of 80 cm was the measure of frost resistance, but warming due to climate change is already changing the standard specifications here
- When the foundation trench is finished, a gravel bed is placed on the ground as a so-called blinding layer
- This is then compacted with a vibrating plate and, if necessary, covered with PE film
- Now the formwork is brought in, if necessary, reinforcement designed
- The upper edge of the formwork is aligned horizontally, now the concrete for the foundation can be poured in
- You need concrete of strength class C12/15
- For small foundations of tiny walls, the concrete can be mixed by hand:
- For example in a wheelbarrow, the simplest of which is pre-mixed concrete that only needs to be mixed with water
- Concrete for larger foundations is mixed on site with the concrete mixer (first sand and cement, then water) or delivered directly from the concrete plant
- It must be evenly distributed in the formwork, occasionally poking the mass with a shovel to avoid air pockets
- When the concrete is in the formwork, it is compacted with a tamper and, if necessary, filled up a bit
- Then the concrete is smoothed off and covered with foil/tarpaulin, after drying the formwork is removed
- If you have worked yourself, tools and cement mixers must be cleaned with water immediately
- Make sure that no concrete residue gets into any drains, which will clog immediately
- Be careful with skin contact with concrete, it irritates the skin
Instructions: build a sandstone wall
First of all, all the ingredients are prepared:
- Mason Hammer
- trowel
- Mortar compound, ready-mixed, for beginners also as a ready-mixed dry mortar that only needs to be mixed with water
- guideline
- sandstones
- plummet
- level
- folding rule

Now let's start with the walls:
- Apply a thick layer of mortar to the foundation
- For sandstone you need a very special mortar, see below
- The first row of sandstone is lined up on top of the mortar
- And precisely aligned with a spirit level, folding rule, mason's hammer and plumb line
- Joints of around one centimeter are left between the sandstones
- Also between the rows upwards
- It is important that the first row is straight so that the entire wall does not become slate as you go up
- If you brick in the classic stretcher bond, the next row of sandstones is always placed half-staggered
- You can first pull up the side walls
- Similar to walling up a staircase, bottom 4, then 3.5, then 2, 1.5 sandstones left and right
- Now you can continue to build high walls in between, with sandstones at equal intervals, which are as exactly as possible in one plane
- In the meantime, you should always use a spirit level and plumb bob, even if the wall looks nice and straight
- A little mortar is allowed to ooze out of the sides of the floor slab and the joints
- Then you don't have to pay attention to the beauty of the joints in between
- The stones are connected "full" and over the entire surface with mortar
- With this method, you have to scrape out about 1.5 cm from time to time
- When the wall is in place (and you have taken a break), take your time, carefully, evenly and clearly fill the open 1.5 cm
Mortar for the sandstone wall
An "iron basic law of bricklaying" is: The mortar must be softer than the stone used. Many natural stone mortars become too hard after setting for the very soft sandstone. If you use mortar that is too hard, there will be long-term consequences: if the weather conditions your wall, the mortar won't do it intercepted, as would normally be the case, but the beautiful, soft, already sensitive sandstone is directly affected pulled. It then weathers much faster than would normally be the case.
So do not use "just any mortar", even the frequently recommended trass mortar leads water to the soft sandstone and is not suitable. Rather, sandstone should only be installed with so-called NHL mortar, which is a mortar with natural hydraulic lime. Alternatively (because it's not as authentic) you can use HL mortar, which is chemically identical, but more uniform, it is made of hydraulic binder phases (cement + hydrated lime). precious lime mortar. The air-lime mortar that is often offered today, on the other hand, is not suitable; it has been shown that it suffers relatively quickly when used outdoors. A grain size of around 2 mm is recommended for new sandstone walls with standard joints.
A very special wall
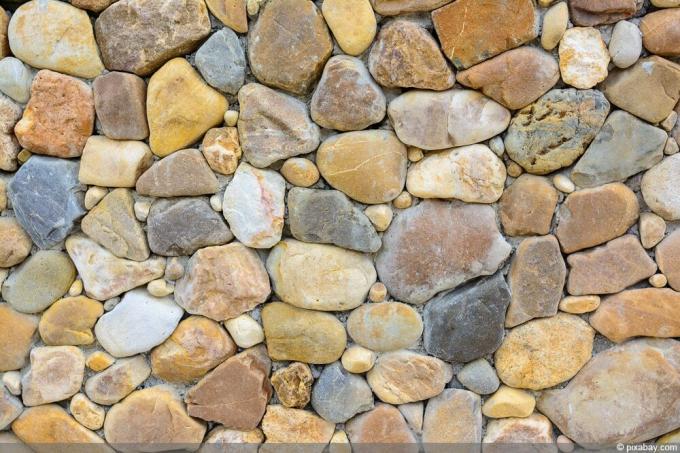
A very special wall is the dry stone wall made of sandstone, a wall that is stacked entirely without any binding material. Dry stone walls have a long tradition here, as Germany is rich in sandstone. Buntsandstein, Burgsandstein, Kalksandstein, Schilfsandstein and Stubensandstein each region has its own sandstone to offer, in greenish color (Abtswinder + Sander Sandstein) or yellowish-brown to brown (Ibbenbürener Sandstein, Ruhrsandstein), for example. Bentheim sandstone is light gray to white, Dietenhan sandstone, Seedorf sandstone and red Weser sandstone are red, sandstone was used in many old buildings and in many dry stone walls. Such a traditional horticultural structure is back in fashion because it brings more nature into the garden. In addition to being ecologically and biologically valuable, sandstone drywall is incredibly durable when built properly. They become small biotopes in whose cracks and crevices small animals (which have already become rare) such as amphibians or wild bees live. Properly building a sandstone drywall is fun in and of itself, more of a puzzle than classic wall building with wet and skin-irritating mortar. A beautiful sandstone drywall takes some planning, but it's worth it.
Foundation for the sandstone drywall
Classic dry stone walls are set on a dry foundation, made of gravel or crushed stone, about 10 cm wider on both sides than the lower row of masonry. How to proceed:
- You need crushed stone or gravel with a grain size of 0/32 - 0/45, construction sand or sandstone for the base of the wall
- Dig a 30 to 40 cm deep trench for the foundation, store the excavated material nearby
- The trench should be 10-15 cm wider than the base of the wall and 5-10 cm wider than the side walls
- If water needs to drain, you need to incorporate a slope in the direction of drainage
- A good two-thirds of the trench is filled with gravel/gravel, and this layer is then very carefully compacted
- This works with a tamper and a lot of power and best with a mechanical vibrator
- On top of that comes a layer of building sand that is 5 to 10 cm up to the edge, which is smoothed off (with a plain board, e.g. b)
- The large, heavy stones for the base of the wall are laid, they should (and will) press a few centimeters into the sand bed
- Leave gaps of around 2 cm between each stone
- These joints and are filled with earth from the excavation
Sandstone dry stone wall
Now the sandstone drywall can be stacked:
- The heaviest chunks have been processed with the wall base, now the remaining stones are sorted by size
- In decreasing size for the wall, a couple of particularly beautiful stones, if possible somewhat elongated, for the top of the wall
- A pile of small stones is stored separately, they are used to wedge gaps
- You can support the settlement of wildlife by planting, which also looks very decorative
- Any rock garden plant, many perennials and a number of grasses can be planted in the sandstone wall
- If the excavation for the foundation is topsoil, you can fill this in between
- Otherwise, other soil should be ready
- The plants must also be selected and made available in advance, sorted according to wall base, joints, wall crown
- Planting is also strongly recommended because it stabilizes the dry stone wall
- Even significantly, otherwise it is only held together by its own weight and the canting of the stones
- Now put some topsoil and the corresponding plants on the first row of stones
- Then the pre-sorted stones are gradually stacked with evenly spaced joints
- In between, always fill in soil and plant plants
- Quite a lot of earth, with increasing height it is compacted by the weight of the stones
- Where stones are "wobbly", wedge small stones between them until everything is secure
- When your stone puzzle is complete, the top of the wall is laid
- Make sure the height is even and the gaps wide enough to accommodate plenty of soil/plants
That was an overview of the construction, a dry wall can grow straight up, but then needs a static calculation from a certain height, right is traditionally built around three times as high as wide, with a powerful base of at least 40 cm and up to 20% narrower towards the top, on both Pages. Always remember that sandstone is a soft and delicate material, even when sanding Cleaning wants to be treated with care and preferably nothing else than water and a brush maybe would like to see some soft soap, especially neither chemicals nor acidic household cleaners.
Conclusion
Especially the natural dry stone walls made of sandstone are very trendy, but sandstone is a great building material. However, it is also a very soft building material, and you should be well informed about its processing and treatment if you want your sandstone wall to last a long time and look beautiful.
 garden editorial
 I write about everything that interests me in my garden.
Learn more about gardening of all kinds
Laying out a garden – you should observe these guidelines
A well-kept garden is a real eye-catcher that enhances the house and property even more. When buying a new property or for seasonal renewal, the garden is designed with many new ideas and concepts. This can be quite expensive if not planned properly. Our article wants to show you how to create your new […]
Find water veins: At what depth does groundwater come?
A well on your own property must be connected to the groundwater. It is not always clear where this is located. Luckily, there are several methods that you can use to reliably track down a "water vein" to take advantage of the water source.
Build your own dowsing rod DIY instructions
Dowsing rods have been a working method for finding water and other things in our environment for centuries. With little effort, you too can easily make your own dowsing rod - with our instructions.
Lawn pavers: how does lawn repair work?
Bald spots or gaps in the lawn are a thorn in the side of many lawn owners. However, overseeding is considered to be tedious work. Relief should Provide lawn pavers that combine many work steps in one.
Build a Frisian wall yourself | Costs for a Frisian wall
The Friesenwall is used to separate gardens and flower beds from neighboring properties. It is aesthetic and offers a living space. The costs you will incur depend on the material you have chosen. Choosing DIY will save you money on labor.
Improve your income with gardening - is that possible?
If you put a lot of time, energy and love into your garden and this then also brings the corresponding successes in the form of a rich harvest shows, you can get the idea of whether you can improve your income with your gardening. We show what you should consider, what pitfalls there are and what opportunities you can offer.
