
Table of contents
- planning
- materials and tools
- step by step
- Instructions for fixed raised beds
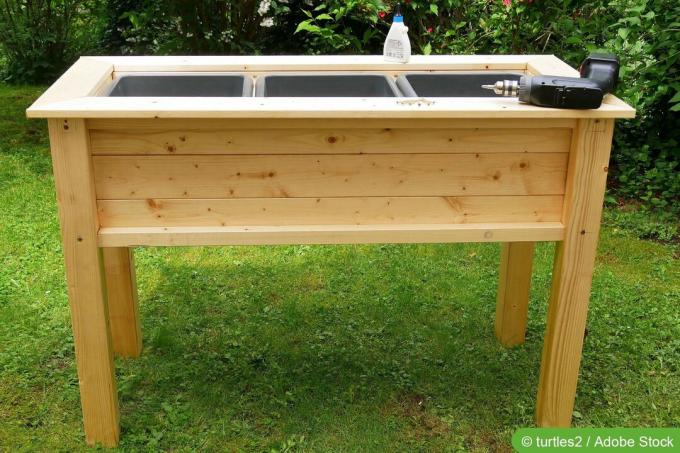
- Construction of mobile raised beds
- Tips and helpful hints
- Prepare and maintain the bed
- Frequently Asked Questions
- useful information
Gardening becomes easier with the right raised bed. Voles and snails don't stand a chance, the yield is increased and plant care is easy on your back from cultivation to harvest. In addition, a decorative raised bed can also be an eye-catcher. However, finished models are expensive, at least if they are to have a large volume and high stability. And even then, they are often not found in the right size. A raised bed is the best alternative here. But what should you watch out for?
planning
If you are planning to build a raised bed yourself, you should first consider a few factors. The following questions can help.
- Where should the raised bed be?
- How much space is there?
- Is a fixed location planned or should the bed be mobile?
The answers decide on the possible height, length and width, as well as the other structure of the raised bed. A firmly placed bed can be anchored in the ground for additional stability and take on enormous proportions. On the other hand, mobile versions, which are to change location as needed and depending on the planting, require additional castors and should not be too large.
materials and tools
The easiest and cheapest material to build your own raised bed is wood. This can be stable boards, square timber, planks, halved round timber, slats or panels. In addition to these, other materials and tools are of course required.
It refers to:
- Square timbers as corner points
- Tight Wire
- pond liner
- screws or nails
- level
- hammer
- cordless screwdriver
- staple gun
- cutter
- Tongs
- spade
- Pencil
- folding rule
- Possibly roles
- Possibly saw and sandpaper
step by step
Once the dimensions have been determined and the material is ready, the assembly can begin. This initially differs slightly for mobile and fixed raised beds.
Instructions for fixed raised beds
- In the case of permanently installed raised beds, the corner points must first be determined. For this purpose, the square timbers are driven or dug into the ground at an appropriate distance and evenly. The exact alignment and height should be checked with a spirit level and folding rule. Marking the timbers beforehand helps to find the correct driving depth of each post.
- Markings are made on the squared timber as the lower edge of the bed – again using a spirit level and folding rule. These should be straight and at least two inches off the ground.
- The selected material for the bed walls is attached to the posts from bottom to top. There should be as few gaps as possible.
- To prevent the wood from rotting, the inside of the raised bed is lined with pond liner. It can be nailed, stapled or glued in place at small intervals.
- To finish off, close-meshed wire, each ten centimeters longer and wider than the bed, is cut to size.
- The wire is cut diagonally or vertically at the corner points and each five centimeters wide. The resulting edges are bent upwards and the wire is placed in the raised bed.
- The edges are to be fastened at close intervals on the inside of the wood, above the foil. This can in turn be done with nails or staples at short intervals. The bottom of the wire should be flush with the bottom of the walls.
Tip:
For larger meshes, insert the wire twice so that no substrate can fall out.
Construction of mobile raised beds
- Align two square timbers straight. The distance corresponds to the length of the raised bed.
- Determine distances up and down and mark on the posts.
- Fasten planks or boards to the timbers. Use the spirit level to ensure that the attachment is straight and without gaps.
- Repeat steps one through three for the second, long side panel.
- With the help of a second person, erect the bed walls that have been created in this way. At the appropriate distance, the third wall is now built as a connection. The selected boards or planks are also attached to the posts.
- Install the fourth wall board by board.
- Lay the finished frame aside and trim the wire mesh. The wire should be as long and wide as the outside edges of the frame itself.
- The wire mesh is fastened all the way round the underside of the raised bed. For larger meshes, it may be necessary to attach several overlapping layers.
- Additional rollers can be attached to the square timbers for easy movement.
Tip:
If you also want to use the raised bed as a cold frame, you should attach the appropriate brackets during construction. Or use scaffolding at the latest when filling.
Tips and helpful hints
So that the raised bed not only looks good in the first year and can withstand both the weather and the pressure of the substrate, a few special features must be taken into account during construction. First of all, this concerns the selection of the wood. Weather-resistant hardwoods that are used for the construction of terraces or fences are suitable. Below:
- douglas fir
- larch
- Garapa
- Oak
- Ipe
- Bangkirai
- Black Locust
- sweet chestnut
- Pressure treated pine
- thermal wood
An additional treatment with oil, glaze or varnish is recommended on the outside. The selected agent should of course also be suitable for outdoor use. Additional impregnation on the inside is not necessary if the pond liner mentioned above is attached here. This protects the wood from moisture and tannins from the substrate used, thus ensuring a long service life.
But even with meticulously applied care products, the wood can sag in the long run. An additional post should therefore be used approximately every 100 cm for stability and consistency of shape. For raised beds that exceed a height of 80 cm, the distance can be reduced to half a meter.
Anyone who relies on a permanently mounted model that is at least buried along the posts may be tempted to do without the wire insert. But it is precisely this that provides protection against voles and is therefore useful. Ground clearance is also an advantage as it ensures better water drainage.
The dimensions are also important for the care of the bed from planting to harvest. Heights of 60 to 100 cm are suitable for back-friendly work. Up to 140 cm wide, weeding and trimming is still possible – even in the middle of the raised bed. Beyond that, however, it becomes difficult.
Prepare and maintain the bed
Once the framework of the raised bed is in place, it is of course far from ready for planting. The corresponding filling is still missing. Ideally, this consists of potsherds, grit and gravel directly on the wire. Rough and fine cuts of trees, shrubs and bushes are also suitable. Only then should compost and then the appropriate substrate be filled in. For the cultivation of heavy-duty plants, it is optimal to introduce the soil a few months before cultivation. In this way, nutrients can be distributed evenly and the substrate has a chance to settle.
About every five years, the nutrients in the raised bed are decomposed and used up and the soil sinks significantly. This is particularly the case with an underlayer of cut material.
If this phenomenon occurs, the entire filling should be removed and replaced. Mobile raised beds can be moved for this purpose. Larger models have to be emptied by bucket and shovel.
Frequently Asked Questions
Depending on the wood and impregnating agent selected, sanding the surface and reapplying it every three to five years is recommended.
If a sufficient distance is left between the filling and the upper edge of the bed, the raised bed can definitely serve as a cold frame or greenhouse. For this purpose, the opening is simply covered with foil, glass or Plexiglas. This closure becomes optically decorative and practical in function if it is provided with a frame and hinges.
useful information
raised beds can be made from a wide variety of materials. A particularly stable construction can be achieved with used railway sleepers. From a hygienic point of view, however, this raised bed should be lined with foil so that the pollutants it contains cannot reach the roots of the plant via the earth. A construction made of spruce palisades is also rustic. The old frame made of logs in block construction must be fastened to the posts that are placed vertically in the ground. The posts are best placed in a layer of drainage or a small concrete foundation in the ground. If you build the simple type of raised bed, you can do this with 10 to 15 cm thick spruce around longer.
bed surface should be about 70 cm high. You shouldn't make it any higher, otherwise you would have to attach additional stabilization. In order to be able to work very well in the middle of the bed and to be able to reach the middle from both sides, you should make sure that the bed is not wider than 1.20 m.
If you want to prevent the beam of your raised bed from coming into contact with the earth, you can attach a weather-resistant foil to the inside. This foil contributes significantly to a longer durability of the raised bed.
Is he Frame of the raised bed, a drainage layer of coarse gravel is filled at the bottom. If you want to fill your raised bed, you should first fill in a layer of smaller branches. This should also ensure good ventilation.
It is important that the material can rot within the raised bed. Then you fill in the soil and start planting or sowing.
 garden editorial
 I write about everything that interests me in my garden.
Learn more about creating a vegetable garden

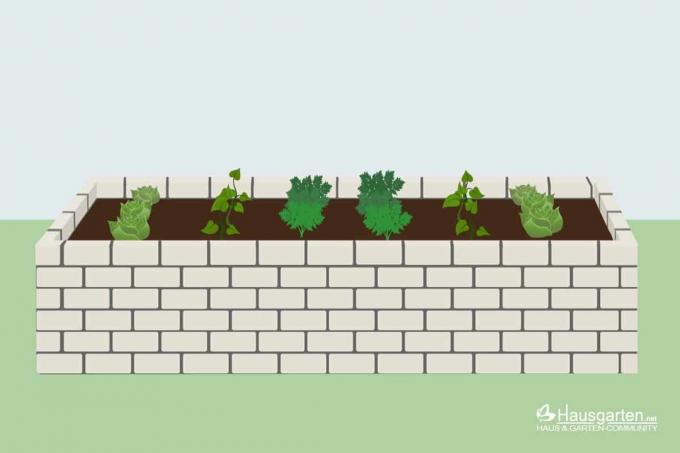
Build your own raised bed out of stones: this is how it works
Building a raised bed out of stones is more complex than variants made out of wood or aerated concrete. On the other hand, they are very durable, decorative, offer decisive advantages and can even increase yields. We explain how it works here.

18 good neighbors of broccoli | mixed culture
Broccoli is a close relative of cauliflower and a great homegrown vegetable. In the vegetable garden, it is generally advisable to pay attention to good plant neighbors. A corresponding mixed culture has many advantages for all species involved.

Paths in the vegetable garden: 7 ideas for beautiful and practical bed paths
As a rule, there is no way in the vegetable garden without paths. Only through them can all beds be easily reached. Of course you have to think about how to create and design them. Here are some tips and ideas.

Creating a vegetable garden for beginners – instructions incl. plan
Quite a few people today dream of harvesting their own vegetables and being self-sufficient. No wonder: you know where it comes from and what's in it. You are also a bit more independent. Of course you need a garden for that. What is important when creating a vegetable garden is here.

Planning a vegetable garden - my first small self-sufficient garden
The vegetable garden is an important first step on the way to independent self-sufficiency. In order for your self-sufficient life to get off to a good start, it depends on the right planning, from A, for cultivation area, to Z, for fence. This step-by-step guide explains how to make your first small self-sufficient garden perfect.

Choose the right film for the raised bed
Raised beds are not only a big trend, they can make growing fresh vegetables and aromatic herbs a lot easier. With a flexible choice of location, the design options are almost inexhaustible. Raised beds can be made of different materials that suffer to varying degrees from soil moisture. This requires good protection.
