

table of contents
- Characteristics
- Location
- Plan the herb spiral
- Zone planning
- Construction preparation
- Building material
- Build a herb spiral
- Planting time
- to water
- Fertilize
Nothing beats fresh herbs that you can't get fresher than anywhere else in your own garden. You don't need a lot of space for this if you create an herb snail or herb spiral. With the right know-how, a few building materials and optimal herb planting, you can be sure of year-round harvests and also create a pretty eye-catcher in the garden. These building and planting instructions show how to do it.
Characteristics
- Herbal snails also suitable for the small space in the garden
- different site conditions from shade to sunny
- with an integrated pond as a relaxing eye-catcher
- versatile planting possible
- increasing accumulation of soil for different planting requirements
- suitable for almost all types of herbs
- can be used to overwinter frost-resistant herbs
There is no compromise when it comes to fresh herbs that give every meal that special pep. The potted herbs from the supermarket usually only last a short time if they have been cultivated quickly and inexpensively for purely commercial advantages.
So why not create your own herb bed and always have the freshest herbs close at hand? The herb spiral offers an optimal and, above all, space-saving solution. Read here how to set them up correctly, including some tips to achieve the best harvest yields.

Location
Basically, there is an advantage if you choose a location that is close to the kitchen so that you can quickly access the herbs while cooking. The location should meet the requirements of the herbs that you want to plant or sow.
It is ideal if the front of the herb snail faces south, in order to find sunny and shady spots to create within the bed snail and to meet the different light requirements of the different types of herbs can. The wall, which provides shade to the area below, provides a shady spot.
In addition, the location should be sheltered from the wind so that they still grow when the first cold winds ring in in autumn and the mostly fine branches do not kink in strong gusts.
Soil condition
Basically, there should be a mix of set, dense, but still permeable soil. You can do this by filling the herb snail with soil and then letting it rest for a few weeks or months. It is advisable to fill the herb spiral with soil in autumn and let it sink in until the coming spring. If necessary, soil must be refilled if the existing one has sunk too deep. Otherwise, the nature of the soil depends on the respective zone.
First Zone Floor
- in the first zone the soil should be very rich in humus and nutrients
- its consistency is kept very moist to wet
Floor of the second zone
- in the second zone the nutrient content is below that of the first zone
- the soil should only have moderate moisture
Third Zone Floor
- in the third zone, moisture and dryness alternate with regular watering
- the soil should be permeable and loose
- a low nutrient content should be given
Fourth Zone Floor
- in the fourth zone the soil should be well calcareous and even increase in lime at the end of the herb spiral
- A mixture of earth and sand is ideal; this stores water and only supplies the herbs when there is a need for water
The nutrient content should decrease evenly in nutrients from the first zone to the top zone and thus the soil in the lower area should be enriched with compost.
Plan the herb spiral
Build and plant a herb spiral
Fresh culinary herbs are not only indispensable for the taste, but also offer above all in one Herb snail is a very decorative sight, which is why more and more garden owners are opting for this type of herb bed decide.
Donning is easy once you know how to do it. Only a few details need to be observed so that it works without any problems and your efforts are rewarded with a splendid growth of your new fresh herbs.
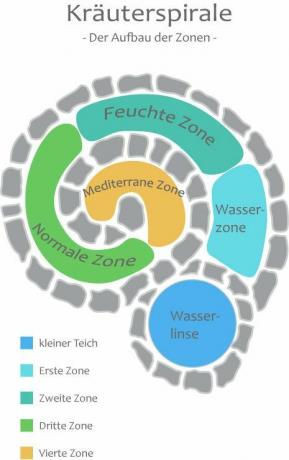
Zone planning
So numerous Types of herbs find space in the spiral regardless of its soil conditions, it is divided into four zones.

First zone
The first zone begins with the lower auger opening, where the earth is lowest. This area becomes a damp wet zone. It is ideal to create a small pond in this area so that a kind of swamp area is created or the roots can be fully soaked and moisture-loving herbal plants do well to develop. The first zone is also considered to be the nutrient-rich plain. The following herbs can be used for planting, for example.
- Watercress
- Bachbunge
- Water mint
- chives
Second zone
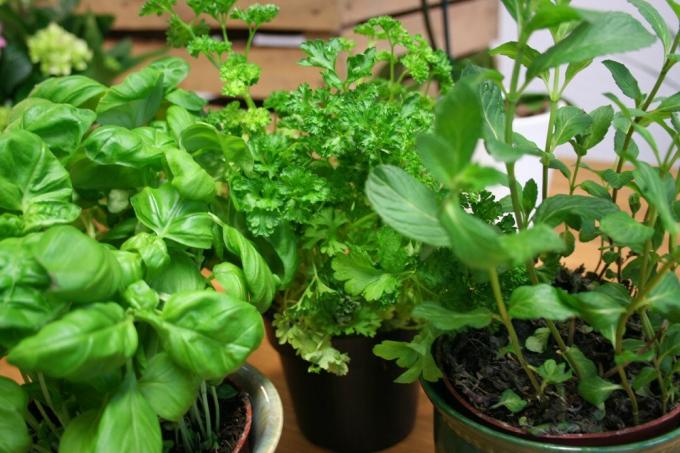
The second zone goes from the wet zone to the first part of the middle floor. This zone has an average nutrient content, is kept moderately moist and offers partially shaded to shady planting areas. These locations are suitable for the following, among others.
- basil
- dill
- Woodruff
- Mustard green
- Nutmeg, spoon and celery herbs
- parsley
- sorrel
- Lady's mantle
- chervil
- Wild garlic and comfrey should be planted in the shady area
- Lovage and peppermint should stand higher on the end as their roots protrude deeper into the ground
Third zone
The third zone should end approximately at the height of the screw entrance. In this area of the herb spiral, the soil should be calcareous. This is the perfect place for herbal plants that like it warm, sunny and slightly humid, such as the following.
- tarragon
- Garden and nasturtiums
- St. John's wort and camphor herb
- Chamomile and fennel
- coriander
- oregano
- Lemon balm
Fourth zone
The end is set by the Mediterranean zone, which extends to the highest point of the herb snail. This is where the highest lime content can be found. The floor should always be slightly dry. The uppermost area needs many hours of sun. The following types of herbs feel at home on this floor.
- Bean, olive and cola herbs
- rosemary
- sage
- Chives garlic
- marjoram
- thyme
- Lavender should be the finishing touch, as this should have the highest lime content it needs
Construction preparation
Once the optimal location has been found, the selected area of the earth is to be cleaned and as far as possible freed from root residues.
Determine alignment
Determine the correct orientation. It is ideal if the beginning of the lowest floor faces south. Here you set the first wooden stake here. Please note that the wooden pegs are correspondingly high according to the increasing bed height and that they are the final height of the spiral at the top.
Determine size
To determine the size of your herb snail, you should know roughly how many herbs you want to sow or plant. The more herbs you want to plant, the larger the herb spiral must of course be. The ideal size is 2.50 meters in diameter. A central height of around 80 centimeters with this average is recommended. You can of course deviate from this according to your own ideas.
When you have an approximate idea of the size, place more wooden pegs so that you get a spiral from the outside in. In the shape of a herb and snail bed, you can orientate yourself on that of a snail shell. The last stake is to be placed in the middle of the spiral.
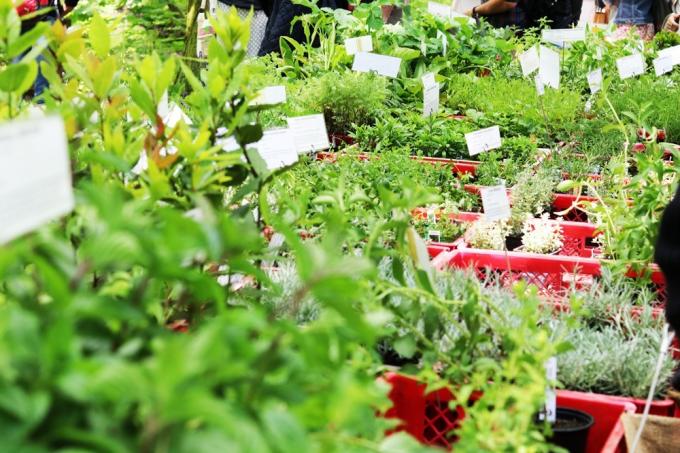
Have seed bags or plants ready
It is helpful if you already have the seed bags or plants at hand. So you can distribute them according to your location and soil requirements on the smooth floor in the desired order and shape of the spiral. This will give you a better look at the minimum size of your herb spiral and you can use the already set wooden stake to enlarge or reduce the herb spiral offset. Don't forget to keep the shell shape, south alignment point, and center.
Then connect the wooden pegs with a string so that the lines become visible. Make sure that the cord has an ascending course that already marks the individual storey heights. If you tie the cord around all wooden pegs at the same height, you will miss the line orientation in the middle and upper area when building the herb spiral.
Then dig the soil inside the herb snail about a length of a spade. Make sure that you leave out the areas of the earth where the wooden pegs are stuck. Put a drain on the ground. To do this, pour a two-centimeter layer of quartz sand or gravel into the trench. Mix the excavated earth with gravel and use it to refill the excavated earth.
Building material
In addition to the gravel, the marking cord and the wooden pegs that rise evenly in their height, you will need building material for the actual construction of the decorative herb bed in spiral form.
It is advisable not to buy this until the construction preparation is done so that you can You can roughly estimate how much material you will use, especially for the construction of the wall walls require. If you present the dimensions to your trusted dealer, they will certainly be happy to help determine the amount of material.
As materials you will need:
- more gravel for lifting the earth from bottom to top
- Concrete, natural or bricks for the spiral construction of walls
- if necessary, mortar
- Gravel to lay another drainage in the uppermost area
- Pebbles for the first and second zone, to protect against rapid drying out
You don't necessarily have to buy new material in stores. Broken blocks are also available on construction sites, which are no longer used there. Instead of gravel to raise the floor, you can also use rubble from a construction site and thus save even more money.
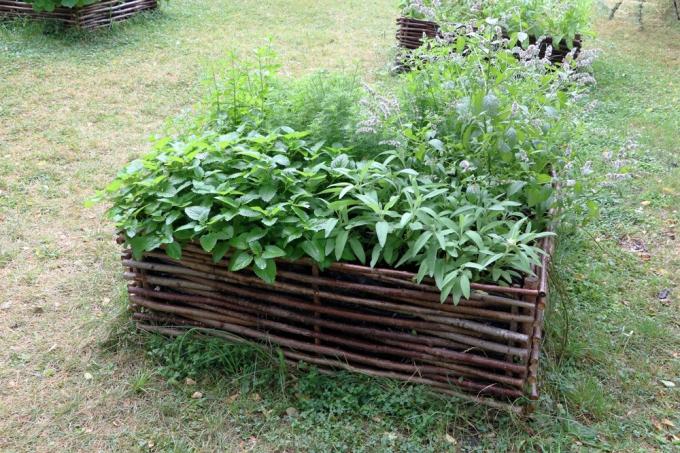
Build a herb spiral
The floor plan is set by the wall. Professional masonry with cement or mortar and drywall construction can be used for this purpose. When arranging and aligning the stones, it is important that they always have a slight internal inclination.
In the dry construction method, you lay a layer of stones along the previously tensioned cord and fill the interior with gravel or earth. Make sure that there is already a tendency here due to the filling.
If the incline reaches the stone height, the second row of stones must be started at the latest. Here, too, you then fill up the soil again with increasing levels. Proceed in this way until you have reached a height of around 80 centimeters in the middle / at the top of the spiral.
Tip: If you come to the higher altitudes, it is advisable to put gravel here before you fill in the soil in order to prevent waterlogging due to rain or too much watering.
If you want to create a small pond, leave out part of the lower area with soil and lay out a pond liner instead of the soil or integrate a ready-made pond basin. Then fill the pond with larger pebbles so high that a residual height of between five and ten centimeters remains. This water level is usually sufficient for all herbal plants that love moisture.
When the construction of your herb spiral is finished, let it stand for at least six to eight weeks, better three months before you start planting. During this time the earth settles. Do not forget to pay attention to the different soil conditions when filling the earth. These are described in the corresponding section above.
Planting time
The official start of the season for grown or grown herbs is at the beginning of May, during the sowing period as well Young plants are only planted or sown in the herb snail after the ice saints from mid-May should.
After that, planting and replanting can be carried out up to and including July. Then only fast-growing herbs such as sage should be planted in the spiral bed so that they can be harvested before the cold snap.
to water
Always ensure that all zones of your bed snail have ideal moisture that meets the respective requirements of the herbs.
Fourth zone
- water only occasionally in the dry zone in the uppermost area
- here the surface of the earth is allowed to dry out for a few days
Third zone
- In the third zone, water is poured when the surface of the earth can be indented to a maximum of two centimeters
Second zone
- The herbal plants in the second zone must be kept more humid
- the surface of the earth should never dry out
First zone
- Watering in the lowest wet zone is usually unnecessary if a pond is integrated
- however, water evaporates here, especially on hot summer days
- the water level must always be checked here
- if there is no pond, it must be watered generously, daily in summer
Fertilize
After a new herb snail has been built, the herb plants do not need any additional fertilizer for high harvest yields in the first year. If the different nutrient contents per zone were taken into account when creating the spiral bed, the supply is sufficient for the time being. Young plants are generally not fertilized in the first year.
From the second year onwards, compost or a nutrient-rich liquid fertilizer can be administered. However, the need for nutrients is reduced from the bottom up and accordingly fertilization should be carried out sparingly or not at all in the Mediterranean zone. The optimal times for fertilization are spring and autumn.