
Raised beds are a space-saving alternative for many households for growing vegetables, fruit and herbs. Mortar buckets can be excellently built as small raised beds, even for balconies and terraces with little space.
In a nutshell
- Use plasticizer-free tubs
- Drill drainage holes
- different sizes possible
Table of contents
- material
- Advantages and disadvantages
- Prepare mortar bucket
- Mortar Bucket Balcony Raised Bed
- Instructions
- PDF instructions: balcony raised bed
- Mortar Bucket Pallet Raised Bed
- Instructions
- PDF instructions: Raised bed made of pallets
- frequently asked Questions
material
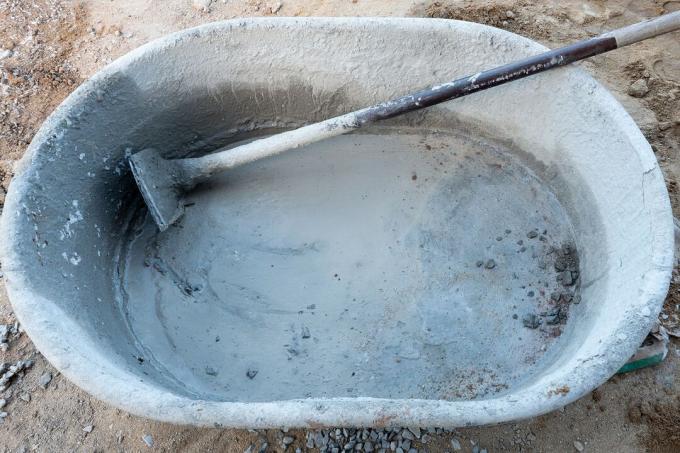
In order for you to be able to use mortar buckets for raised beds, you must consider the material before construction. The tubs are made of plastic, which puts off many interested parties due to possible vapors and plasticizers. In the worst case, toxic chemicals find their way into the crop. Fortunately, there are enough harmless plastics out of which mortar buckets are made that are suitable for planting. It is important that these are "hard" plastics that do not contain any plasticizers such as phthalates and are food-safe. If you want to be on the safe side, check the materials in the product description or ask the manufacturer directly.
The following thermoplastics are suitable for raised beds:
- polyethylene (PE)
- Polypropylene (PP)
A notice: Mortar buckets are available in numerous sizes, shapes and depths. This makes it possible to select a vessel to match the balcony, terrace or a spot on the property.
Advantages and disadvantages
Mortar buckets for a raised bed offer other advantages in addition to space savings and individual application options. If you only use variants of the materials already mentioned, you can use them all year round. They have the following qualities that are ideal for use as a raised bed:
- frost resistant
- shatterproof
- heat resistant
- light weight
- Roots do not adhere to the material
- prevents evaporative cooling in the root area
- easily washable
Frost resistance down to -40°C can be expected for most tubs, while the heat resistance depends on the type of plastic:
- PP: +82°C
- PE: +130°C
Even intense summers are therefore no problem for the tubs. One often overlooked benefit you take advantage of when implementing a mortar tub raised bed is the edging. Most mortar and concrete mixing buckets have a large folded rim. This allows it to be hung in a cladding, which significantly reduces the amount of work involved in implementation. Possible disadvantages are:
- poor UV resistance
- intense soot smell
Prepare mortar bucket
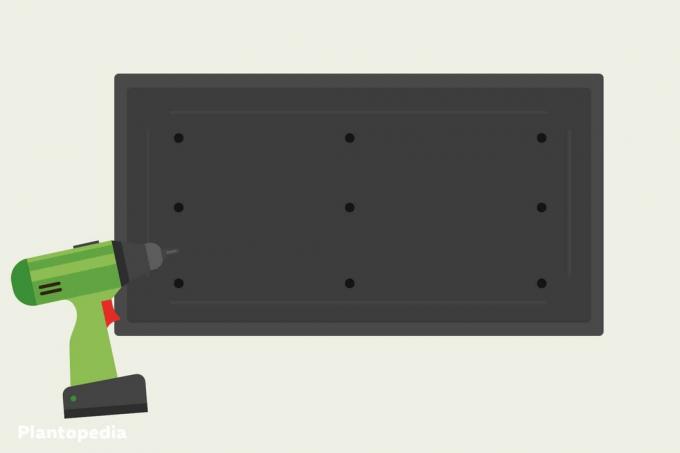
One of the most important parts of building a mortar tub raised bed is preparing the container. Since the tub serves as a planter, it's essential to adjust it accordingly to prevent the plants from drowning. Mortar tubs are completely sealed so that the mortar stays in the tub when mixing. This is a big problem for use as a raised bed, as no drainage is possible. Because of this, they must Drill holes in the bottom of the mortar bucket. All you need is a drill or cordless drill with one of the following drill bits:
- HHS steel drill bits for metal
- Cone drills for plastics
- Wood twist drill
Alternatively, you can use so-called thermoplastic screws, which have thread-forming properties. They can be used like self-tapping screws without an additional drill. Even a screw for a few cents is enough to provide drainage for the floor. As soon as you have decided on a suitable variant, you can get started.
Instructions
- Turn over the mortar bucket
- place securely
- clamp the desired drill
- alternatively apply screws
- Drainage holes provided at the bottom of the mortar bucket
- 6 to 10 pieces are enough
- keep regular intervals
- Distribute holes evenly
- one-sided distribution of holes impairs drainage
A notice: In theory, you can only use the mortar bucket and use it as a raised bed. To do this, place the mortar trough a little higher, for example on several blocks of wood, to allow the water to drain away.
Mortar Bucket Balcony Raised Bed
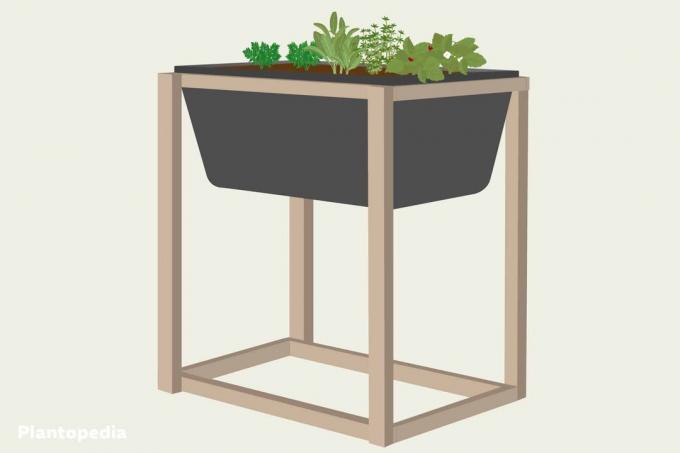
If you only have limited space for the raised bed, you do not have to worry about it. Since mortar buckets are available in many sizes, a suitable raised bed can be built even in the smallest of spaces. This is noticeable with this variant, as you can use much smaller mortar buckets because there is no panelling. The bucket is hung in a frame, which means that the work involved is extremely low, but the function is not restricted. This variant is particularly suitable for ornamental flowers and herbs.
You need:
- 1 x 90 l mortar box measuring 78 x 46 x 31 cm
- 4 x squared timber with the dimensions 78 x 4.4 x 2.4 cm
- 4 x squared timber with the dimensions 42 x 4.4 x 2.4 cm
- 4 x 100 cm squared timber with a thickness of 4 to 5 cm
- 24 x Self Tapping Stainless Steel Screws
- cordless screwdriver
- saw
- folding rule
Instructions
- First saw the individual squared timbers. If you don't want to do the sawing yourself, you can have the squared timber cut to size at a hardware store for a fee.
- Place two squared timbers (78 x 4.4 x 2.4cm) with two shorter squared timbers (42 x 4.4 x 2.4cm) to form a frame. The shorter sticks lie between the longer ones. Screw the frame. Repeat this step with the other squared timber of the same length.
- You should now have two frames of the same dimensions. Turn the mortar pan upside down and invert the frame to the edge of the bucket. He should sit exactly. If you turn it over again, the bucket should now be in a frame.
- Remove the frame again. Now use the remaining four squared timbers with a length of 100 cm. They serve as legs for the raised bed.
- Screw the squared timber to the corners of a frame. Although the raised bed can theoretically be used immediately, it is not stable enough. This is where the second frame comes into play.
- The rest of the frame is now also screwed to the legs. At the end you should have a rectangular box in front of you to place the mortar tub in. The raised bed is ready. If necessary, you can seal the wood if it is not weatherproof.
PDF instructions: balcony raised bed
The corresponding instructions for the balcony raised bed to build yourself can be found here again in compact form for downloading and printing.

Mortar Bucket Pallet Raised Bed
This variant offers significantly more space than the small balcony raised bed. It connects the classic pallet raised bed with the mortar buckets that are inserted into the cladding. The pallets thus function as a frame that obscures the view of the mortar tubs and provides sufficient stability for the tubs and raised bed during construction.
You need:
- 4 x Euro pallets (120 x 80 cm)
- 10 x Douglas fir wooden slats measuring 90 x 4.4 x 2.4 cm
- 20 x stainless steel brackets measuring 5 x 5 x 3.5 cm
- cordless screwdriver
- self-tapping stainless steel screws
- folding rule
- Pencil
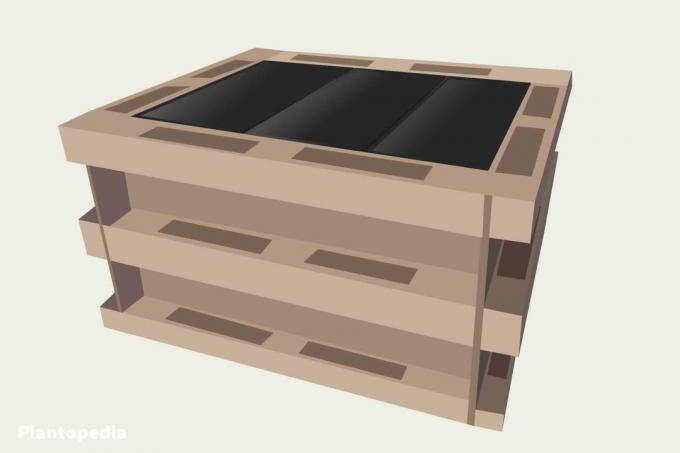
Instructions
- Begin by forming the frame of the raised bed from the pallets. To do this, place the Euro pallets as a rectangle, which should ultimately have the dimensions 150 x 90 x 80 cm. The feet of the pallets point outwards.
- Screw the individual pallets together. This is done via the adjacent boards. Feel free to use more screws to ensure sufficient stability.
- Now you need to fix the wooden slats at a depth of 30 to 35 cm below the edge. To do this, screw 10 stainless steel angles on the long sides at intervals of 2.8 cm from each other. The brackets must be attached exactly opposite one another.
- Once the angles are fixed, you can screw the 10 slats. They serve as a shelf for the mortar tubs, since they are not hung. You can therefore simply place a large number of mortar tubs on the slats in the pallet frame. If you want to use deeper tubs, you can of course adjust the height of the slats.
- Finally, you can set up and plant the mortar tubs.
A notice: An advantage of this raised bed is the possibility to hang other planters and flower pots on the outside. This allows you to cultivate even more plants in the smallest of spaces.
PDF instructions: Raised bed made of pallets
Here you will also find the corresponding instructions with further graphically illustrated steps in a compact form for downloading and printing.
frequently asked Questions
Due to the significantly smaller amount of space available, plants with large fruits such as pumpkins and melons not or only partially suitable for a mortar bucket raised bed. Instead rely on herbs, strawberries, carrots (only for tall tubs), radishes, radishes, peppers and chillies. Even tomatoes, aubergines and cucumbers can be cultivated in the larger mortar tubs.
Usually you don't have to worry about voles as the drainage holes in the bottom are far too small. However, as an extra precaution, you can secure a wire mesh to the floor for maximum access security. This does not interfere with the structure of the raised bed.
If you move the raised beds or want to empty and store them away over the winter, you can equip the buckets with wheels or a roller board. To do this, they are simply fixed with thermoplastic screws and can then be pushed without much effort.
Spray the mortar buckets thoroughly with water before use or wash them out beforehand. This dissipates some of the odor generated by the carbon black filler. The disguise also helps as the smell is no longer released into the air.